Moist and Easy Banana Bundt Cake
This post might have affiliate links, please check out my full disclosure policy.
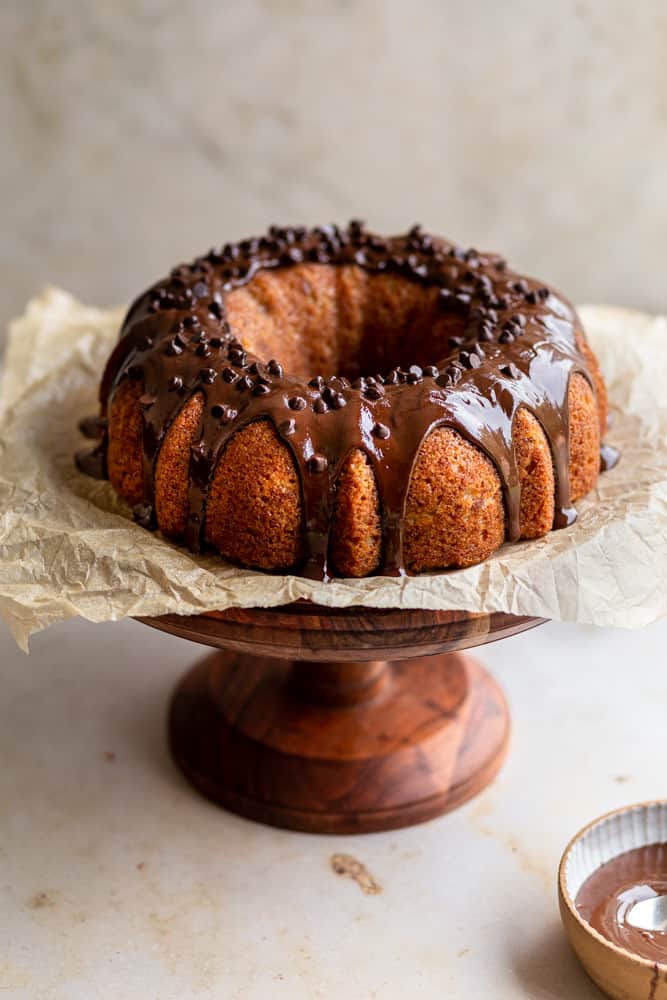
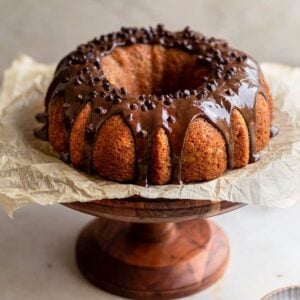
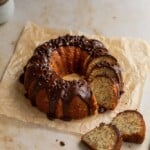
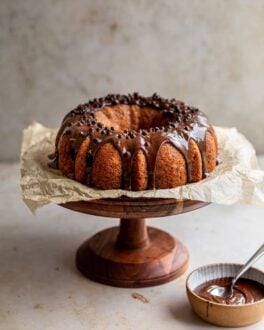
This banana bundt cake is moist, sweet, and gives you an answer for what to do with all those over ripe bananas you have. It is beautifully baked up in a bundt pan and can be topped with an easy chocolate glaze or even a tangy cream cheese frosting. This banana cake is perfect for when you need an easy dessert for a party.
Banana is not everyone’s flavor ( I’m talkin about you banana laffy taffy…) but I LOVE a good banana cake recipe! I often have over ripe bananas on my counter and no one who wants to eat them, so I usually end up making this banana bundt cake, this banana cake in sheet cake form or my 5 star rated Banana Chocolate Chip Muffins.
This banana bundt cake recipe is super moist from using oil and not butter which creates a very tender crumb. Also the more over ripe your bananas are, the sweeter the cake will be. I like to top this cake with either a chocolate glaze or a cream cheese glaze for that extra tang. Read how to easily frost a bundt cake for all my tips!
As a trained pastry chef I love making bundt cakes because they have a built in design that makes them look impressive. If you are worried that your bundt cake wont come out as pretty, make sure to read how to get a bundt cake out of a pan for all the tips that I use to ensure a pretty and intact cake every time!
Best bananas for baking
Once your bananas get really spotty and brown, you know they are perfect for baking! Their natural sugars come out as they age resulting in a sweeter taste.
If you have too many bananas you can freeze them by individually wrapping peeled bananas in plastic wrap.
INGREDIENTS Needed
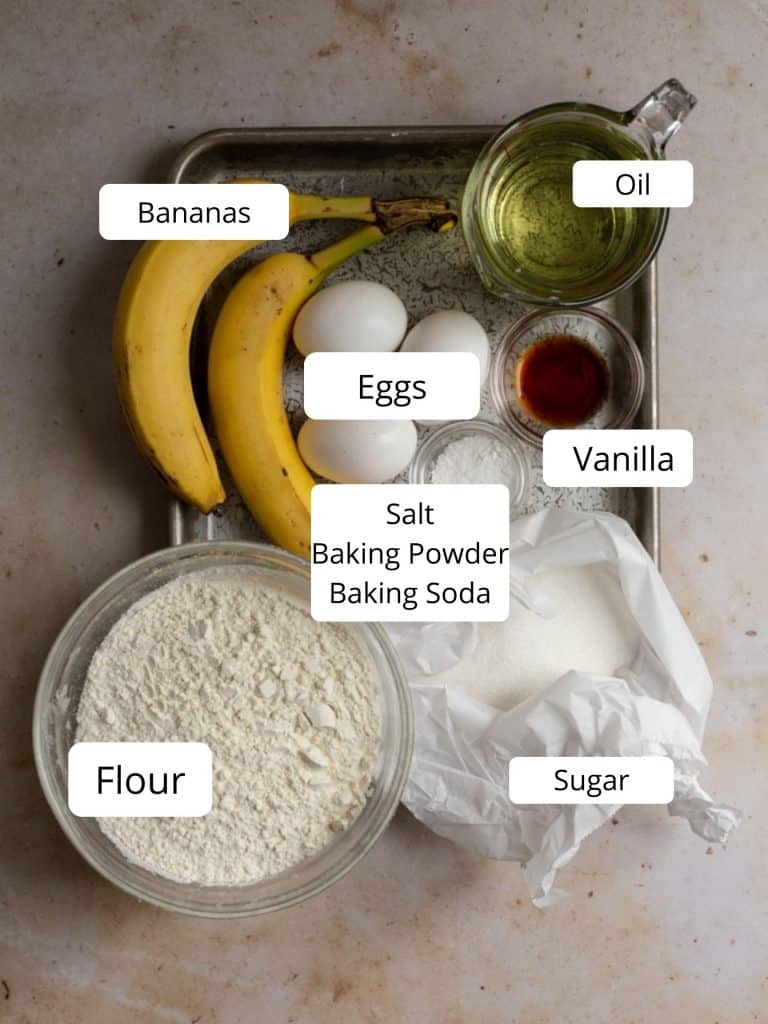
- Bananas– enough to equal one cup mashed, so that’s about two medium bananas. The spottier, the sweeter.
- Vegetable oil- Oil helps give the cake its smooth moist texture.
- Flour– Flour binds the cake together
- Sugar– Sugar helps with sweetness and structure.
- Salt– Salt brings out the best flavor.
- Baking Powder– Baking powder helps the cake rise.
- Baking Soda– Baking soda also helps the cake rise.
- Eggs – Eggs provide structure to the cake.
- Vanilla– Vanilla adds a sweet fragrant vanilla flavor.
- Chocolate glaze -optional to add as an icing.
- Cream cheese glaze optional to add as a frosting.
HOW TO MAKE A BANANA BUNDT CAKE
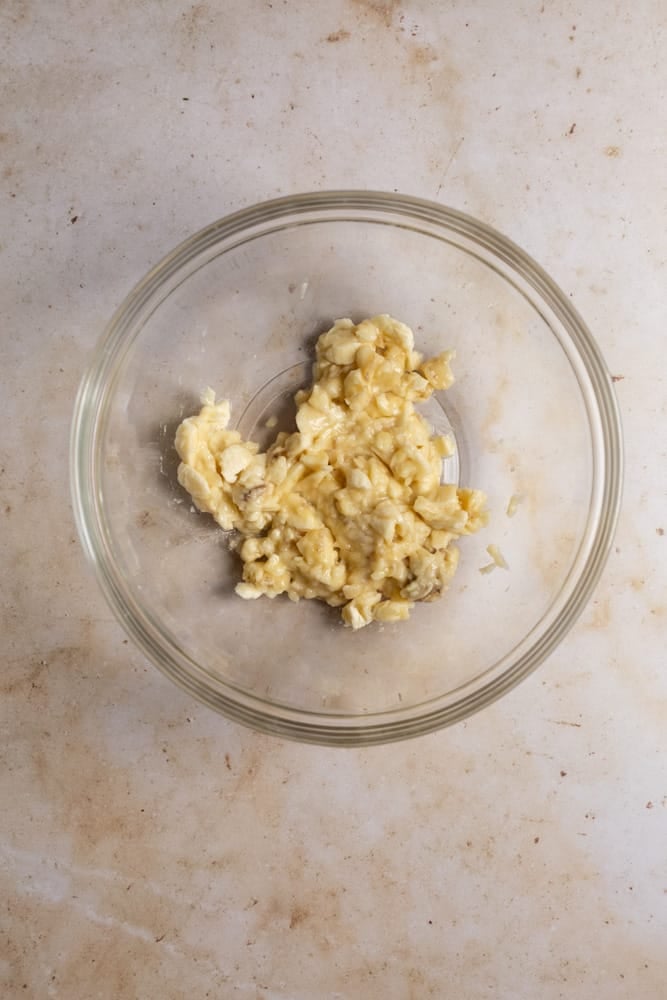
- Start with your wet ingredients and mix together your mashed bananas, oil, vanilla extract and stir to combine.
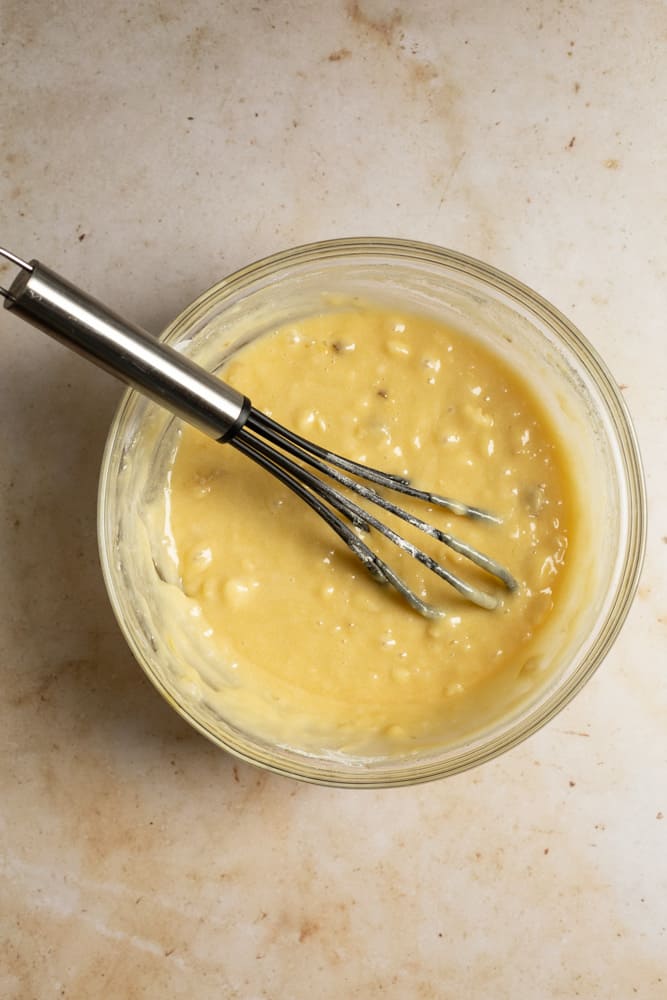
- Add the sugar to your wet ingredients.
- In a separate bowl, combine the flour, baking powder, baking soda, and salt.
- Use your trusty standup or hand mixer or whip together by hand.
- Add the dry ingredients to the banana mixture and mix lightly until combined.
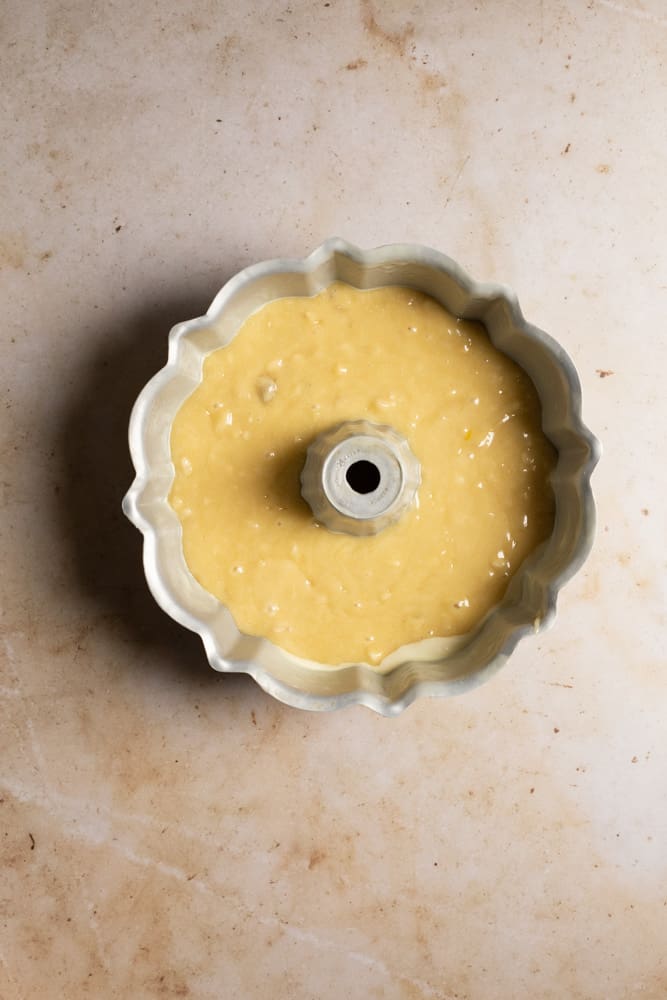
- Pour the batter into a very well greased bundt pan and bake for 45 minutes.
- Make sure to check out my post on how to bake and get a bundt cake out of the pan perfectly.
Yield
This cake will feed 12-15 people depending on the size of the slices you are cutting.
Storage and Freezing
Storing- To store this cake, wrap it well in plastic wrap or under a cake dome. You can leave it out at room temperature, theres no need to refrigerate even if you top it with cream cheese icing.
Once the cake has been cut, cover the cut sides with plastic wrap and then cover the rest of the cake. This keeps the open cake from getting stale.
Freezing- To freeze, do not glaze the cake. Once cool wrap it well in plastic wrap and then again in tin foil and place in the freezer for up to 3 months.
When serving leave it out at room temperature for a couple of hours to thaw, then you can ice it.
Recipe Tips
- I use a 10 cup bundt pan for this recipe. If you use a smaller or larger pan you will have to adjust the baking time accordingly.
- Top with powdered sugar if you don’t want to make a glaze.
- Make sure to mash the bananas well so they are incorporated easily into the batter.
- Add 1 cup chocolate chips to make this a banana chocolate chip cake.

Recipe FAQ
Can I add chocolate chips or walnuts to the cake?
Absolutely! You can add any of your favorite toppings to the batter. First dust whatever you are adding with flour so that it doesn’t sink to the bottom. 1 cup of topping is perfect.
Can I use fresh unspotted bananas?
Of course! The bananas will be a little harder to mash so as long as you mash them well it’s not a problem.
More bundt cake recipes

Easy and Moist Banana Bundt Cake
Ingredients
For the cake
- 1 cup (150 g) mashed ripe banana, About 2 medium-large or 3 small bananas
- 3 large (3 large) eggs
- 3/4 cup (218 g) vegetable oil
- 2 tsp (2 tsp) vanilla extract
- 1 1/2 cups (300 g) granulated sugar
- 2 cups (250 g) all purpose flour
- 1 tsp (1 tsp) baking powder
- 1/2 tsp (0.5 tsp) baking soda
- 1/2 tsp (0.5 tsp) kosher salt
Instructions
For the cake
- Preheat oven to 350 F and generously grease a bundt pan with baking spray. You can make this recipe by hand or by using a hand or stand mixer on medium speed.
- In a large bowl mash the 1 cup bananas. It's ok if there are little lumps. Add the 3 eggs, 3/4 cup vegetable oil, and 2 teaspoons vanilla extract and stir to combine. Add the 1 1/2 cups of sugar to combine.
- In another bowl or over a large piece of parchment paper combine the 2 cups of flour, 1 teaspoon baking powder, 1/2 tsp baking soda and 1/2 tsp salt. Add the mixture to the bowl and mix lightly until combined.
- Pour the batter into the bundt pan and bake for 45 minutes. The cake is done when the edges start to pull away from the sides and the top feels firm when touched.
- Allow cake to cool at least 10 minutes then invert into a wired rack to cool.
- When the cake is cool, drizzle with chocolate glaze or cream cheese glaze.

Easy to bake and super delicious!
Thank you so much Jen! You are the best!!!
I never used to bake or eat banana bread/cake as it wasn’t an intense enough flavor. I saw an article in one of my cookbooks where the pastry chef was talking about freezing bananas when they too “old and black” to eat. She peeled them, threw them into a plastic bag. Thawed them overnight in the fridge, took all the juices they gave up and simmered them on the stove and reduced them to a 1/4 cup, added to her batter. Wow! The flavor was terrific! I have also added the little finger bananas (dried) diced, from Trader Joes to amp flavor even more and keep the cake/bread moist. Am in fact baking a bundt cake today using this method. (I get about 3/4 to 1 cup of banana juice from three large bananas to reduce.)
Sounds cool to me!
It was easy to make,
However I twerked the measurement of oil in the recipe because I felt it was a little excess with a bit of butter. It was really good then.
Thanks for making this recipe!