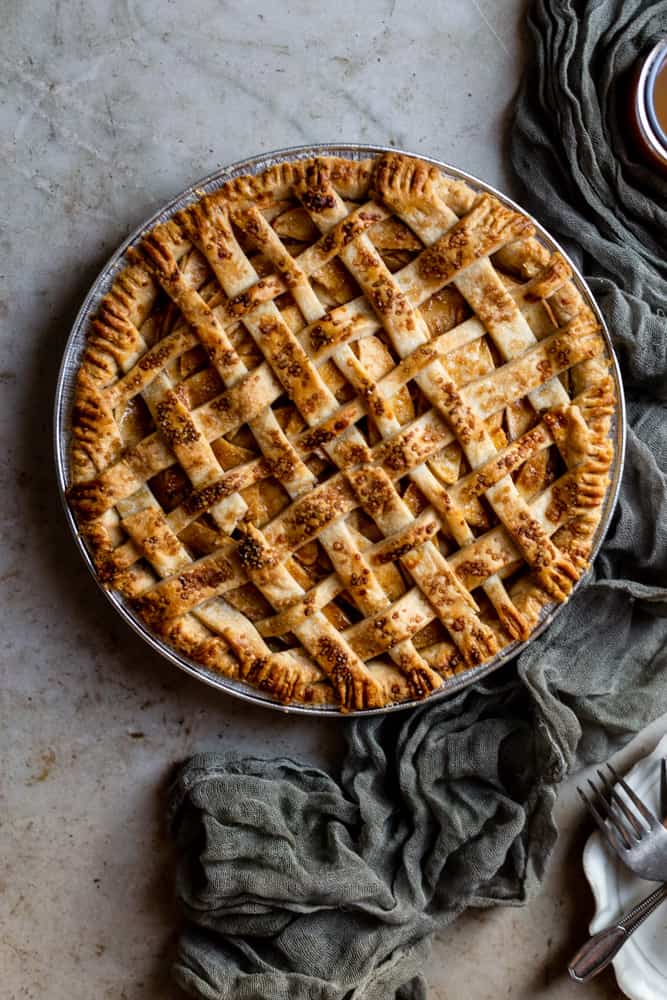
Easy Caramel Apple Pie (with Lattice Tutorial)
This easy Caramel Apple Pie is loaded with sweet sliced apples and doused in a salted caramel sauce. It is delicious on its own or topped with vanilla ice cream. With the step by step lattice tutorial you will be a pie making pro in no time!
Caramel apple pie is a dessert that can never be turned down. It’s perfect to make in the summer and even better all warmed up on a cozy fall day.
A lot of people my be intimidated by pie, with all the fancy lattice work, but as a trained pastry chef I am here to tell you that it’s not that scary, and yes, you can do it!
This salted caramel apple pie is full of sweet slices of apples that are covered in a gooey caramel sauce and then baked inside a flaky pie crust. You can either make your own crust by learning how to make a flaky pie crust, or you 100% can buy a pre made crust. No judgements here!
If you love pie but want an easier dessert try these apple pie bars! They have a crumb topping instead of pie but taste just as good!
If you don’t have pie crust dont worry! You can make this recipe into an apple pie with graham cracker crust or a puff pastry apple pie. Just add the caramel sauce to each recipe!
Apple lovers should also try this apple coffee cake and this apple bundt cake.
Why you should make this recipe
- It’s a classic recipe that everybody loves.
- Impress your friends! It looks harder than it actually is.
- Caramel and apple are a fall staple.
- You can make this with a pre made or homemade crust.
Ingredients:
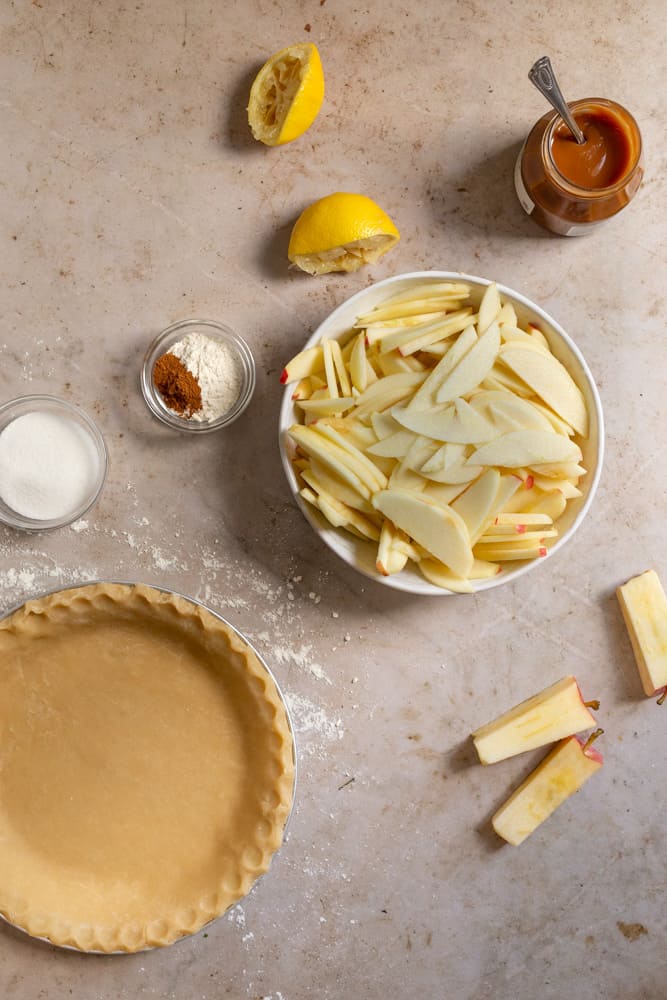
- Pie crusts- You will need two pie crusts for this recipe. One for the bottom and one for the top. You can either make your own with my super easy flaky pie crust recipe, or you can just buy it from the store. NO judgements here. I did that for years until I started making my own!
- Apples– I like using Honey Crisp or Braeburn apples.
- Lemon Juice– Fresh or bottled.
- All Purpose Flour– This will help soak up the apple juices.
- Granulated Sugar– Adds sweetness.
- Cinnamon– Adds great flavor!
- Salted Caramel Sauce– Again you can either make your own, try this Bourbon Caramel Sauce (leave out the Bourbon!)
- Egg– this is used for brushing the crust before baking.
- Sugar in the Raw- For an extra crunch and sweetness.
The best apples to use for baking pie
The best apples to use for baking are going to be Honeycrisp or Braeburn apples for sweet, and Granny Smith for tart. They can hold their shape and texture when being baked. Other apples like Gala, Fuji, Red Delicious, are not the best because they can get mushy in the oven.
How to make caramel apple pie
Prepare the crust: Make or buy the pie dough and the caramel sauce . If using home made crust, combine the 1 teaspoon flour + the 1 teaspoon sugar in a small pinch bowl. Mix it together and then sprinkle it all over your bottom pie crust. This will help soak up any remaining apple juices.
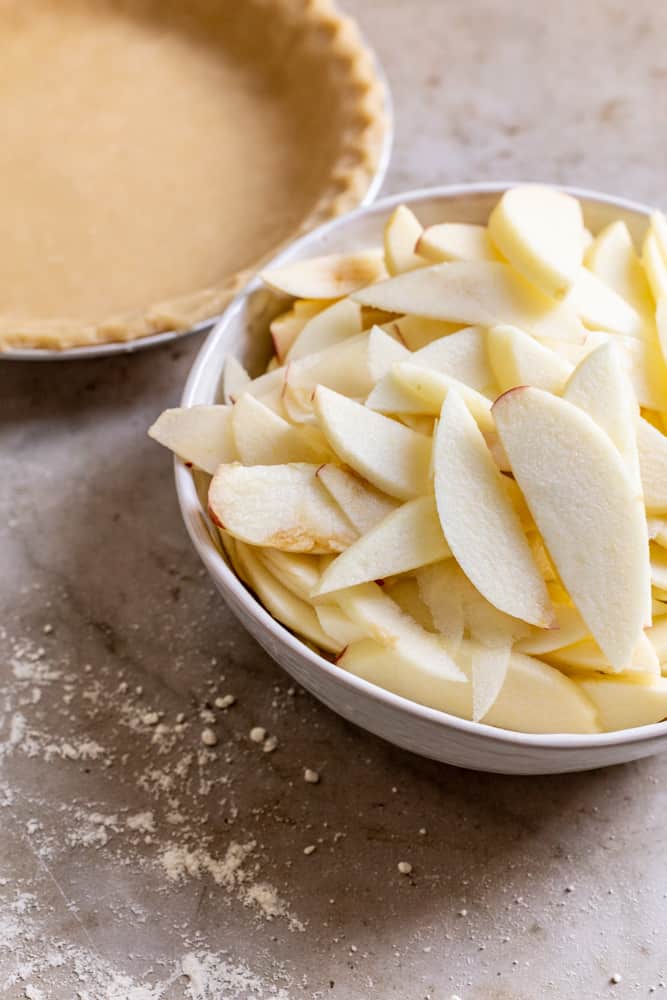
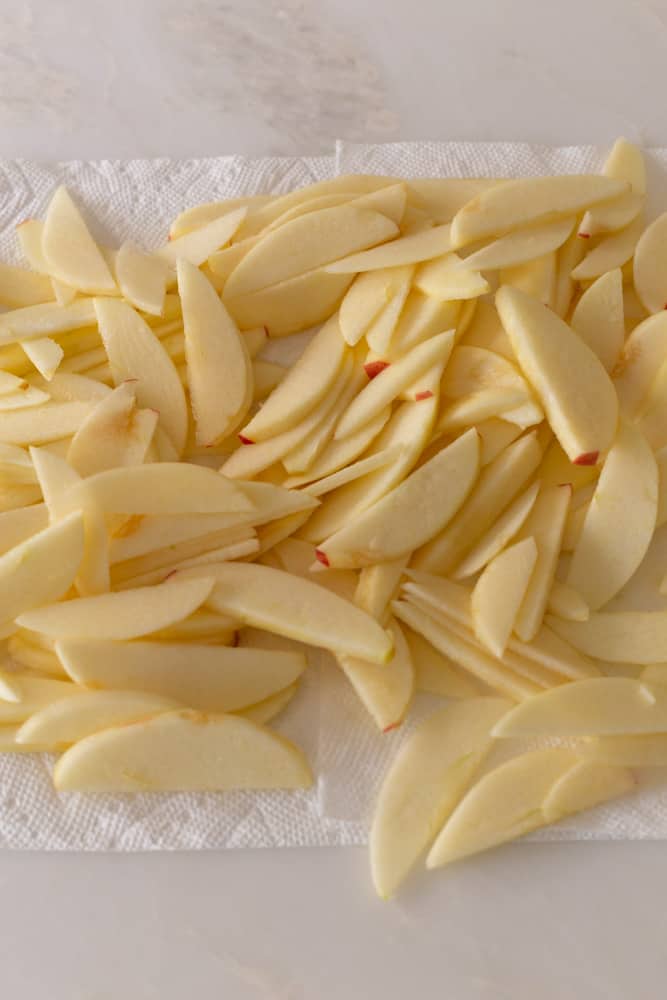
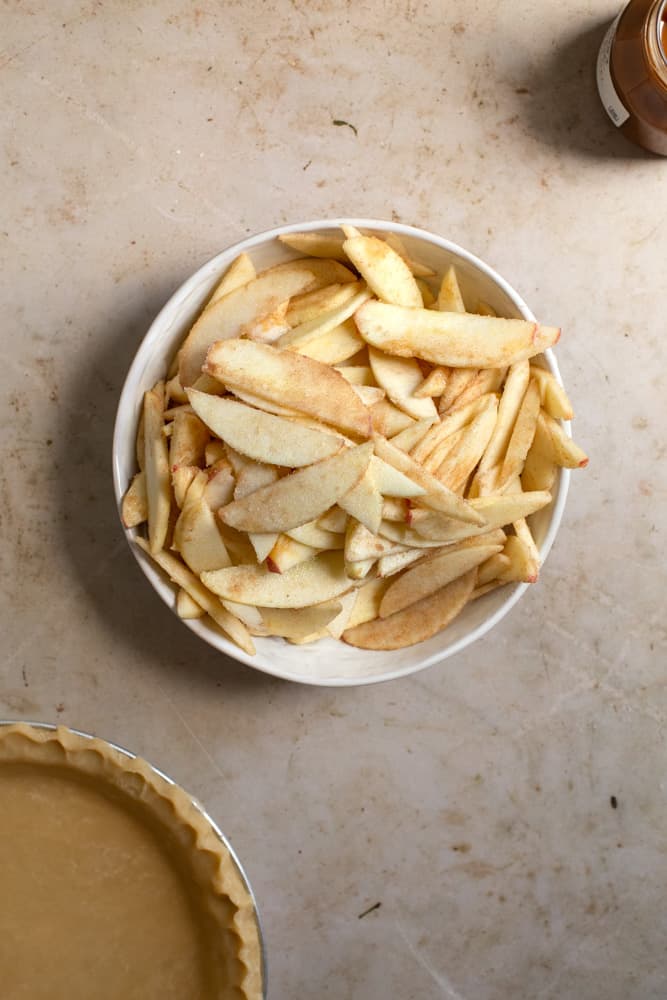
Prepare the apples: Peel and slice the apples 1/4 inch thick. Feel free to make them a little chunkier if you like. Place the apples in a bowl and pour 1/3rd cup of lemon juice over them and let it sit for 5 minutes. Drain the apples and dry them well.
Make the apple pie filling: Add the apples to a large bowl and add the rest of the flour, cinnamon, and sugar. Mix to coat the apples well.
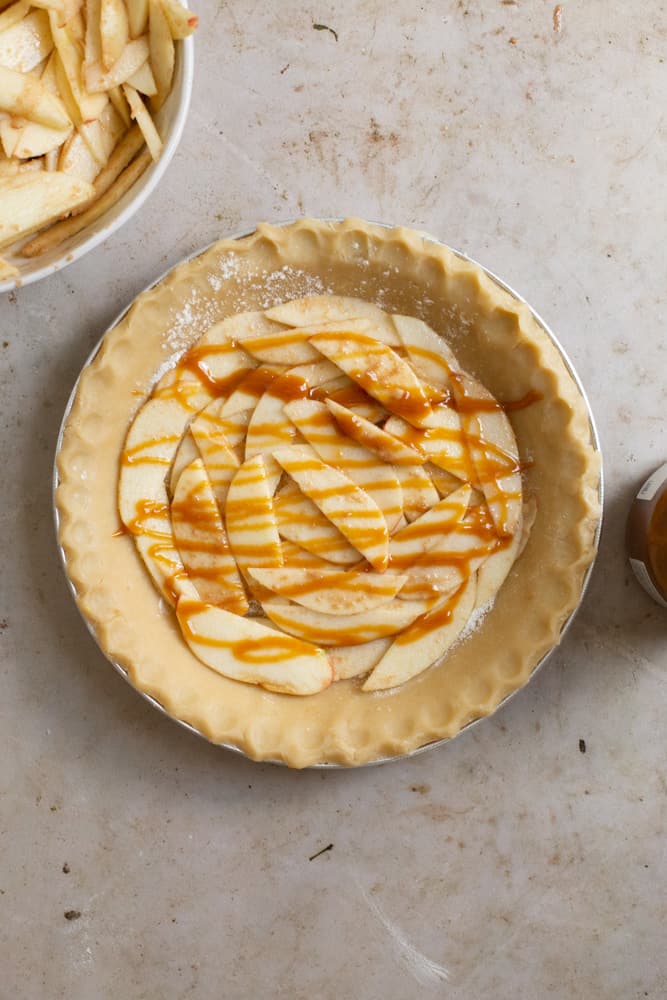
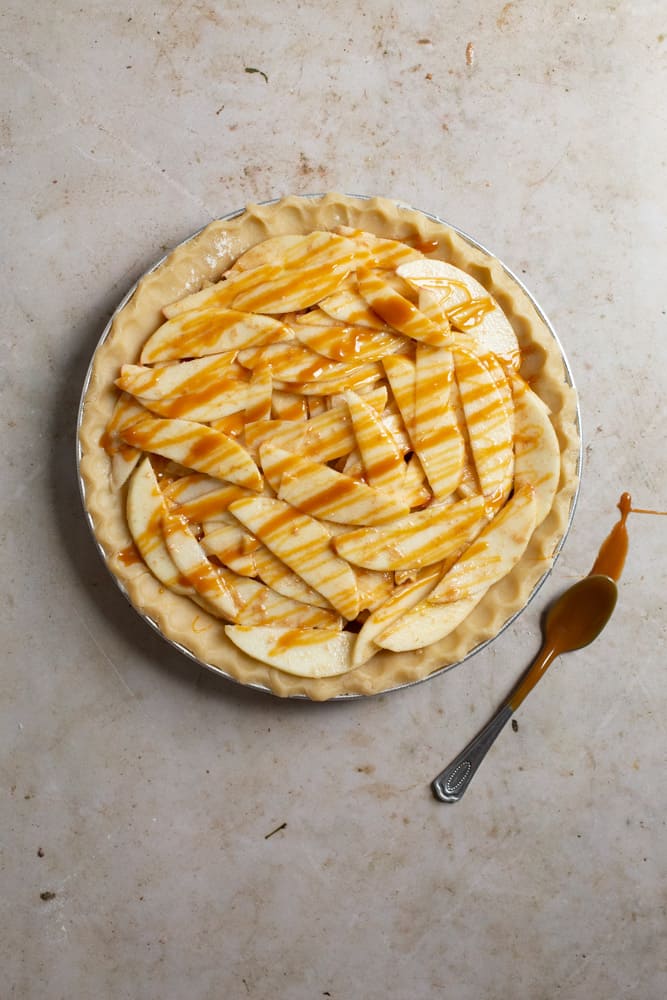
Assemble the pie: Layer one layer of apples on the bottom of the pie shell, then drizzle with the caramel sauce, about 1-2 tablespoons. Repeat this process until there are no more apples left. Drizzle one more spoonful of caramel sauce on top.
Finish and bake: Cover the pie with the 2nd pie crust in the design of your choice. See below for the lattice tutorial! Then brush with a beaten egg and top with a sprinkle of turbinado sugar (Sugar in the Raw) and bake on 375 degrees F for 30-35 minutes.
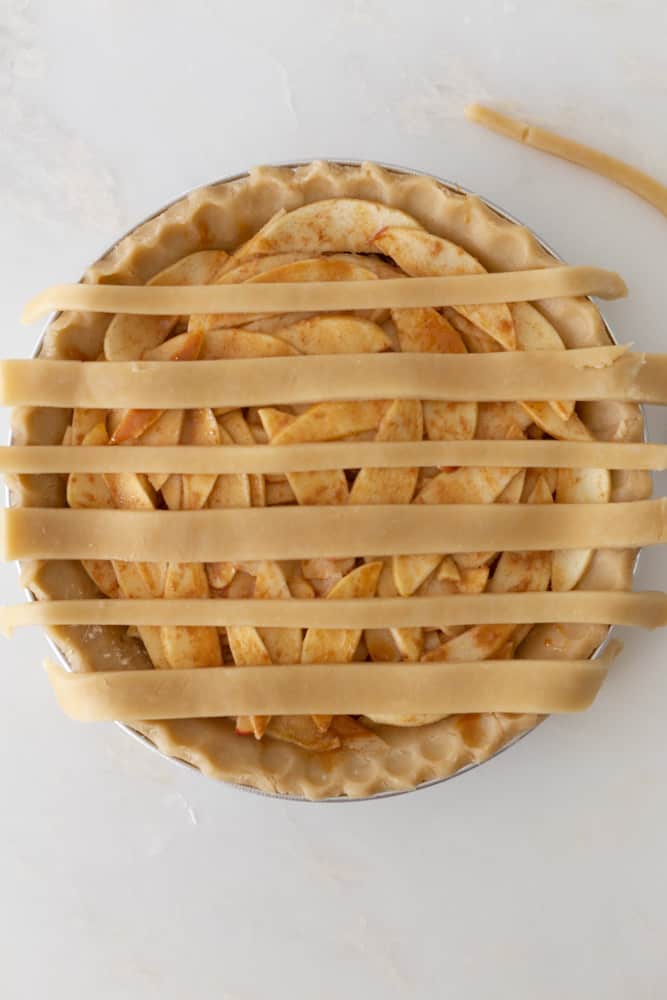
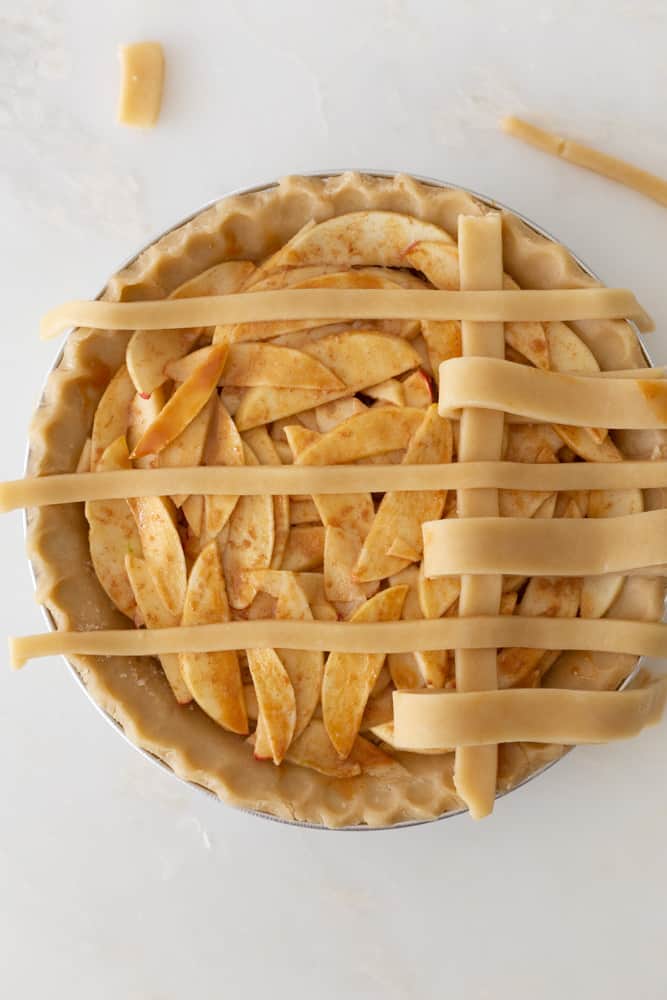
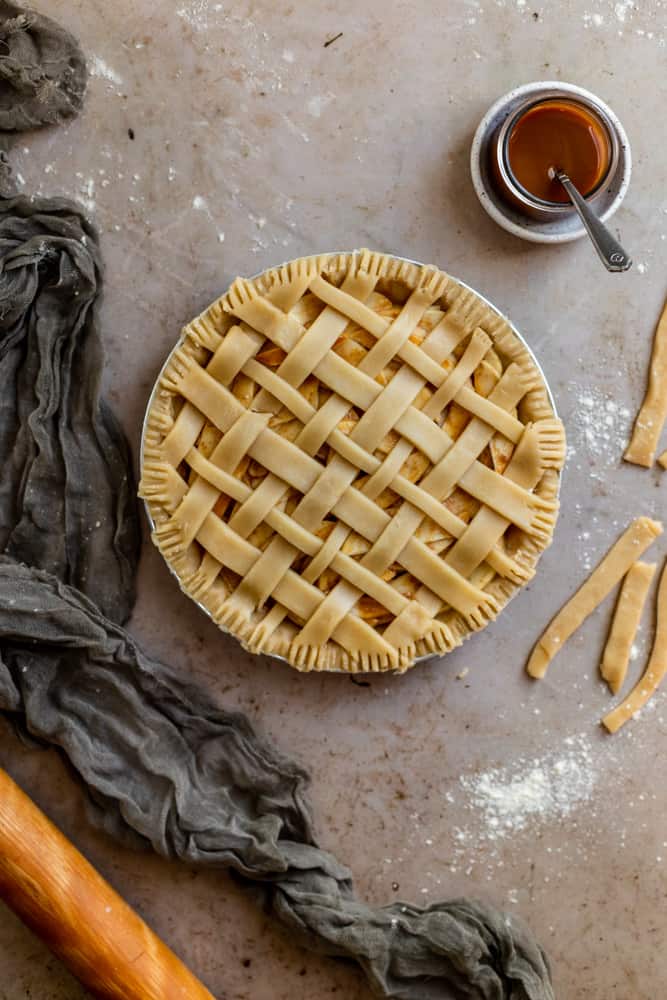
How to make a lattice crust
This is not as scary as it seems! It is an easy technique once you learn it, which you will then be shocked as to actually how easy it is.
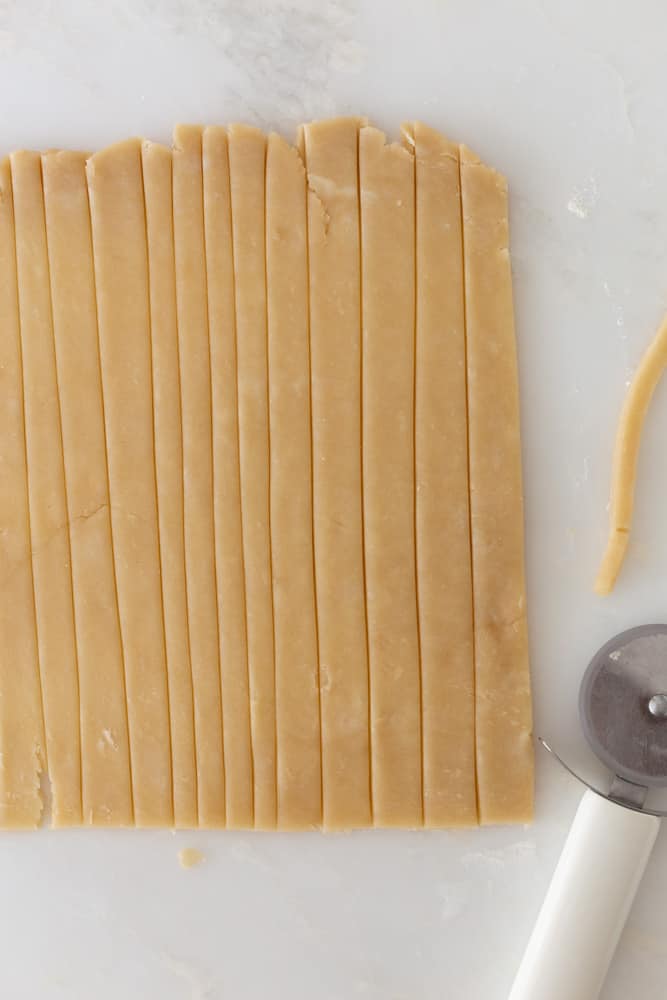
You will need 10-12 strips total.
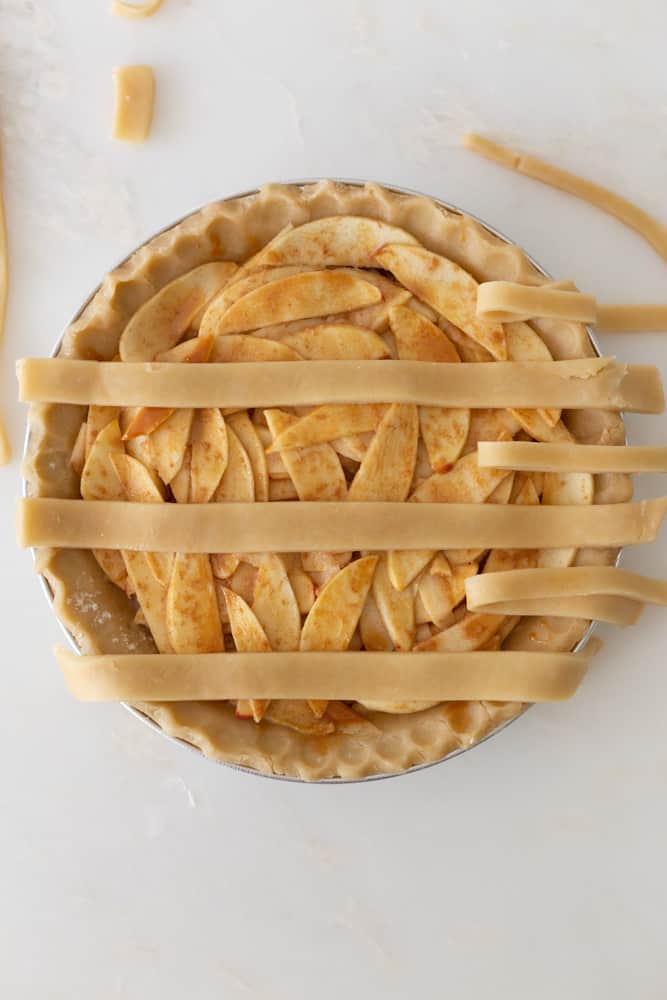
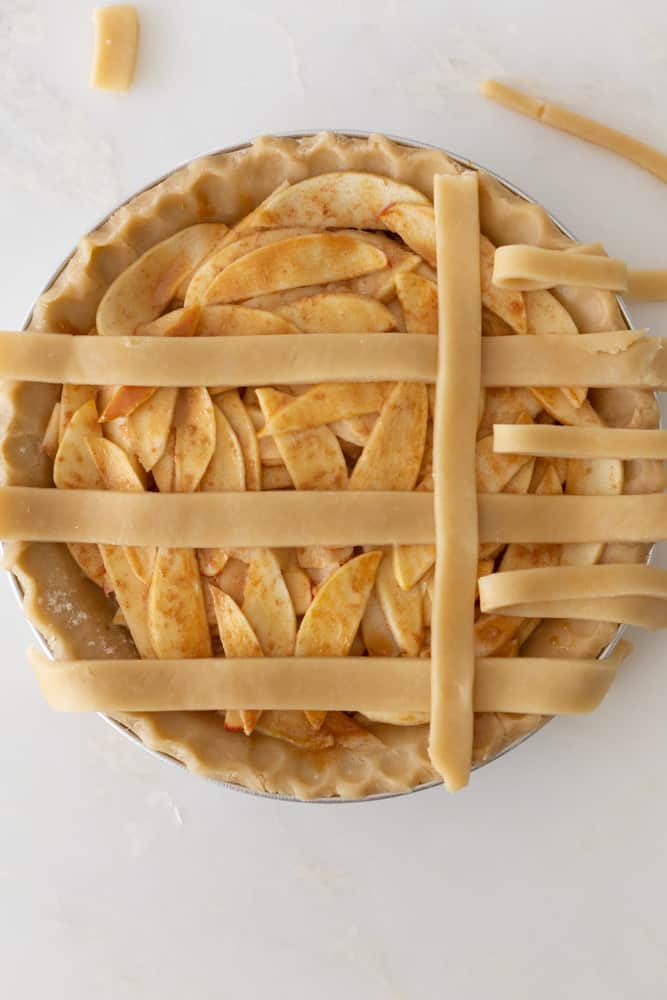
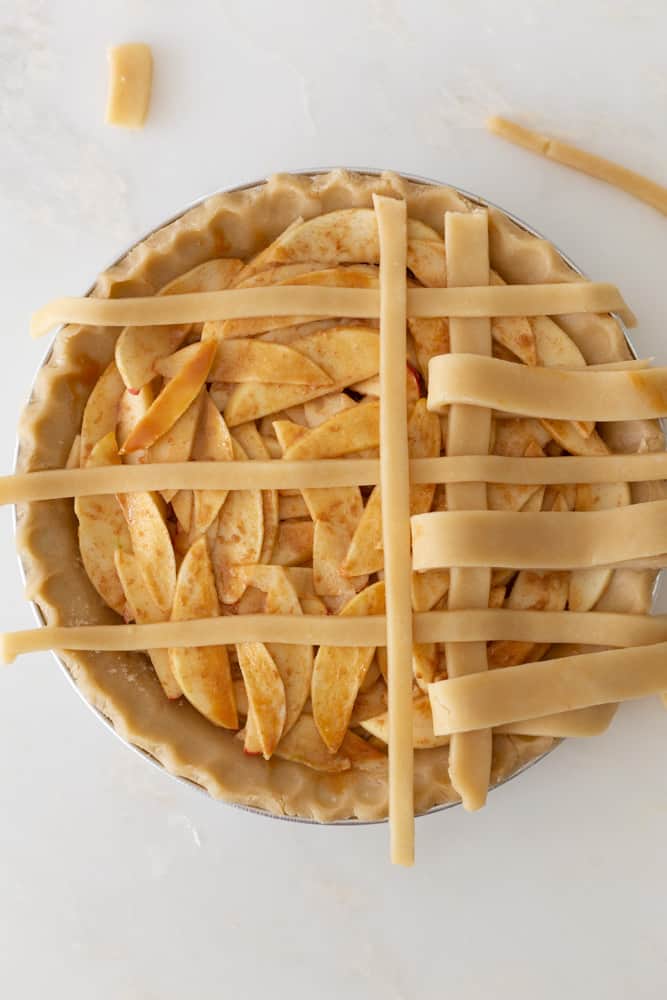
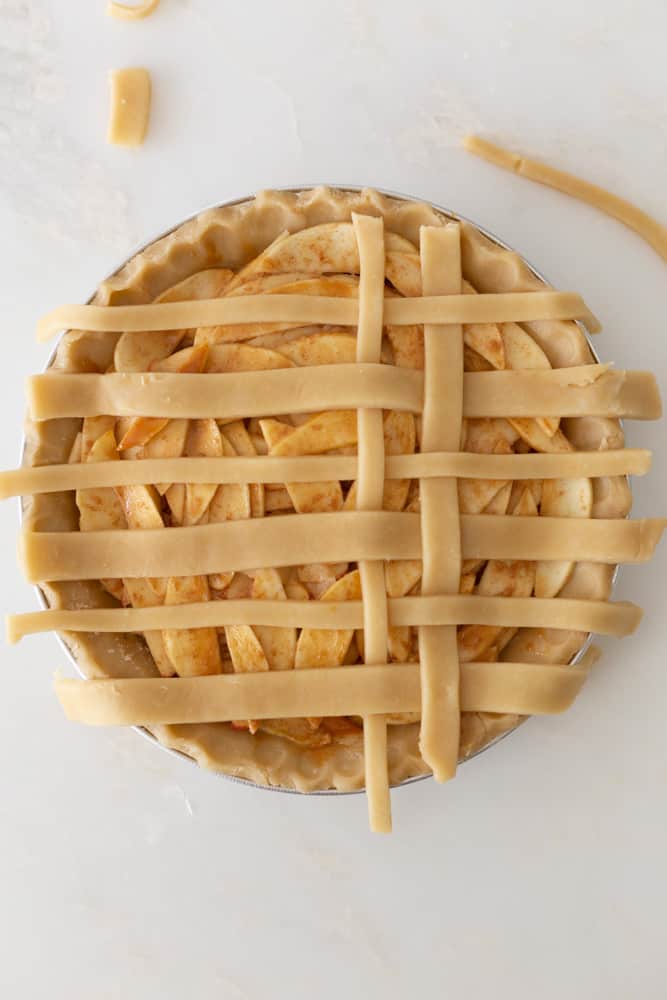
One set for horizontal strips and one set for vertical. It’s helpful to keep them different widths so you don’t get confused! Essentially you will be placing your horizontal strips down first then alternating adding the vertical ones.
Here are the step by step pictures for how to make a lattice pie crust:
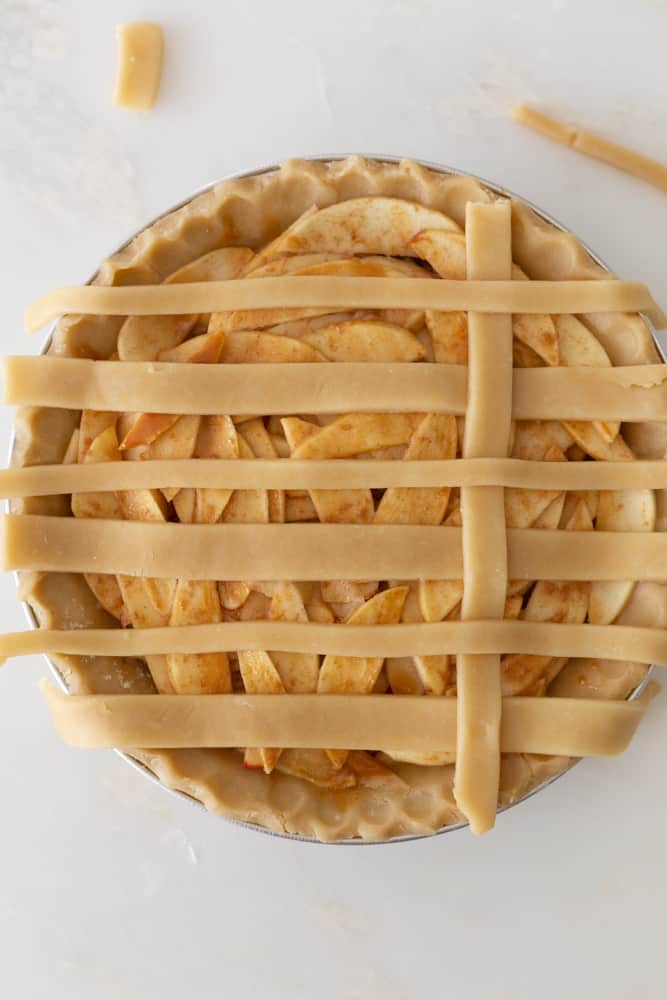
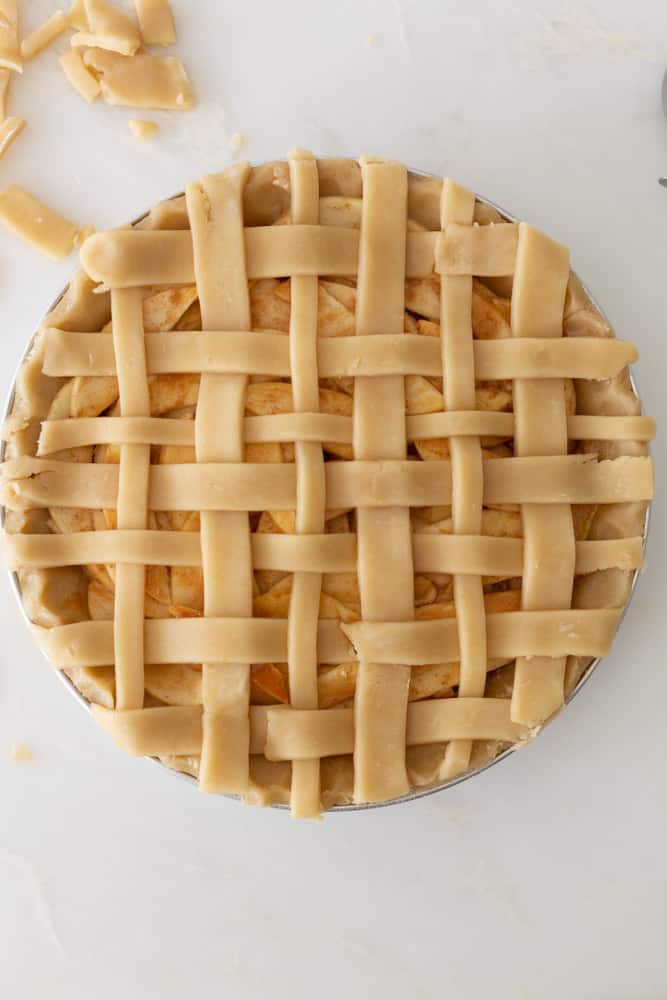
When you are finished with the lattice, trim any excess dough and crimp the edges with a fork so it stays down.
Pie crust alternatives
- Roll the dough onto the pie top and crimp the edges with a fork, then make 3 small slits in the middle to let the steam out.
- Make a streusel crumb topping instead.
- Cut out pie dough with cookie cutters and place all over the pie.
Serving
Make sure to let the pie sit for 25- 30 minutes (at least) at room temperature to firm up before serving. If you don’t let it rest the juice from the apples will run.
Serve with ice cream and more caramel! Maybe better for the summer, but just another excuse to make this pie!
Storing & Freezing
Storing- Store the pie covered with foil on the counter for 2 days or in the fridge for up to 5 days.
Freezing- When the pie has cooled down cover it in tin foil and then in plastic wrap if possible. Freeze for up to 3 months. Defrost in the fridge and reheat in the oven.
How to reheat pie
Reheat the pie in the oven at 325° F for 10 minutes, watching carefully so you don’t burn it. If you want to just reheat one slice, pop it into the toaster oven for 2 minutes on 350°F. I do not recommend microwaving the pie.
Recipe Tips
- To keep the edges of the pie from burning cover them with foil. Take a large piece of tin foil and place the pie on top. Crimp it up over the edges of the pie, then bake.
- Keep the pie dough cold at all times. If you are re working your dough to make the top and it gets to warm and rips, place it back in the fridge for 30 minutes before working with it again.
- It’s best to spoon the apples into the pie crust so that you can leave out any juice on the bottom of the bowl.
- Bake the pie on a cookie sheet in case it overflows so it doesn’t make a mess in your oven.
Recipe FAQ
Can I make this recipe ahead? To make ahead I would make the pie dough, caramel sauce, and the apple filling separately, and then assemble and bake the pie on the day you need to serve it.
Can I leave out the caramel sauce? Yes of course!
Why is my apple pie runny? Make sure not to cut into the apple pie for at least 30 minutes after baking. The pie needs to cool down and firm up before slicing, otherwise when you slice into it, it will be a runny mess.
Want more pie recipes? Check these out:
Easy Salted Caramel Apple Pie (with Lattice Tutorial)
Ingredients
- 2 9" Homemade Pie Crust, store-bought
- 4 Apples, medium size
- 1/3 cup lemon juice, fresh or bottled
- 2 tbsp all-purpose flour, Plus 1 teaspoon divided
- 1/4 cup granulated sugar, Plus 1 teaspoon divided
- 1/2 tsp ground cinnamon
- 3-6 tbsp caramel sauce, homemade or store bought
- 1 egg, for brushing
- Sugar in the raw, for garnish
Instructions
Prepare the apple filling
- Have your pie crusts and caramel sauce ready.
- Preheat the oven to 375° F. Peel and slice 4 medium apples into 1/4 inch slices. Place the slices in a medium sized bowl and pour 1/3 cup lemon juice over them. Mix lightly. Set aside while you prepare the dry ingredients.
- In a large bowl combine 2 tablespoons flour, 1/4 cup sugar, and 1/2 teaspoon cinnamon. Mix lightly to combine.
- In a small pinch bowl, combine the remaining 1 teaspoon flour and 1 teaspoon sugar. Mix to combine. Sprinkle this mixture all over the bottom of one pie crust.
- Drain the apple slices and pour them out onto a few paper towels. Dry them as best as you can then mix them into the dry ingredients in the large bowl. Toss the apples in the dry ingredients to coat them evenly.
Assemble the pie
- Layer one layer of apples on the bottom of the pie and top with 1-2 tablespoons of caramel sauce. Repeat these steps until there are no more apples left. Finish with a last drizzle of caramel sauce.
Prepare the top pie crust
- Decide which design you are using. Either create a lattice design or roll out the pie crust on a floured surface into a 10" round with 1"2 thickness. Fold the crust onto the rolling pin, lift and place it on top of the pie. Trim and crimp the edges with the tines of a fork or your fingers. Add 3, 1" slits into the middle of the pie to let steam escape.
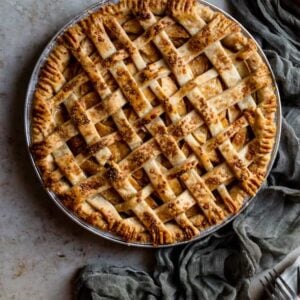
- Whisk an egg in a small bowl and brush it over the pie crust. Sprinkle with Sugar in the raws and bake for 30-35 minutes. The pie is down when its golden brown and bubbly!
- Cool the pie on the counter for at least 30 minutes before cutting into it.
Notes
If you make this recipe, please let me know by leaving a comment and a star rating below! I love to read all the comments. Thanks for supporting my blog!!
