One Batter Moist Marble Cake
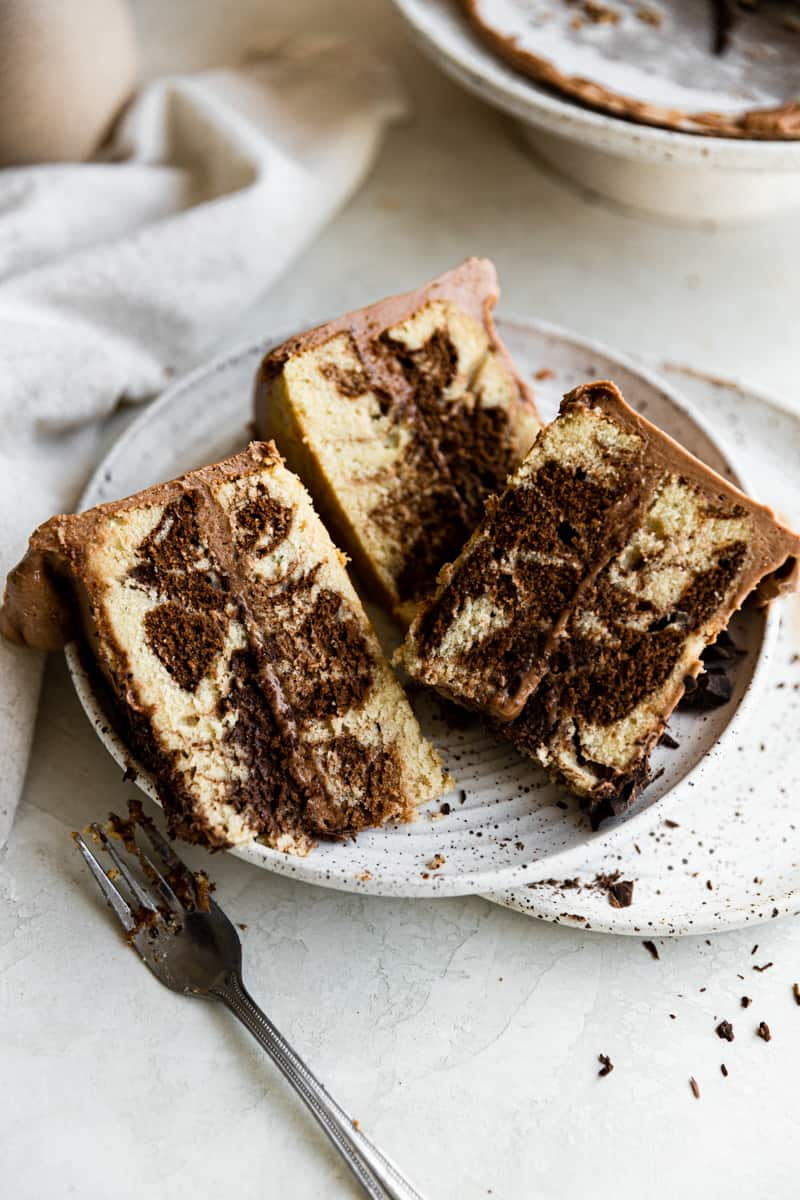
This Marble Cake looks so impressive but is very easy to make! It is a 2 layer cake that is made using only one batter for both the vanilla and chocolate flavors. They are simply swirled together in the cake pan to give the classic marble effect. You will love this light and fluffy cake!
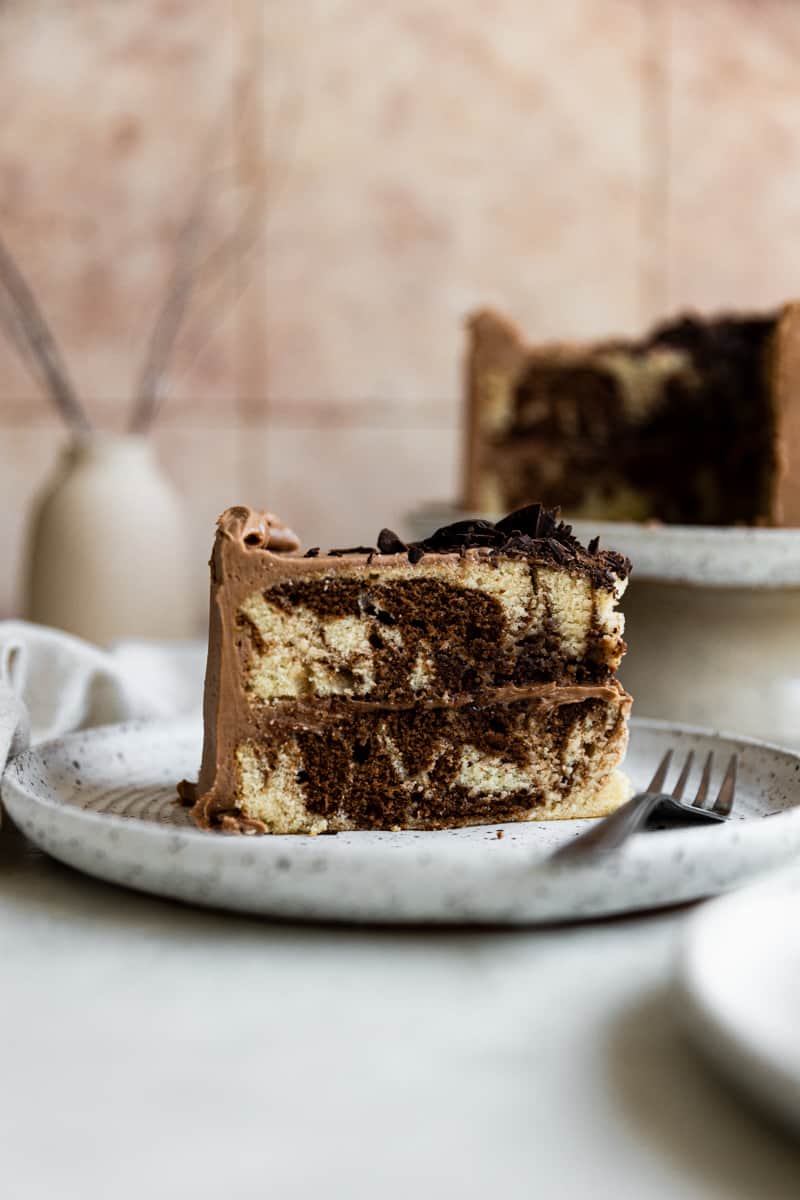
As a trained professional baker, I love a pretty layer cake. What makes this cake even prettier are the never ending swirls of chocolate and vanilla inside this marble cake.
The marble effect is created by swirling the two different flavors into one batter. All you need to do is mix together a basic vanilla cake batter and divide it, then add some cocoa powder to one half to create two different flavors. So easy and efficient!
The result is a beautiful marble layer cake that looks almost too good to eat! The texture is light and moist, with creamy swirls of vanilla and chocolate.
A lot of times marble cake recipes have you making two batters, but honestly, I don’t have patience for that, so I wanted to figure out a way to make just one batter but turn it into two different flavors.
Happy to say I figured it out! Marble cakes can also come out dry sometimes, but this recipe uses buttermilk along with 3 eggs to keep the cake super moist.
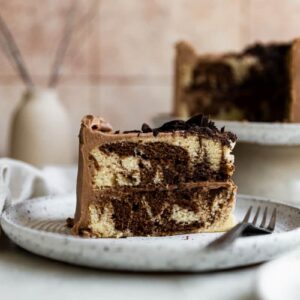
To take the cake over the top I frosted it with my light and airy chocolate cream cheese frosting but you can also use regular chocolate buttercream frosting, or even classic cream cheese frosting.
I honestly had so much fun swirling this cake that I adapted this recipe into a Marble Loaf Cake, these Marble Cupcakes, and this Marble Bundt Cake!
Here’s to lots of merry marbleing! 🤣
Ingredients
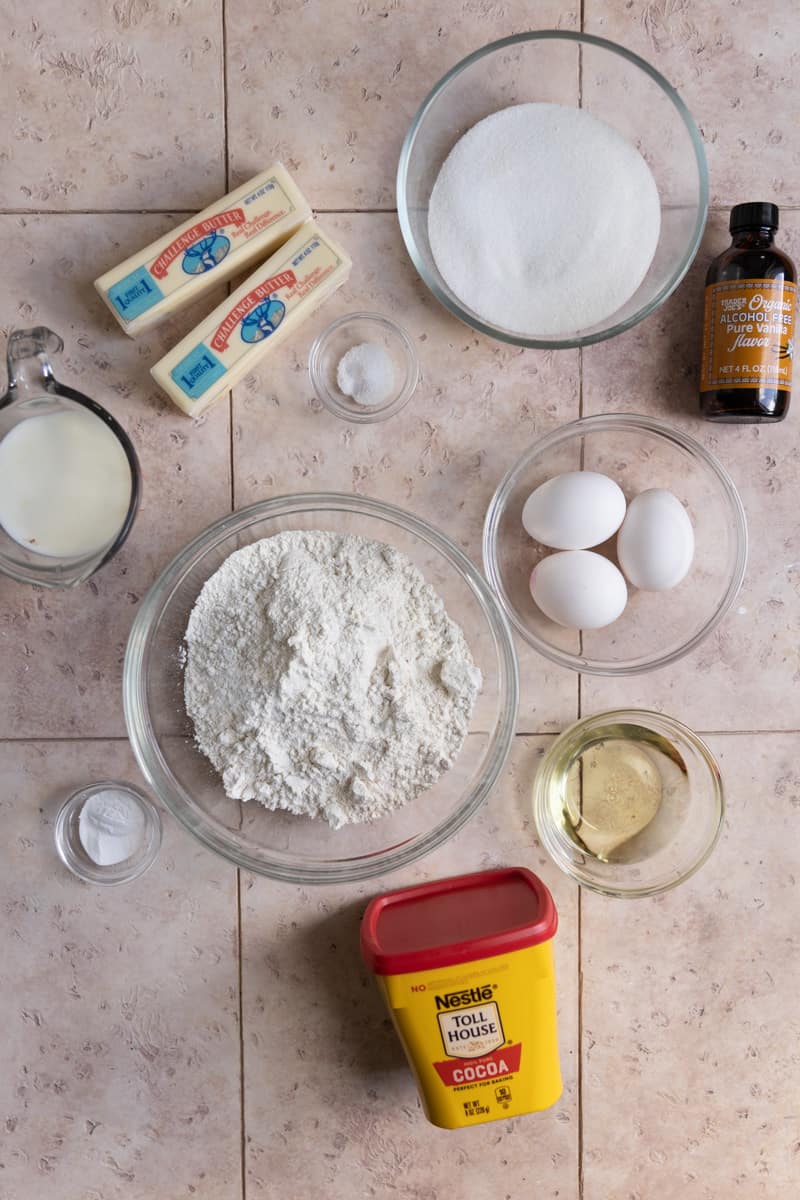
When I was testing this cake, regular cocoa powder didnt have as much contrast against the vanilla base. To fix it and make it more contrasty, I used this Hershey’s special dark cocoa to make the chocolate darker for a better marble effect.
Recipe instructions
Bake and cool: Bake for 28-32 minutes or until the cake is set and the sides are pulling away from the pan. Let the cake cool completely on a wire rack.
Add frosting and filling: Fill and frost the cake with either chocolate buttercream frosting or chocolate cream cheese frosting. Enjoy!
One Batter Moist Marble Cake
Ingredients
- 1 cup butter, (227g)
- 2 cups sugar, (400g)
- ¼ cup vegetable oil
- 3 eggs, large room temperature
- 2 ¾ cup all purpose flour, 330g
- 1 tsp baking powder
- ½ tsp baking soda
- ½ tsp salt
- ¾ cup buttermilk, room temperature + 1 tbsp, divided
- 1 tbsp vanilla extract
- 2 tbsp cocoa powder, I recommend Hersheys Dark
Instructions
- Preheat the oven to 350 F. Heavily spray 2 8” cake pans with baking spray.
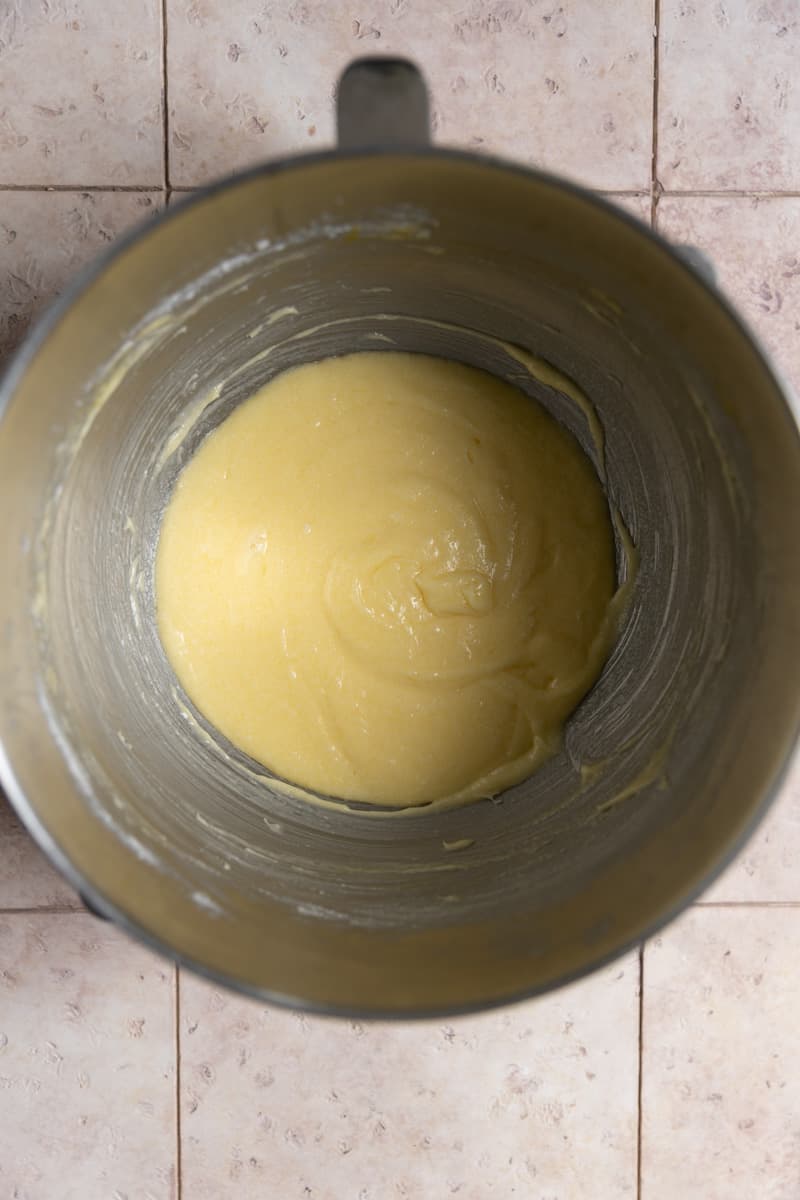
- In the bowl of a hand or stand mixer fitted with the paddle attachment add the 1 cup butter and 2 cups sugar and mix on low-medium speed for 2 minutes.
- Add the ¼ cup vegetable oil and mix again until combined. Add the eggs one at a time on medium speed, mixing in between.
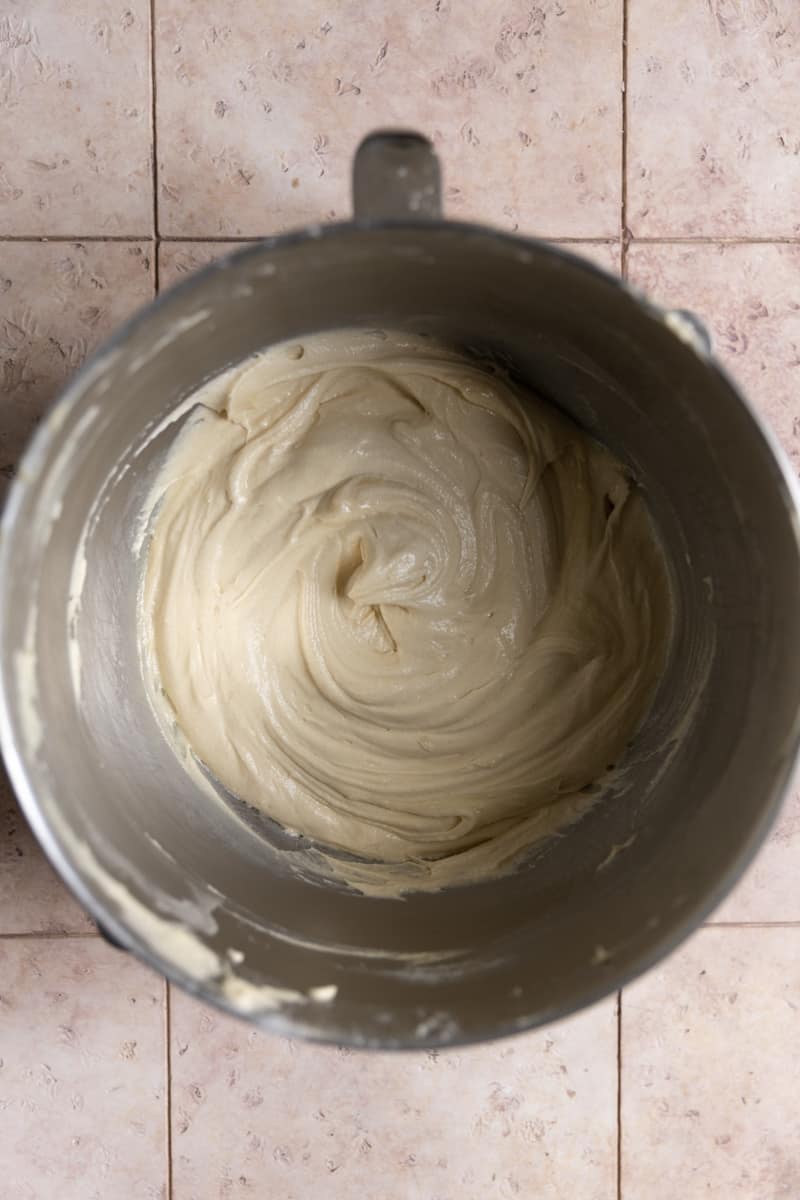
- In a separate bowl combine the 2 ¾ cup flour, 1 tsp baking powder, ½ tsp baking soda, and ½ tsp kosher salt and mix lightly.
- In a measuring cup add the 3/4 cup buttermilk and 1 tbsp vanilla extract and set aside.
- Alternate adding the dry ingredients with the buttermilk to the batter mixture by thirds starting and ending with the dry ingredients. Mix for 30 seconds on medium speed.
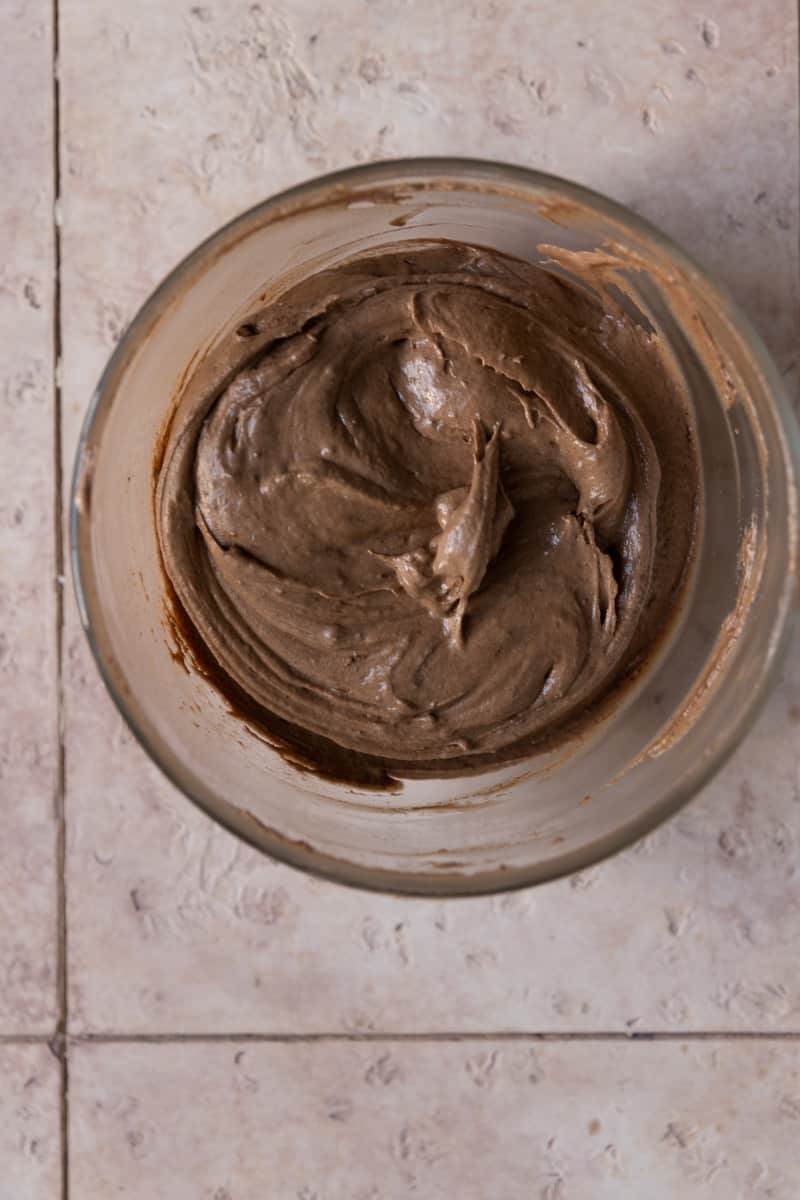
- Take out one cup of the batter and add it into a bowl. Add 2 tbsp cocoa powder and remaining 1 tbsp buttermilk. Stir to combine. Now you have your separate vanilla and chocolate bases for the cake.
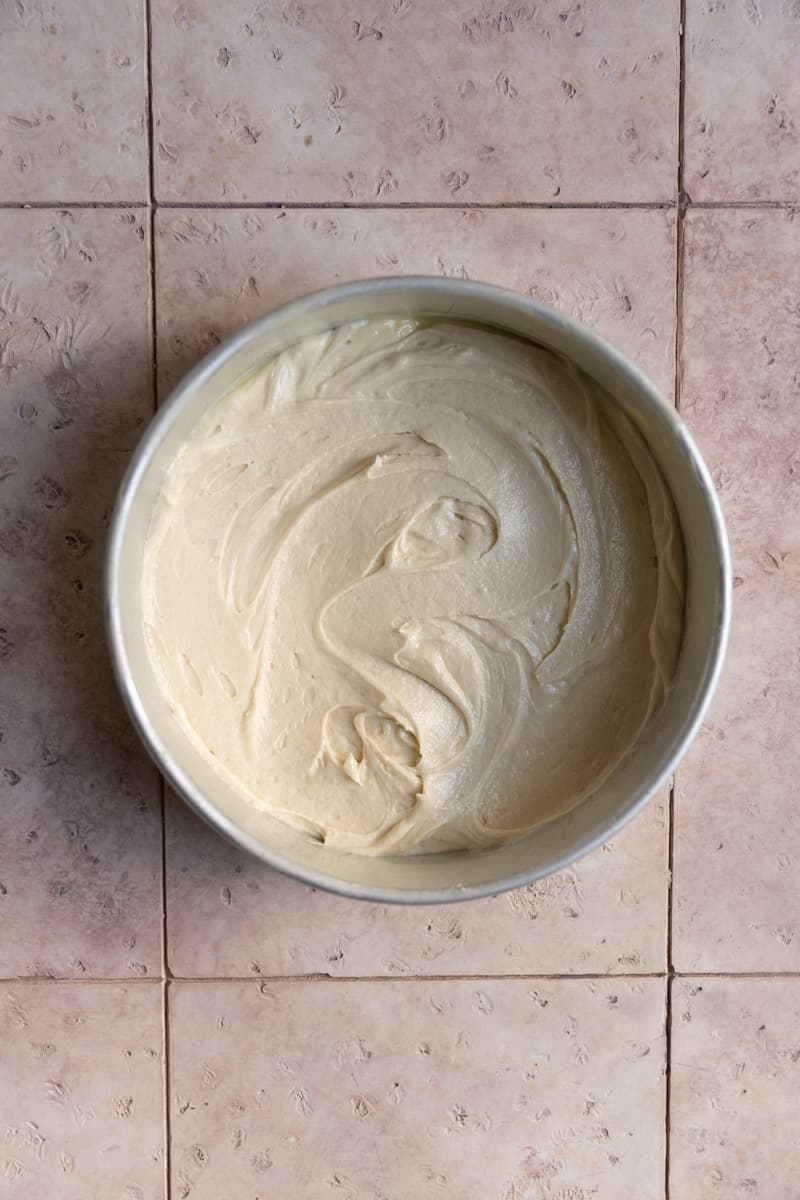
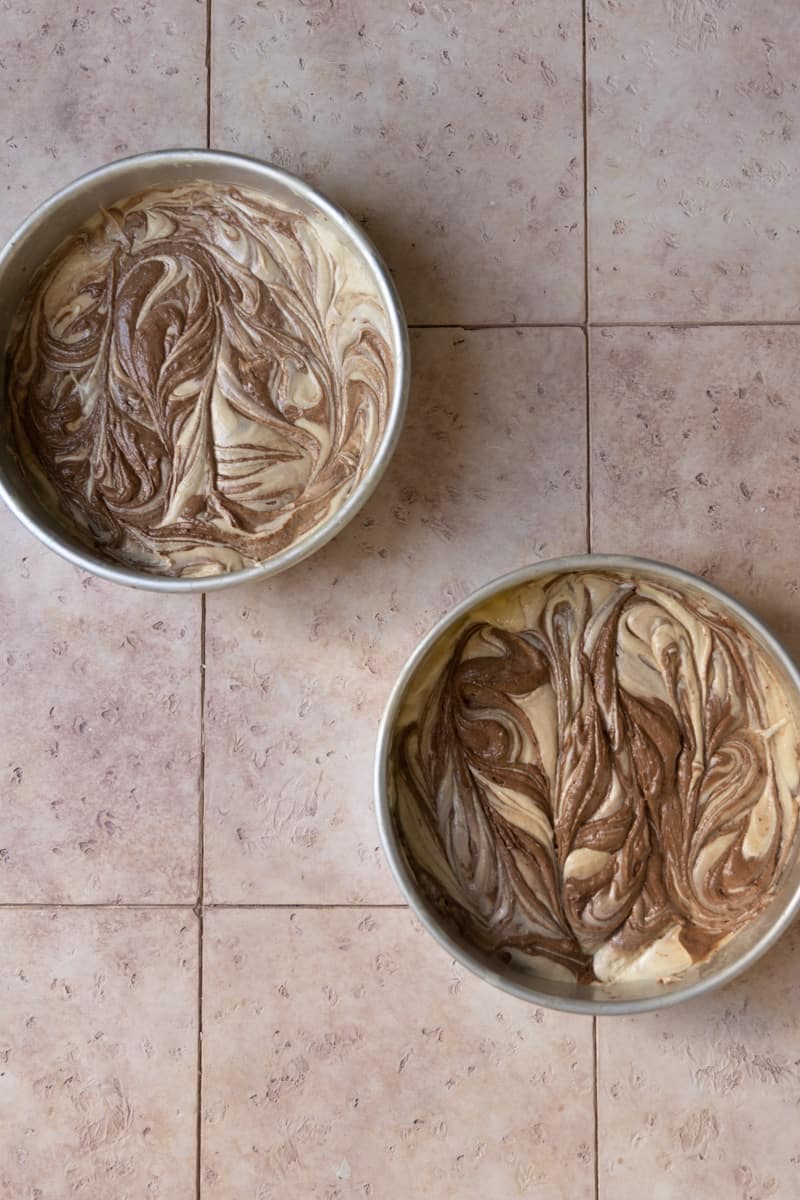
- Spread a thin layer of vanilla cake batter onto the bottom of each cake pan.
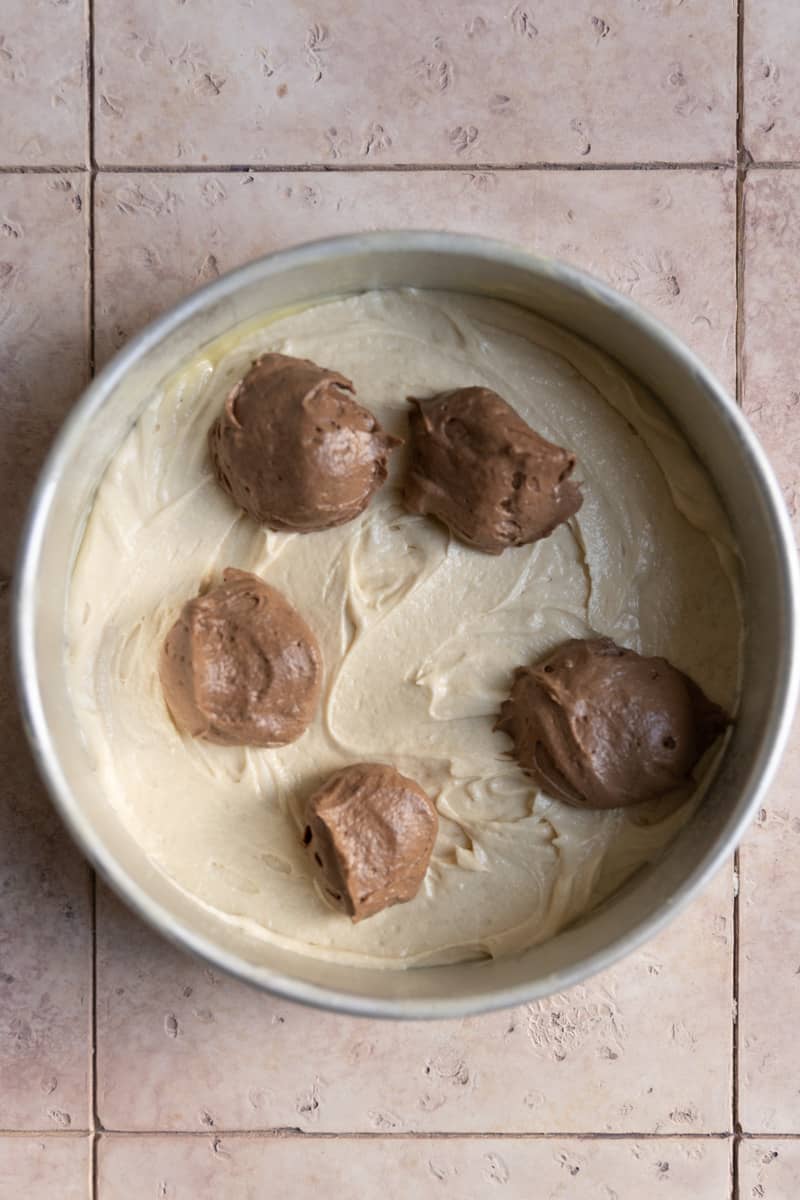
- Using and ice cream scoop, dollop the chocolate cake batter on top around the cake pans.
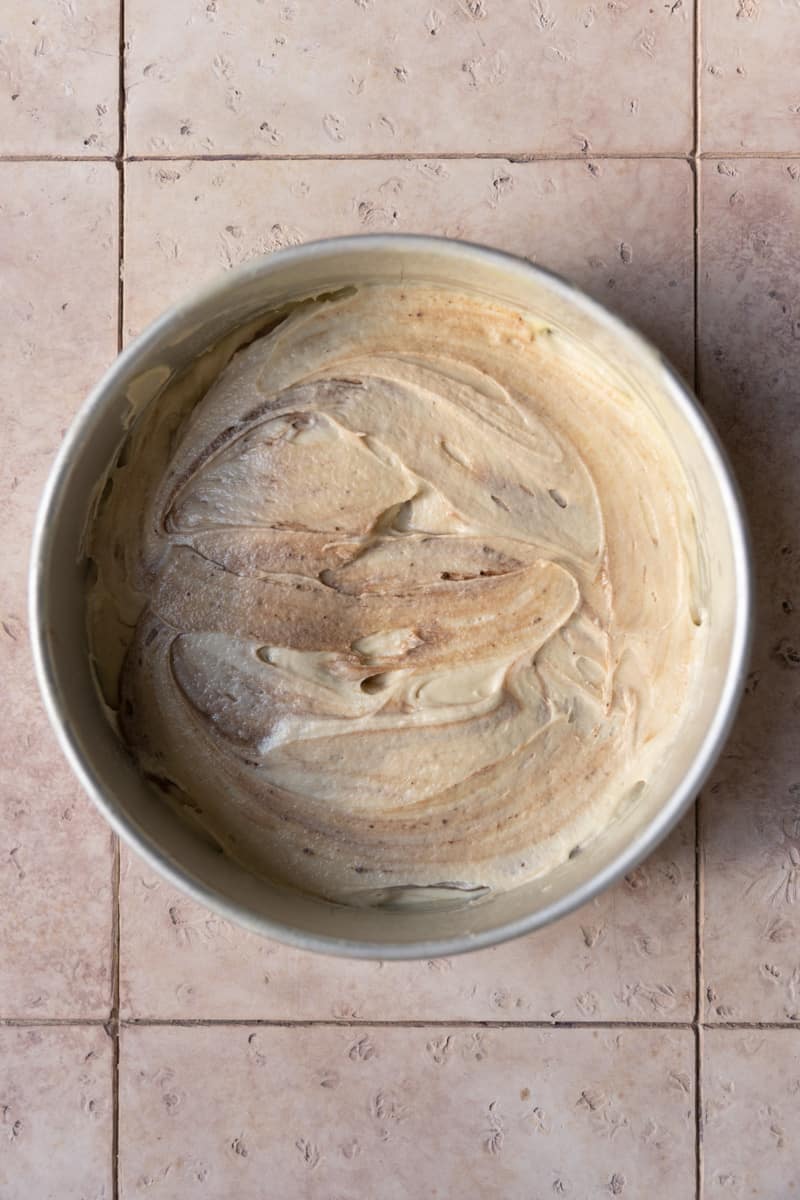
- Spread another layer of vanilla batter over the chocolate as best you can trying not to mix the batters thats much.
- Using a skewer or knife, swirl the batters together. Make sure not to swirl too much or the batters will blend together and you wont be able to see the swirl.
- Bake for 30-35 minutes or until the cake is set and the sides are pulling away from the pan. Cool on a wire rack completely.
- Fill and frost the cake with either chocolate buttercream frosting or chocolate cream cheese frosting.

My cakes sunk in the middle. What did I do wrong? 2 8”x2” round pans. I did bake for 32 minutes. They did taste good though. 😩😩
Thats super frustrating! They may just have needed more time. Sometimes our ovens are off on the actual baking temp.
Can you make this as a 1/2 sheet cake, would I need to double the recipe for a 1/2 sheet cake?
I wouldnt double it, you can make it as it is.
Hi! Looking to make this for my son’s bday. What temperature do you recommend the butter should be?
Thank you!
Hi! I have a whole post on softening butter here!
Do all your buttercream recipes make enough for frosting this cake or do I need to double them? I have made cakes before where I didn’t have enough frosting and it is always such a pain to make more.
No need to double, all my frosting recipes make enough to frost a 2 layer 9 inch cake (like this marble one), a sheet cake, or 12-18 cupcakes depending how much frosting you put on each cupcakes.
It was great a was gobbled up in no time. I am making another one for gathering I am sure they will be impressed. I was!!!!
Wohooo! Thank you so much for letting me know Joy! I really appreciate the 5 star review and comment!
I doubled the recipe since I was using 2 10×2 pans. It took longer to cook. Like over an hour. But it came out good.
Hi Bre, for sure it would take longer if the batch is doubled. Glad it came out good though, thank you!
What would the ingredient measurements be for a 6 inch cake?
Unfortunately I havent tested it out for that size.
This looks so good! I want to make a 2 layer cake, like you describe in your other post. Can I use this marble recipe for that? Or do you have another marble recipe that would be better? Thanks!
HAHA its ok! Yes you can make a 2 layer cake out of this recipe, bake in two 9″ cake pans and check after 30-35 minutes!
Sorry, I mean two tier! 😆 already confusing myself!
We loved this cake. It took a bit longer in my oven but I tested it every three minutes to make sure it didn’t over bake. I liked that it did rise nicely, but had a flat top instead of dome shape. It has a lovely delicate crumb and is so moist. Everything about this cake pleased my grand daughter, who requested a marble cake for her birthday. It was a hit with everyone, and I’ll be making it again often. So good.
Yay Nancy! I’m so happy this helped the birthday celebrations turn out as success! Thank you so much for coming back and letting me know.
🤗🍰🥮🎂🥞🎉🎆🎇✨ …..
Frosting & fettuccine .. so nice sweetest recipe too…happy wonder …bless me …tks …im glad to meet miss xo Sam A
Thanks for your kind message!
Mine was cooked all the way through, but also dropped a lot in the middle
Oh no Hillary! I’m so sorry to hear it dropped in the middle. What size pan were you using and do you know about how full you filled the pan? I wonder if was a patio to pan ratio or sometimes over mixing can create extra air bubbles that then pop and collapse the cake. How did it end up tasting?
This was delicious! I baked it in a 9× 13 pan and did not frost it. Everyone liked it. I will definitely make this again.
Everyone liked it 🙌 – reading this just made my day Martha! I’m so, so happy it turned out well for you AND you got to share it!
I felt directions about adding the buttermilk were unclear. The chocolate portion didn’t mix well into the bottom vanilla layer to look marbled. A bit dry tasting in the end.
Hi Felicia, I went in and updated the recipe card to be more clear. It could be that the cake was over baked a bit which could lead to a dry cake. All our ovens bake differently so you likley needed a few minutes less. Thanks for trying it anyways!
I’ve been making a few of your recipes for a while but this is actually the first comment I leave (I should totally leave some five stars in the other ones too, they’ve all been great! My go-to cookie recipe is now one that I got from you!)
I made this cake as a gift for my friend’s family when I went over, and it turned out soooo good. I was a little worried because I didn’t use to be very gifted at baking, but I’ve found out that if I just follow your every word everything turns out more than alright, lol. Thanks for making me look good!
The oven time took a while more in my case (and I had it running for a while before putting the cake in, too!) but that’s about it, so I don’t really count it as a problem.
Awww Vivianne! I’m so, so happy you left a comment. Your post completely made my day! Which of the cookie recipes is your go-to?
It did not work for me 😭
Im so sorry! Can you tell me more about what didnt work?
Can I grease and flour the pans or do I have to use spray
You can totally grease it, I just prefer spray because its super easy and fast!
My 1st time making this from scratch and it’ll be the only way I make a marble cake thanks to your easy recipe. The only thing that had me stumped was the salt, in the list of ingredients it says 1/2 tsp of salt, but in the instructions you say 1/2 tsp of kosher salt, so I played it safe and just did regular table salt and it turned out great, maybe next time I’ll try kosher salt.
Thanks again for sharing your yummy recipe!!
Thank you so much Temara! Im so glad you found this recipe easy and delicious! I typically only bake with kosher salt, table salt can be a too concentrated, but im glad it worked out!
Can I use 2 9” square pans?
Yes totally, I would check after 28- 30 minutes though.
Do I use regular flour or cake flour in this recipe?
regular all purpose flour 🙂
What should the bake time be for cupcakes?
Hi Jennifer! The bake time for cupcakes are always 18-19 minutes on 350 degrees F. It’s universal for all standard sized cupcakes for any recipe 🙂
HI ,
this looks delicious!
Do i have to double the recipe for a 10inch 2 layer cake??
If you are ok with the cake layers being a little thinner, I dont think you need to double it because it might be too much batter. Bake for a few mins less!
Question: can you use regular milk ? What does the buttermilk do that regular milk won’t?
Dee
You totally can use regular milk. Buttermilk add a bit more moisture and a slight tanginess to it but you can use milk too.
This is my fourth year making this recipe for my husband’s birthday. Unfortunately it is too dense no matter what I do and dry, I will be moving on to a new recipe. Great flavor. I’m bummed!
Hey Jordyn, thanks for making this for his birthday! I wish you would have reached out earlier and I could be able to help! What have you tried? The cake might need a few minutes less in your oven- all ovens are different and it might not bake the same as it does in mine.
This is perhaps the worst recipe I have ever tried in my life. Totally unclear instructions that fall apart after step 5. I was left with numerous bowls, no specific measurements to follow for mixing, and no cue to mix the bowl of wet ingredients. I was making a birthday cake. With little time to run to the store after this disgrace of a recipe, this leaves us in a bind. What a waste of time.
The steps do look like they were written by AI. Beware, find another recipe to follow on a website created by humans. Something read, edited, and tested. I’d be wary of following any other recipe on this site. Never coming back here again.
Geez Candy, this is a really harsh review considering this recipe has also received 5 star reviews from other bakers. The recipe has clear steps with process shots that show you the exact process of how to make the cake so Im not sure why you thought it was so confusing. Did you not read the whole recipe card? It clearly says when to mix in the buttermilk and to alternate it with the dry ingredients. And no. This recipe was not written by AI, it was written by me, a real person who is also writing this comment to you right now. Maybe you could have asked for help and I would have been able to give it to you- you also could have read the other comments on this post and see that I clearly monitor it and respond to each one. I value each person who comes across my blog even more so when a recipe doesnt work out for them and try to help but not when the reader is rude. 👋🏻
I’m not clear… is the cake cooled completely in the pan, then removed?
Hi Charlene! I would cool the cake for 20 minutes in the pan and then flip over on to a wire rack to remove from the bundt pan and cool completely on the rack.