• Skip to primary navigation
  • Skip to main content
  • Skip to primary sidebar
  • Recipes
    • Recipe Search
    • Recipe Index
    • Bars & Brownies
    • Breakfast
    • Cakes
    • Cookies
    • Cupcakes
    • Frosting
    • Fruit Desserts
    • Muffins
    • One Bowl Desserts
    • Pies & Tarts
  • About Me
  • Food Photography
    • Work with Me
    • Classes and Workshops
  • Shop

Frosting & Fettuccine

Home » Recipe Search » Chocolate Cakes

Jul 10, 2022(last updated February 14, 2023)

Light and Fluffy Flourless Chocolate Cake

4.11 from 29 votes
BySam Adler
Jump to Recipe

This post might have affiliate links, please check out my full disclosure policy.

This flourless chocolate cake recipe has only 5 ingredients! It is super light and airy and not dense like other recipes. Even without the flour, this easy cake is still fluffy, spongey, and delicious-it’s almost like magic! You will love this gluten free chocolate cake!
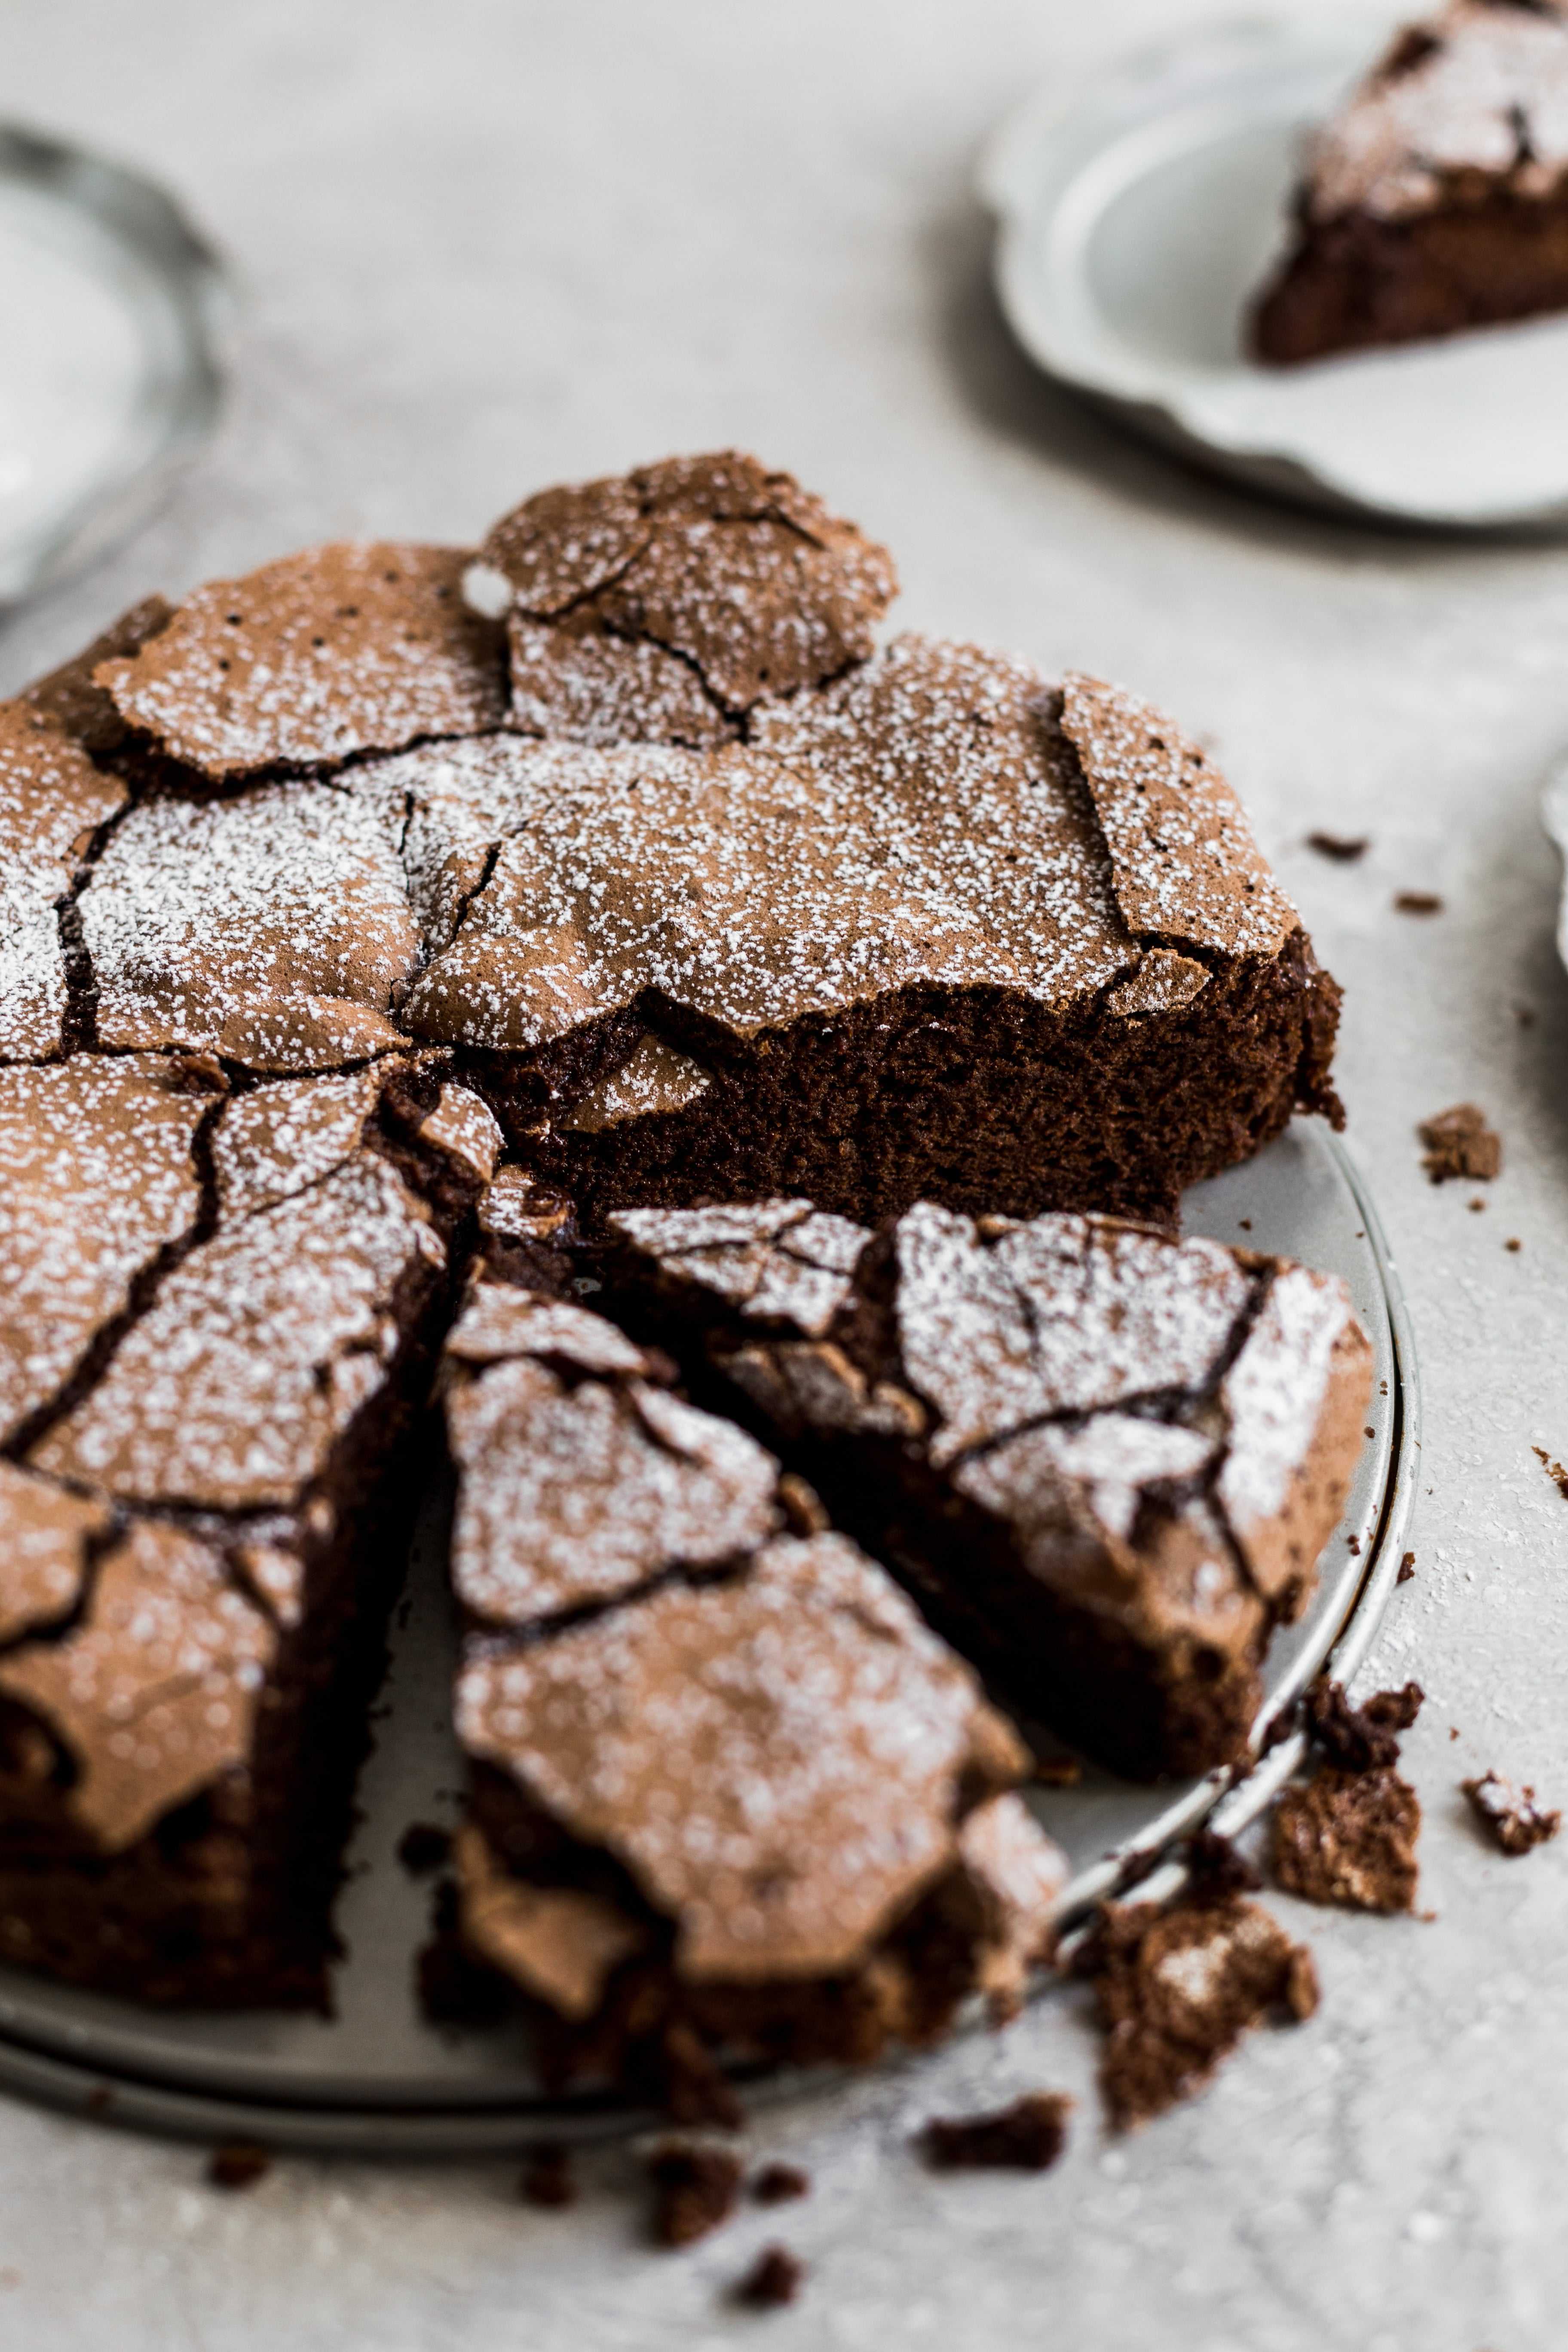
The top of a flourless chocolate cake with 2 slices cut out.

You may have your doubts about how good this cake is- I mean cake without flour? Blasphemy.

But once you make this cake, I BET you will change your mind. The first time I made it I had my doubts too. In pastry school we made our fair share of cakes but never made a flourless cake, so I was skeptical. After I took that first bite though- I hooked! The cake is super fluffy and light and has a rich chocolate flavor. It’s not dense like some other flourless chocolate cakes.

What gives this cake its light and airy texture are the whipped eggs whites that are then folded into the chocolate mixture. They help the cake rise in the oven and then when the cake comes out it sinks slightly to create this crackled chocolate crispy top.

While this may be the only gluten-free cake recipe on my site you can always substitute 1:1 gluten free flour for my 6 inch chocolate cake recipe, chocolate bundt cake, or my one bowl chocolate cake.

Why you’ll love this recipe

  • When you dig into this cake, expect a light, fluffy, and spongey cake. This is not dense at all!
  • You can use either semi sweet or bittersweet chocolate.
  • The cake has a rustic crackled crunchy meringue top when it comes out of the oven.
  • It’s the perfect decadent cake to make for Passover.
  • It can be made dairy free using Earth Balance and dairy free chocolate.
  • It uses simple ingredients and is easy to make!

Ingredients you need

Ingredients for flourless chocolate cake.
  • Unsalted Butter- You’ll melt the butter with the chocolate
  • Semi Sweet Chocolate– You can use either semi sweet or bittersweet chocolate for this. You can even use chocolate chips.
  • Instant coffee– For a deeper flavor. Sub vanilla extract if you dont want to use it. You can also add some espresso powder in more a deeper flavor, try 1/2 tsp.
  • Granulated Sugar– The sugar is mixed with the egg whites to create the meringue that lifts the cake.
  • Eggs– The egg whites and yolks need to be separated. In this case, cold eggs whip better than ones at room temperature.

Type of chocolate

I use 8 ounces of semi sweet chocolate in this recipe. You can either use a baking bar or chocolate chips. I don’t recommend using milk chocolate for this recipe because it would be too sweet. Any dark chocolate or bittersweet is fine too but it wont be as sweet.

The best way to measure out the chocolate is if you have a kitchen scale. If you don’t, the amount you need is about 1 1/3rd cups of chopped chocolate or chocolate chips.

How to make flourless chocolate cake

Prep your pan: This cake is made in a 9″ springform pan. Line it with parchment paper or spray with baking spray. If you don’t have a springform pan don’t worry! You can make this in a 8″ or 9″ round cake pan or even a disposable cake tin! I do prefer to line it with parchment for any tin you use, it makes the clean up a breeze!

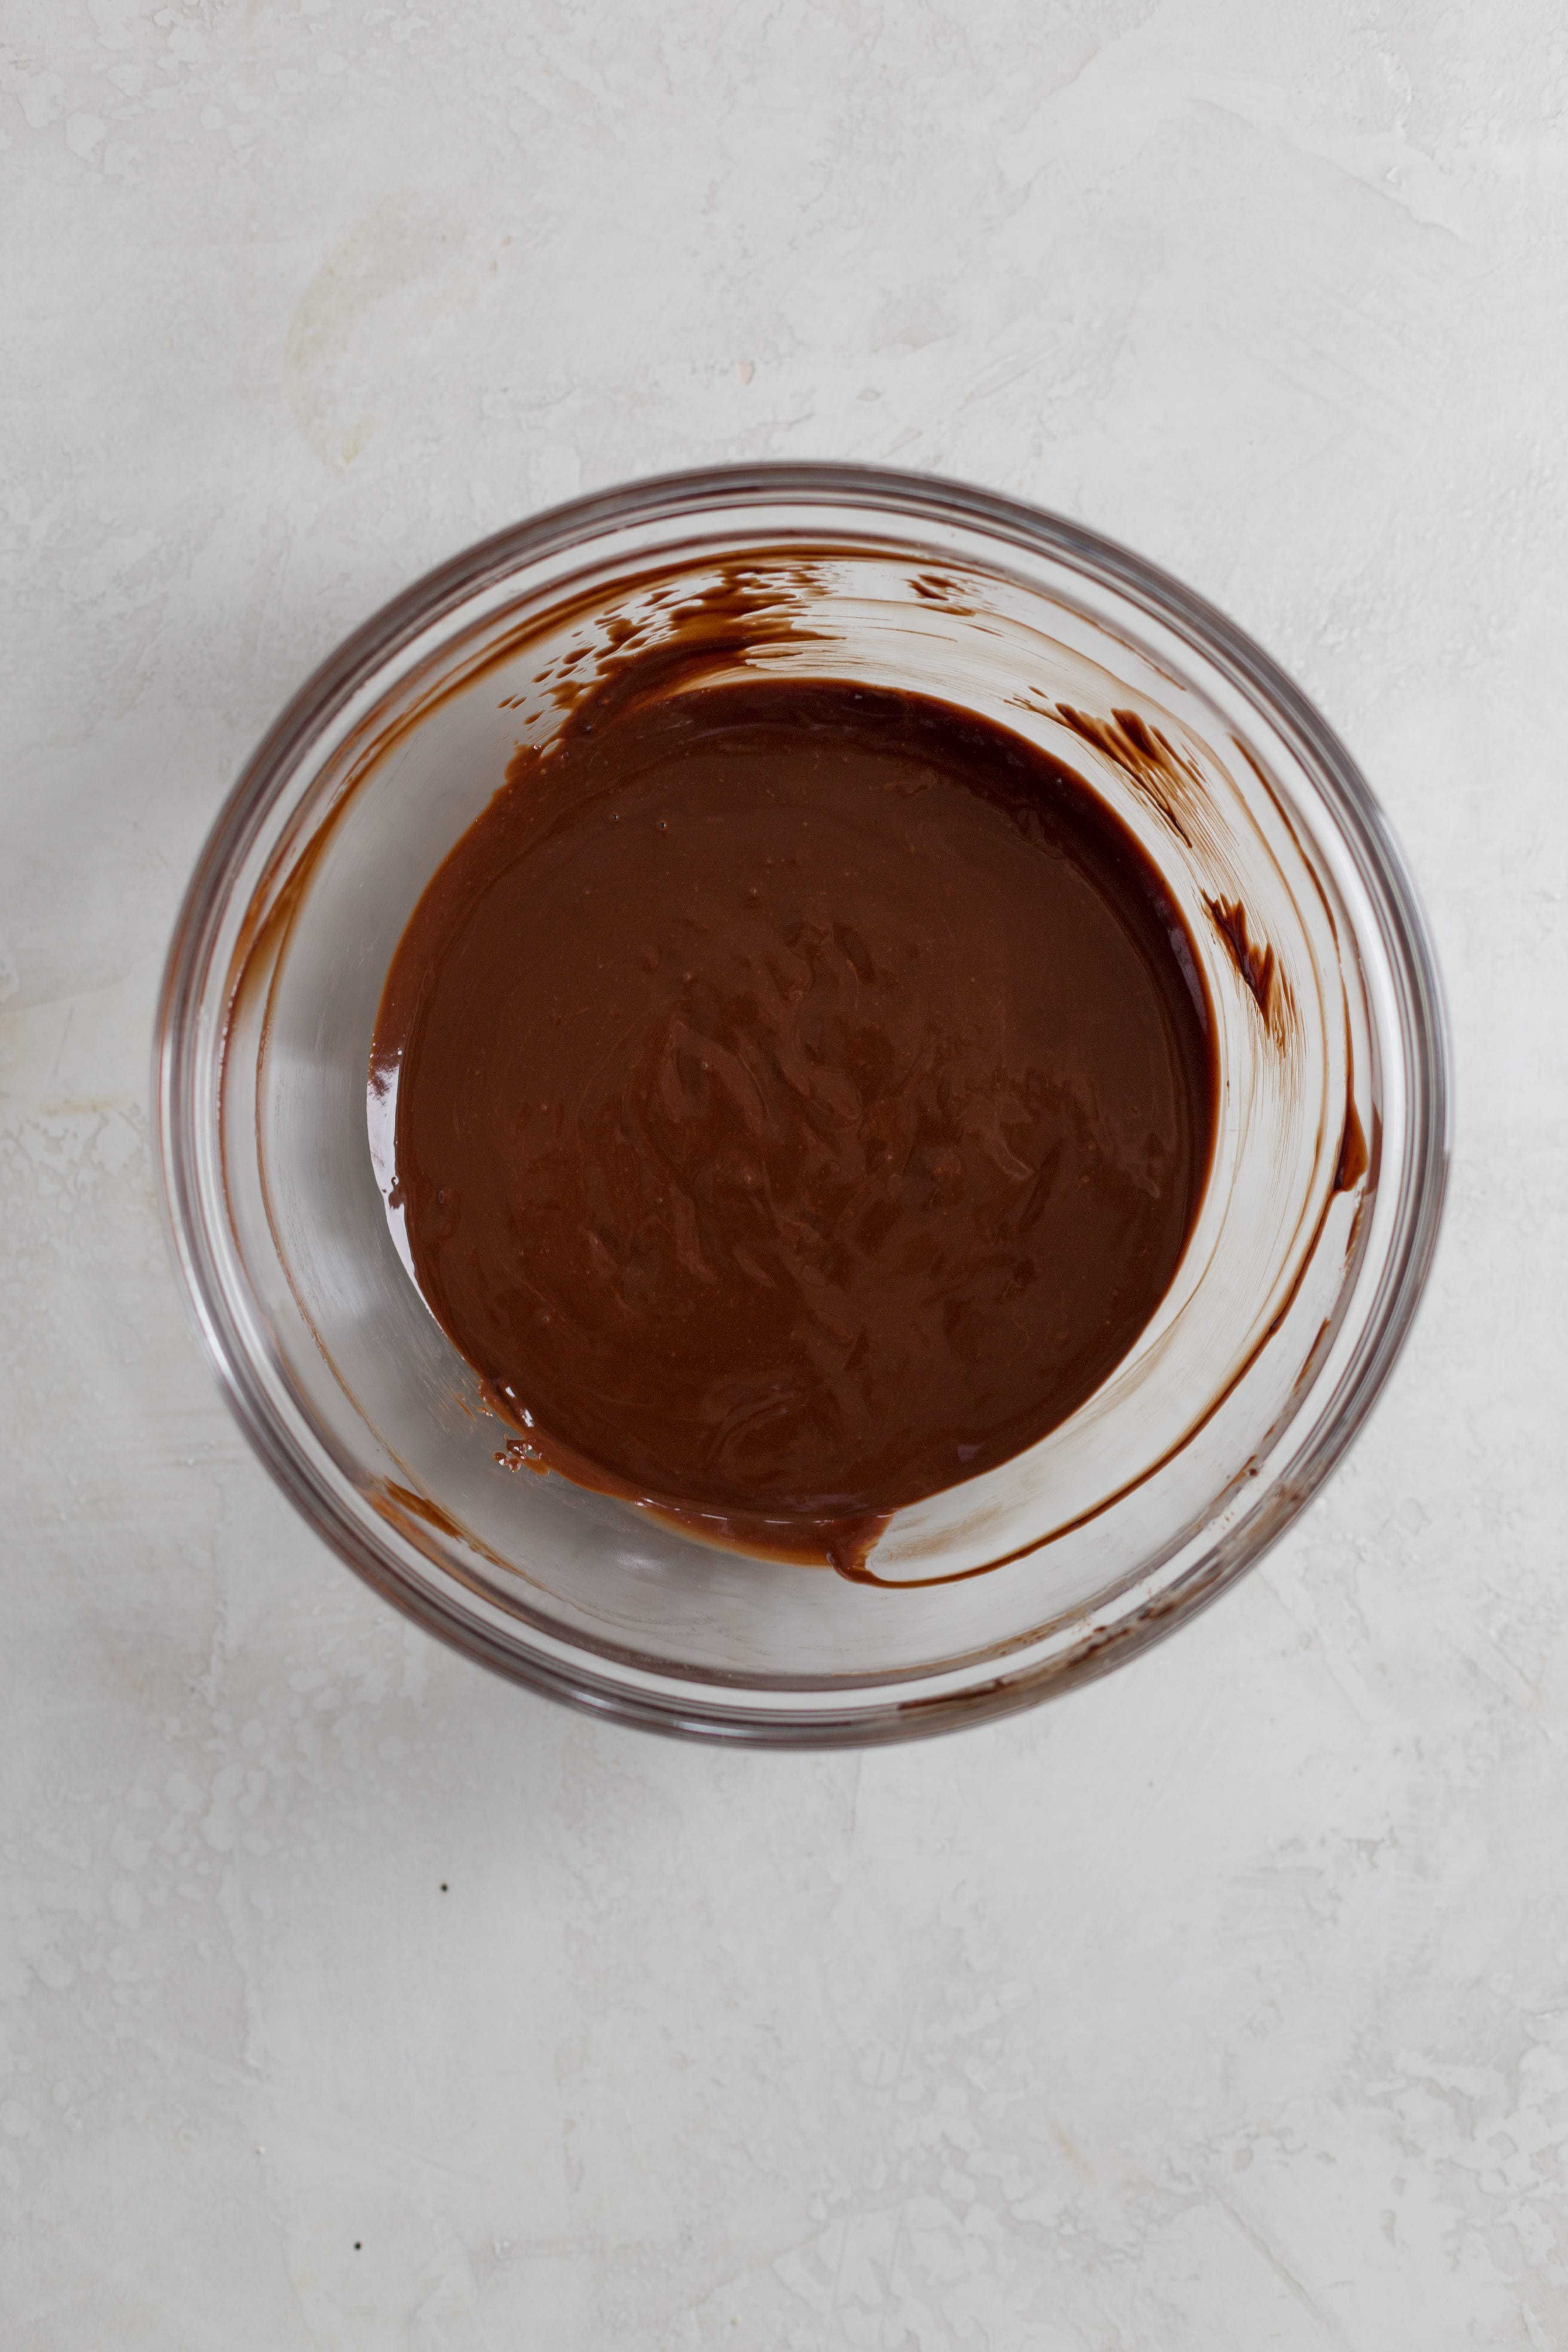
Melt the butter and the chocolate: In a microwave safe large bowl combine the butter and chocolate. Microwave for 30 seconds at a time, stirring in between. Let the chocolate cool for 5 minutes. You can also melt the butter and chocolate over a double boiler.

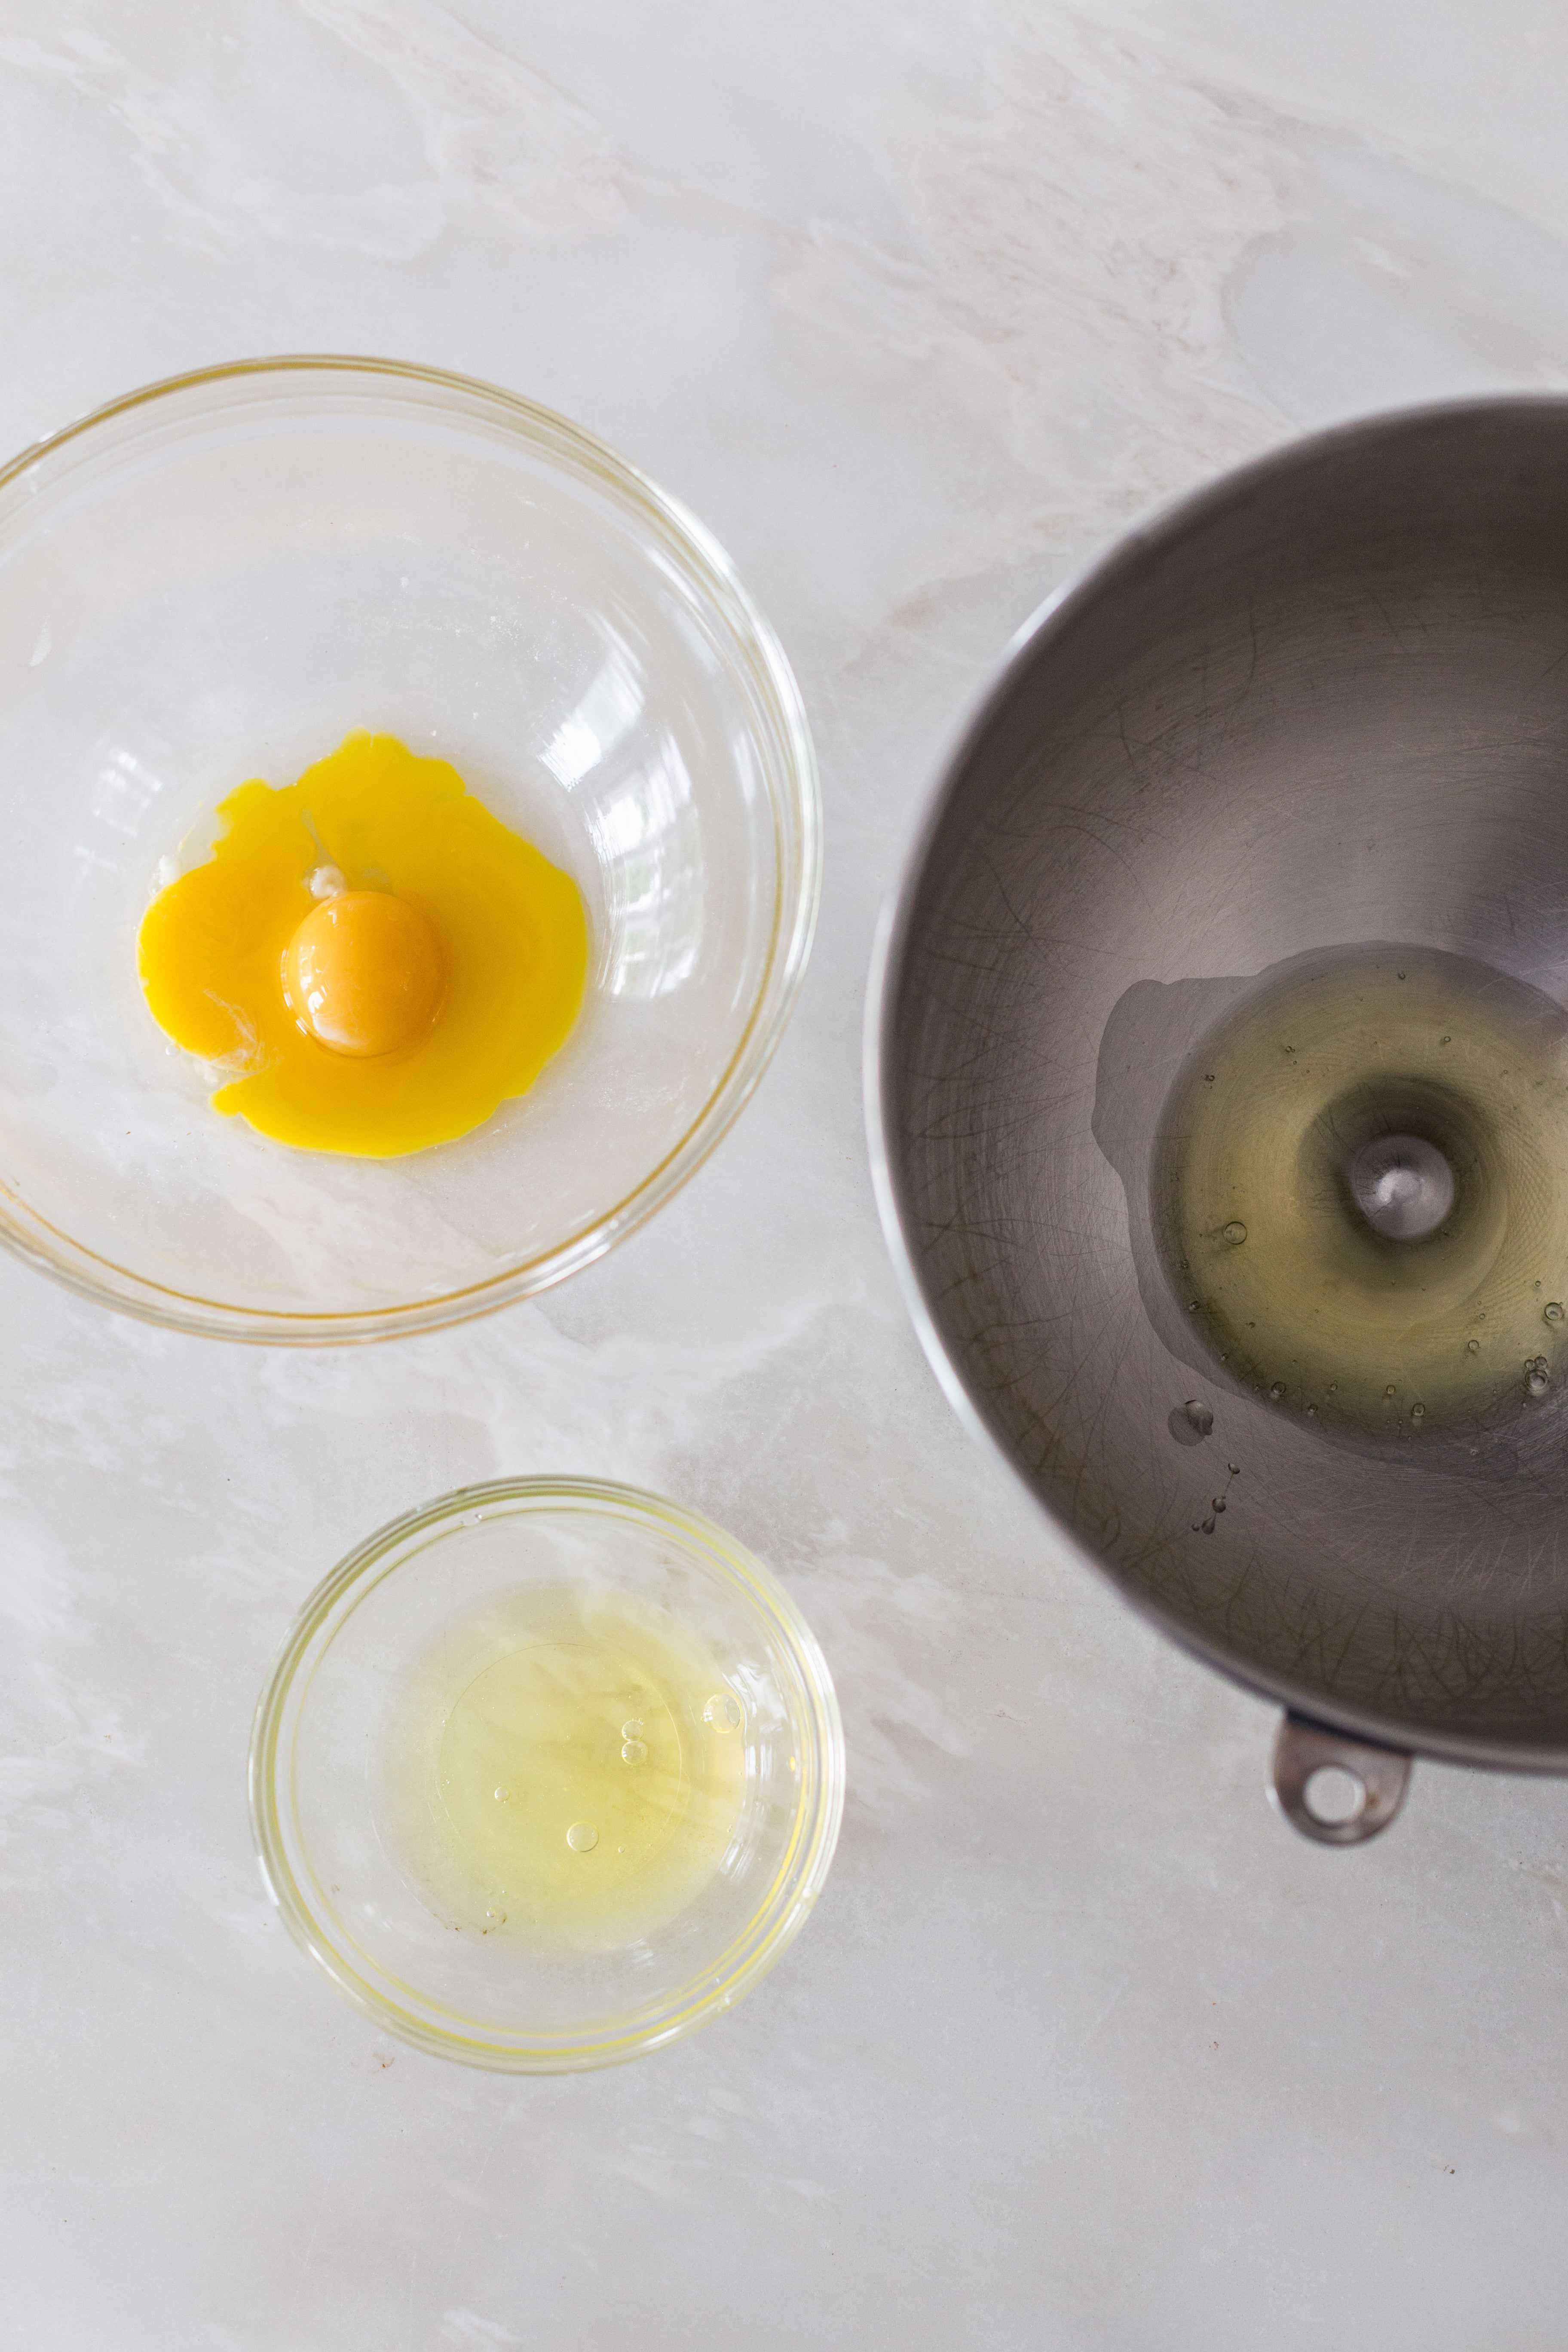
Separate the eggs: Carefully separate the egg yolks from the eggs whites in two small bowls making sure not to get any yolk into the eggs whites. If even the tiniest amount of fat gets into the whites, it will stop the whites from whipping.

Make the chocolate mixture: Add all the egg yolks and tbsp black coffee into the chocolate mixture and stir to combine. I usually use 1/4-1/2 tsp instant coffee with 1 tbsp hot water.

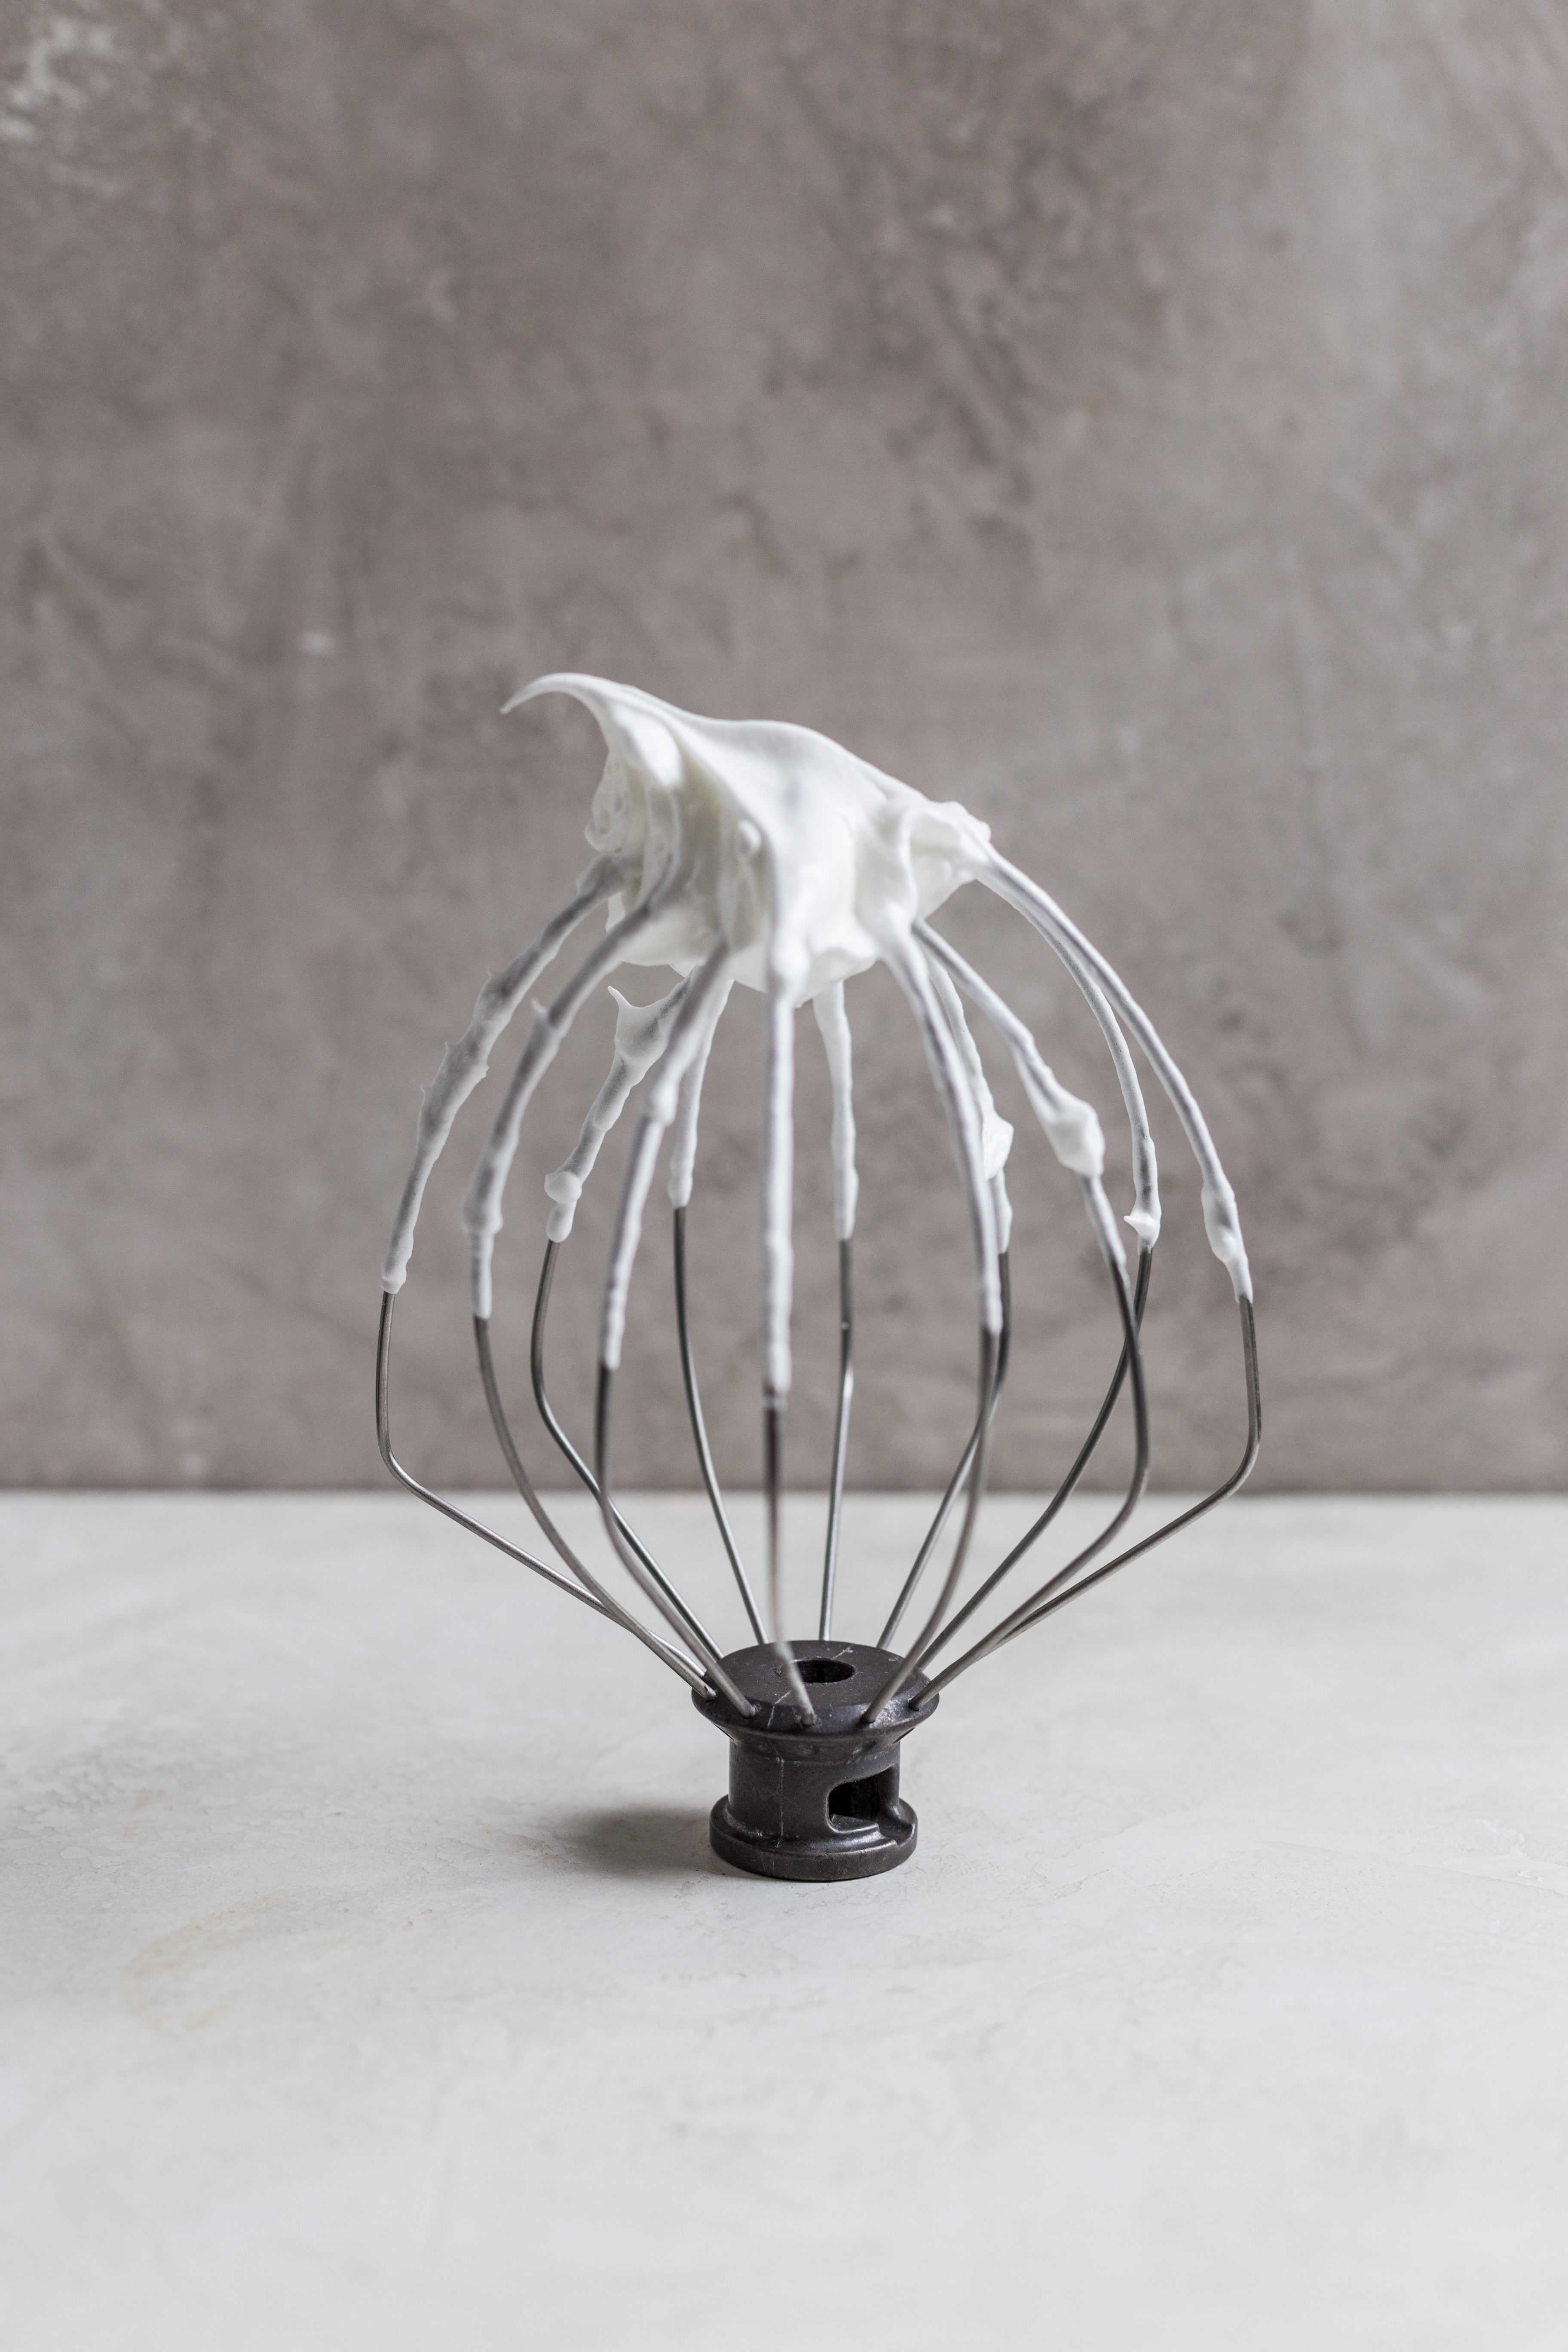
Whip the egg whites: Next whip the whites in an electric mixer ( either a stand or hand mixer) fitted with the whisk attachment on high speed. Slowly add in the sugar around the edges of the bowl. Whip until stiff peaks. Stiff peaks hold their shape and soft peaks will flop all the way over.

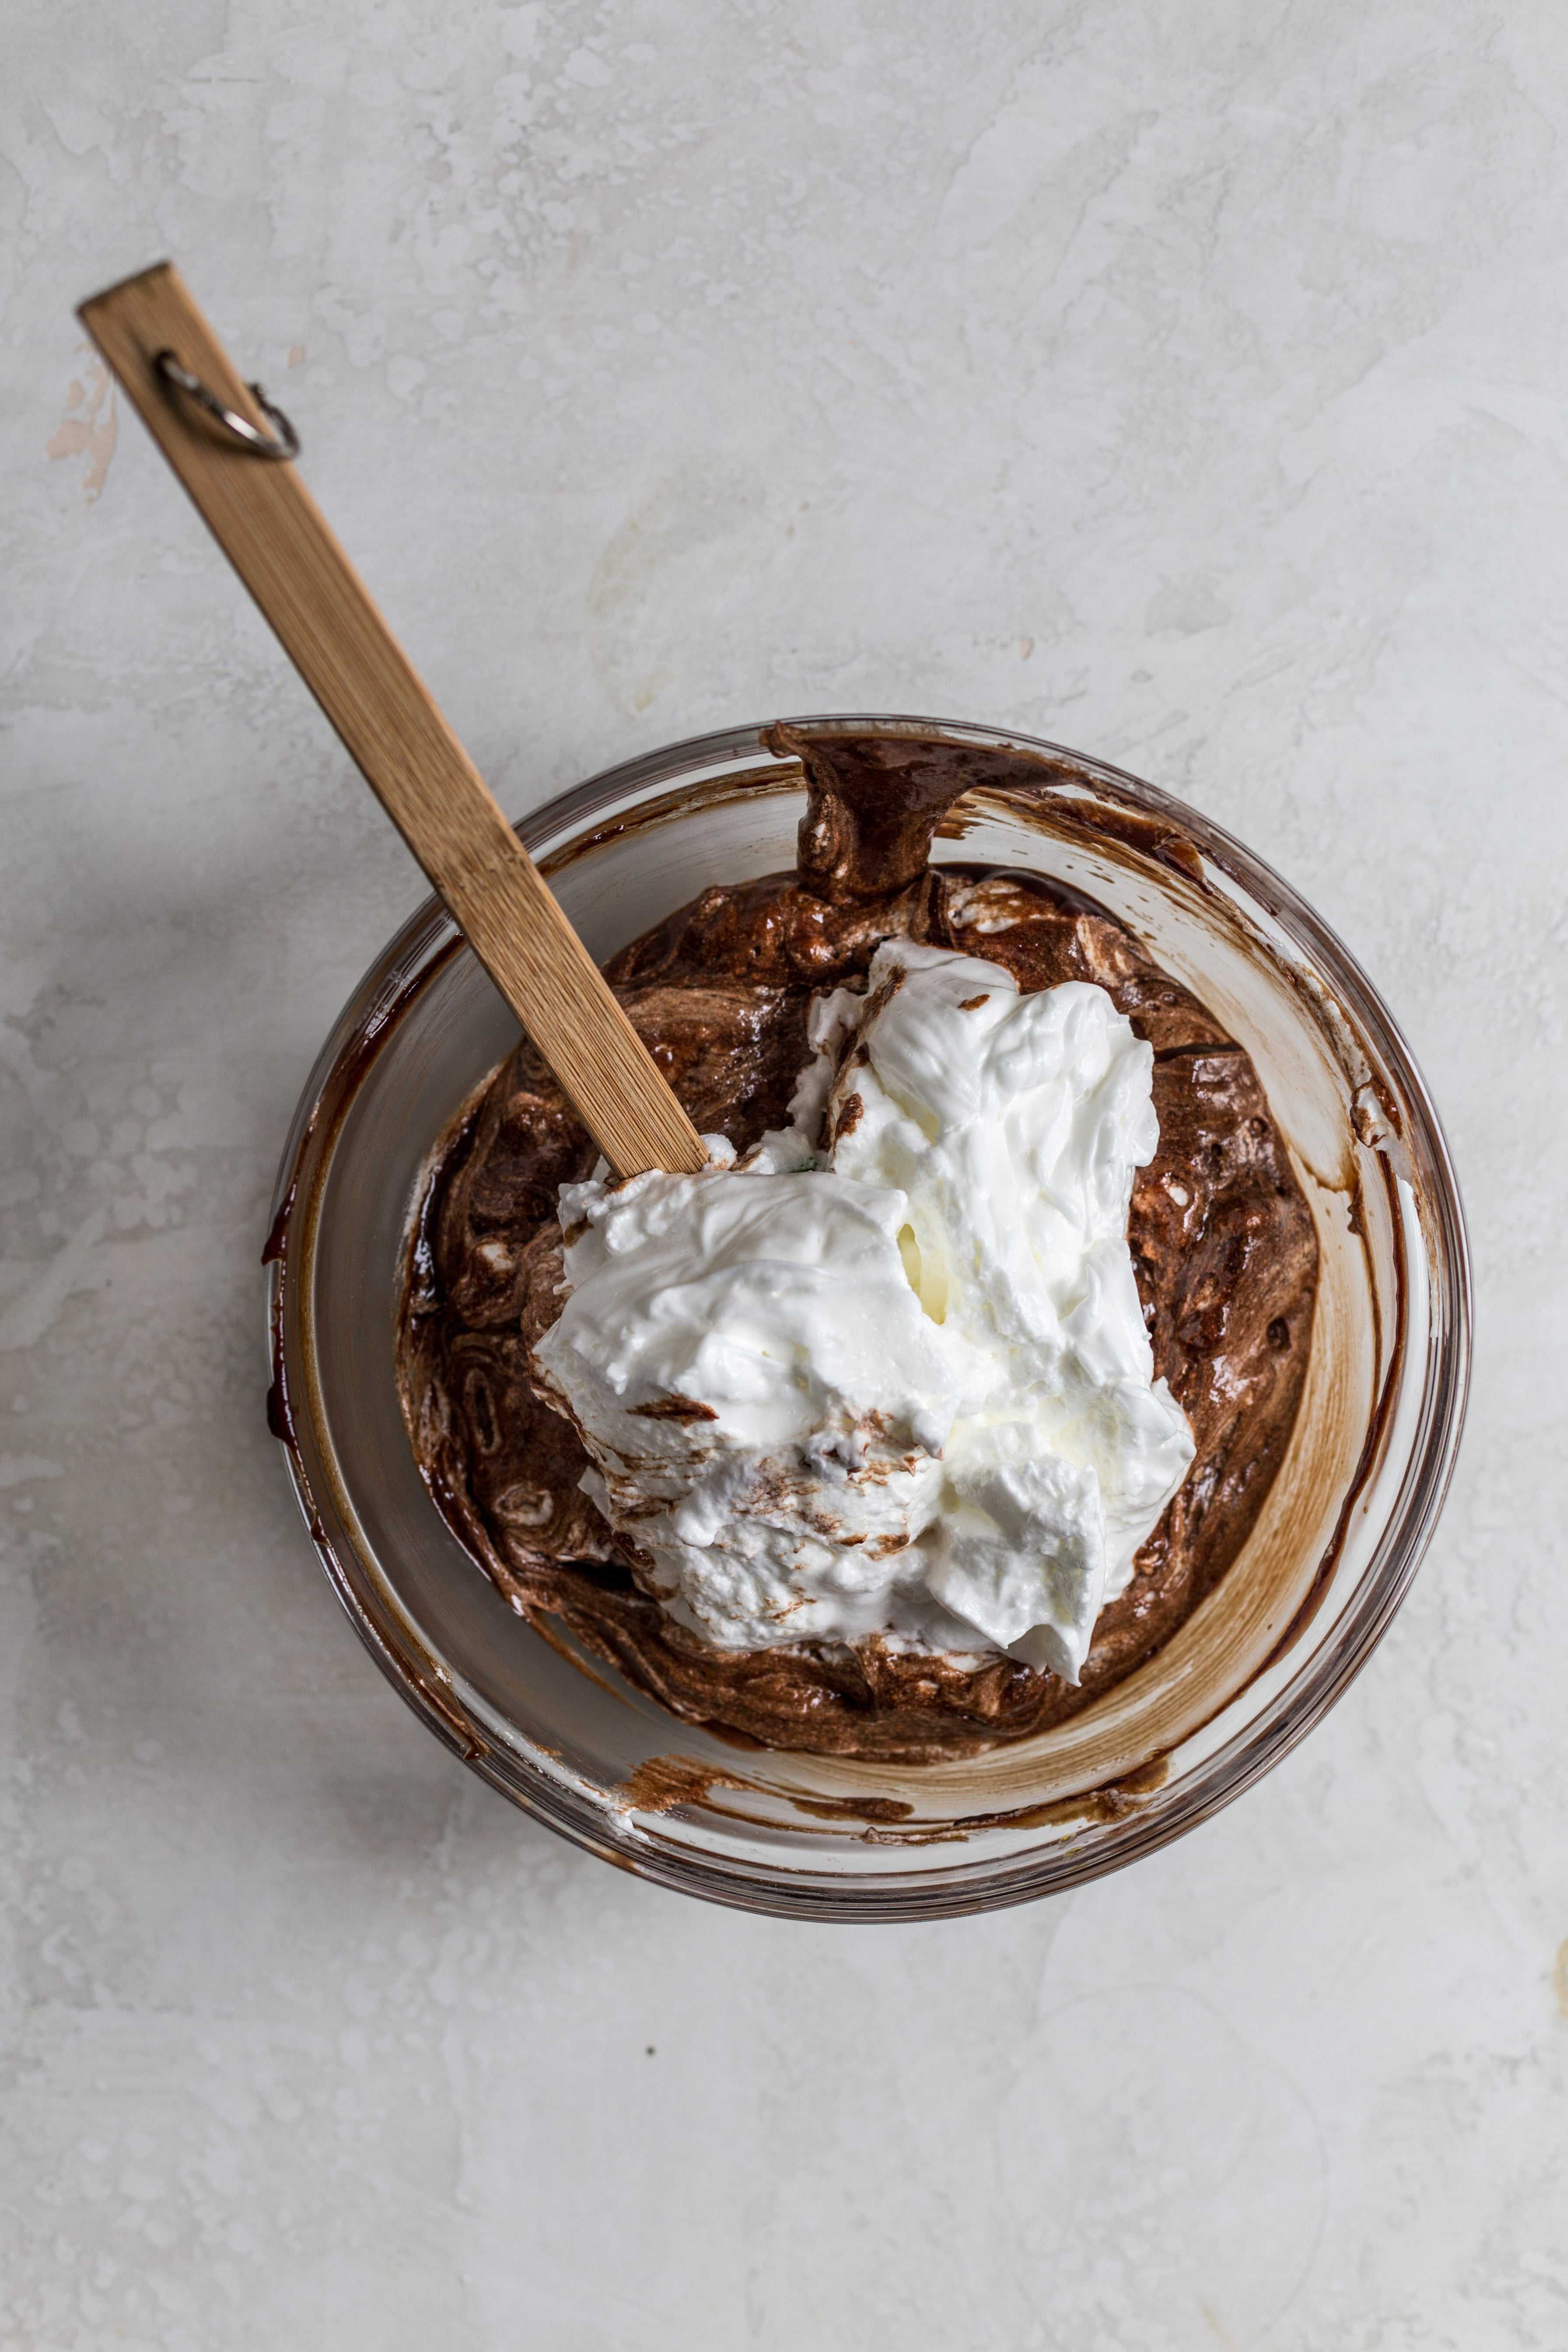
Fold the egg whites: Using a spatula, fold the egg whites into the chocolate mixture 1/3rd at a time. Gently fold until there are no white streaks before adding more. Make sure to scrape the bottom of the bowl to get all the chocolate.

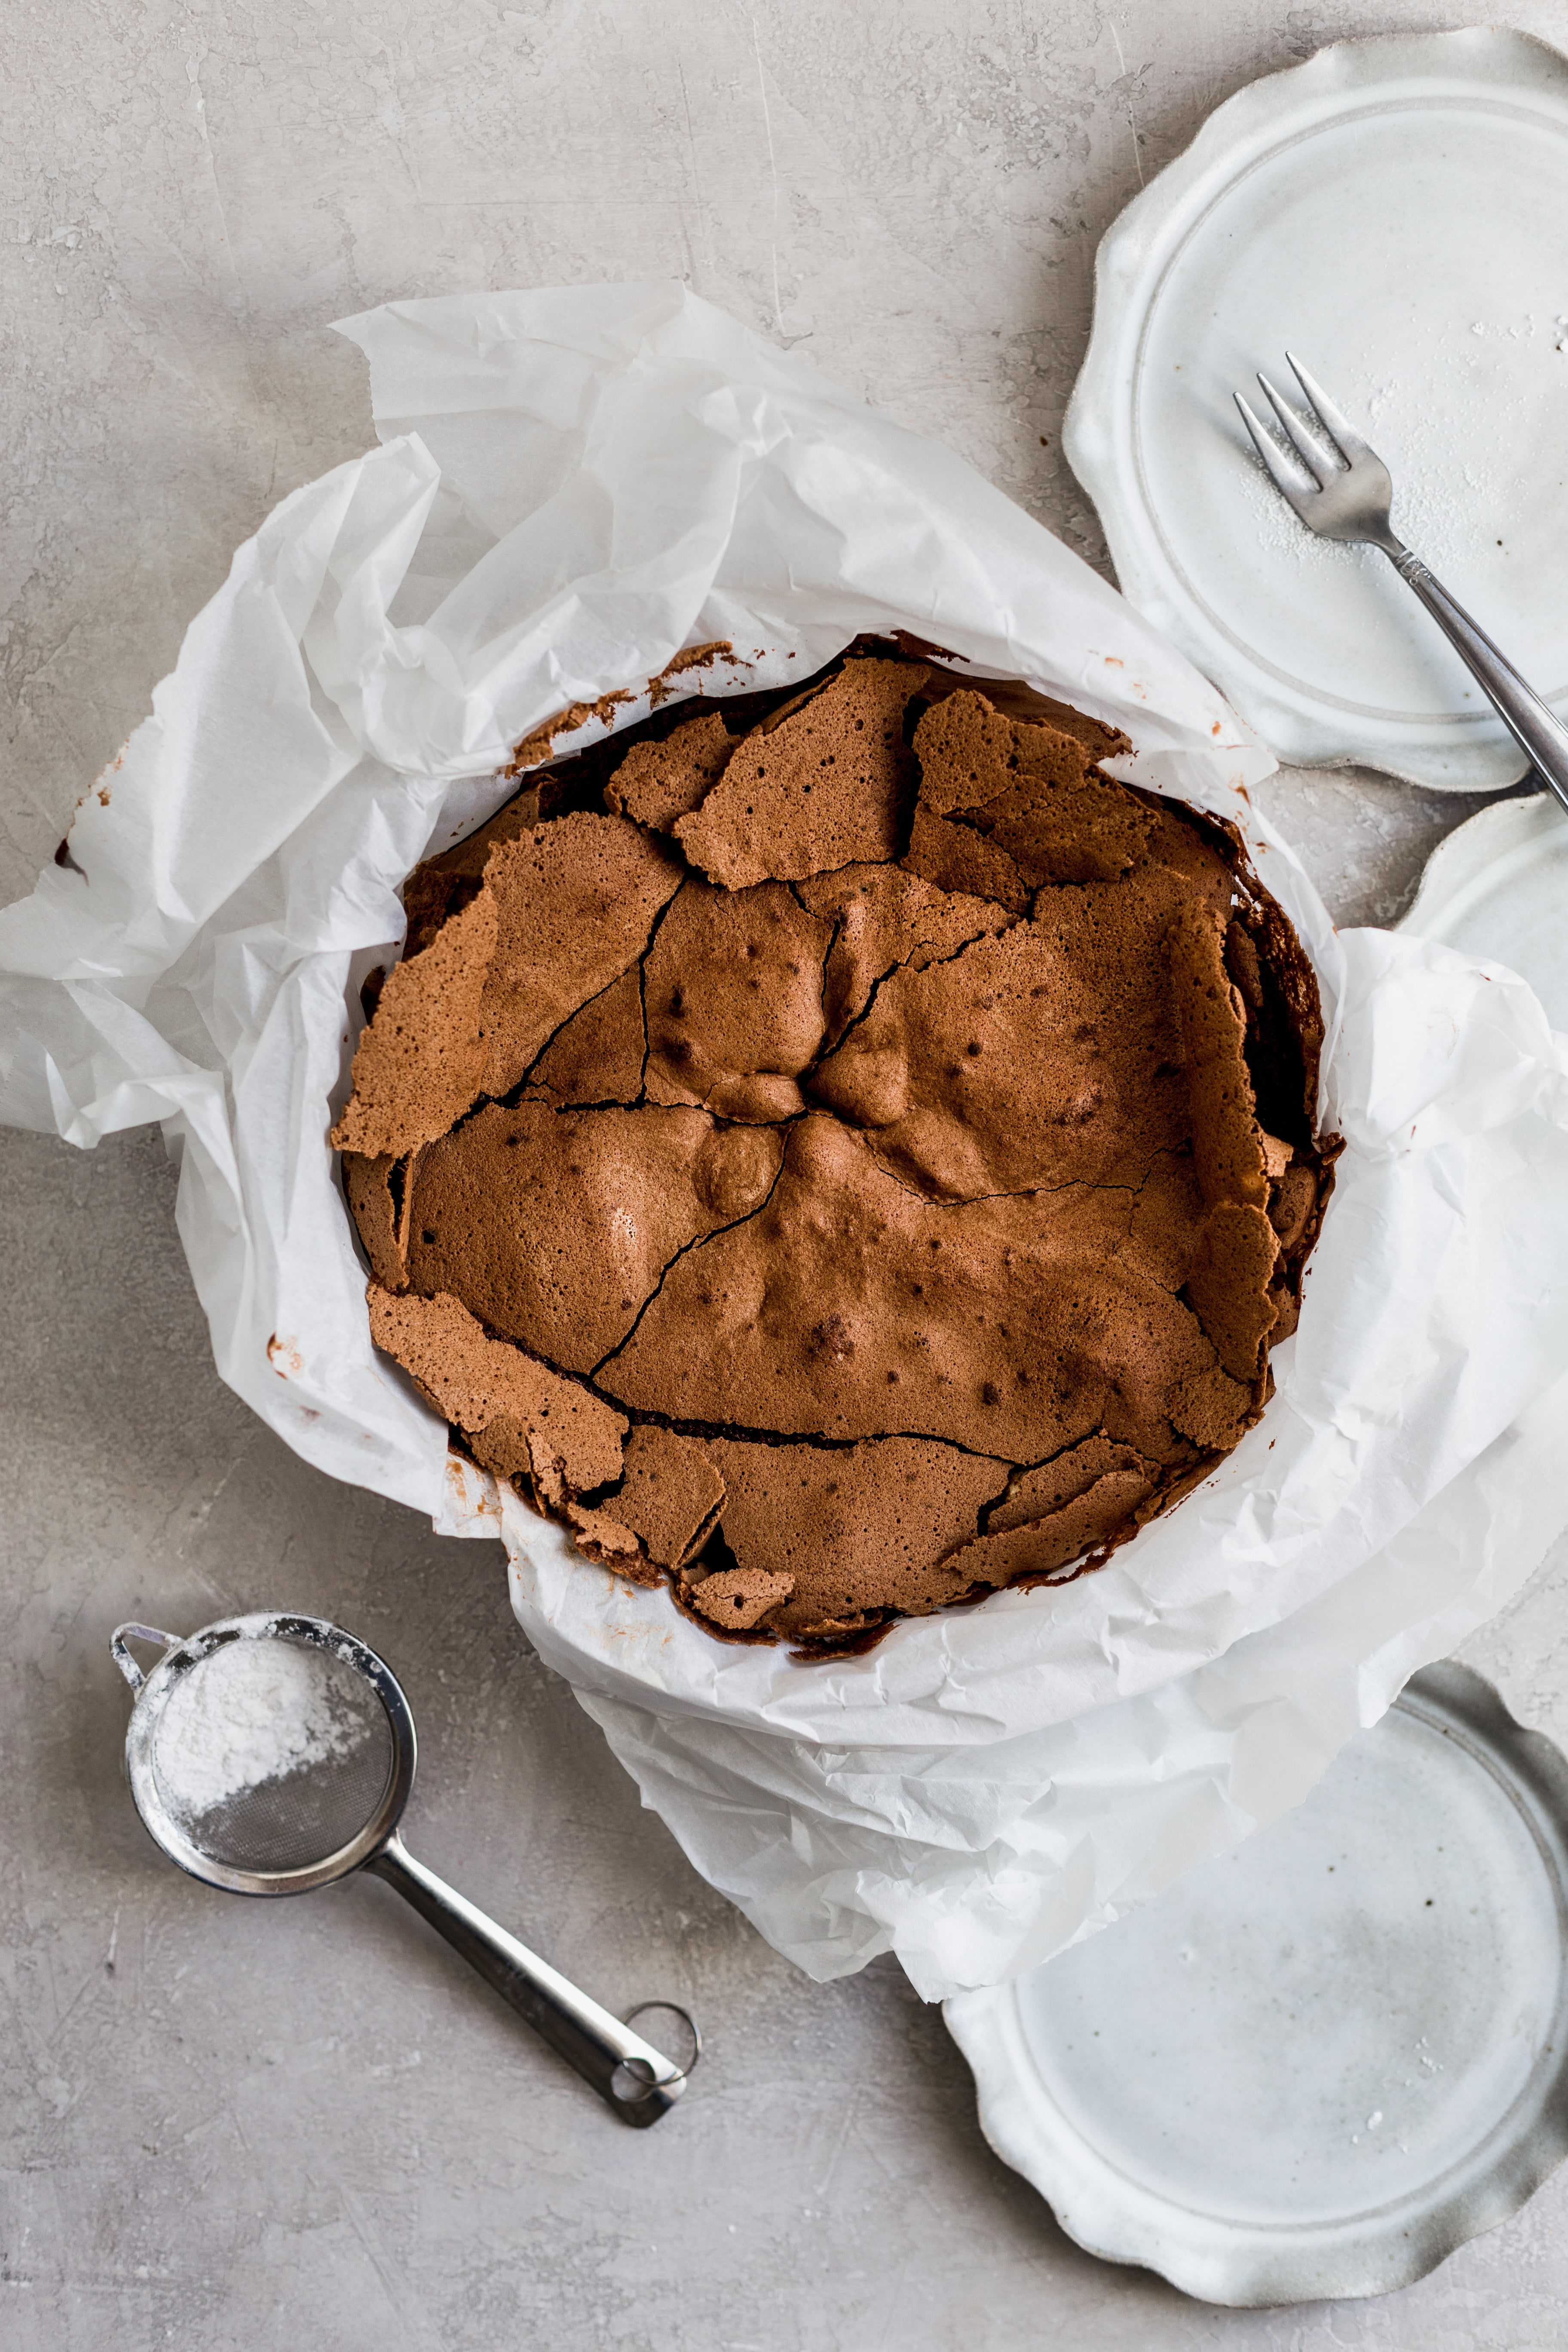
Bake the cake: Pour batter into the prepared pan and bake for 45-50 minutes. The cake is done when the sides start to pull away from the pan and the top looks a little crackled. It will deflate once you take it out of the oven and will create beautiful cracks. The center of the cake might still be a little jiggly and thats ok!

A glass bowl filled with melted chocolate
Melt the butter and chocolate.
A mixing bowl with one egg white in it next to a small glass bowl with about egg white in it next to another glass bowl with egg yolks
Separate the egg whites.
A beater standing up with stiff peal egg white on the end
Whip until stiff peaks like this.
Whipped egg whited on top of chocolate batter in a glass bowl with a spatula sticking out
Fold the egg whites into the chocolate.
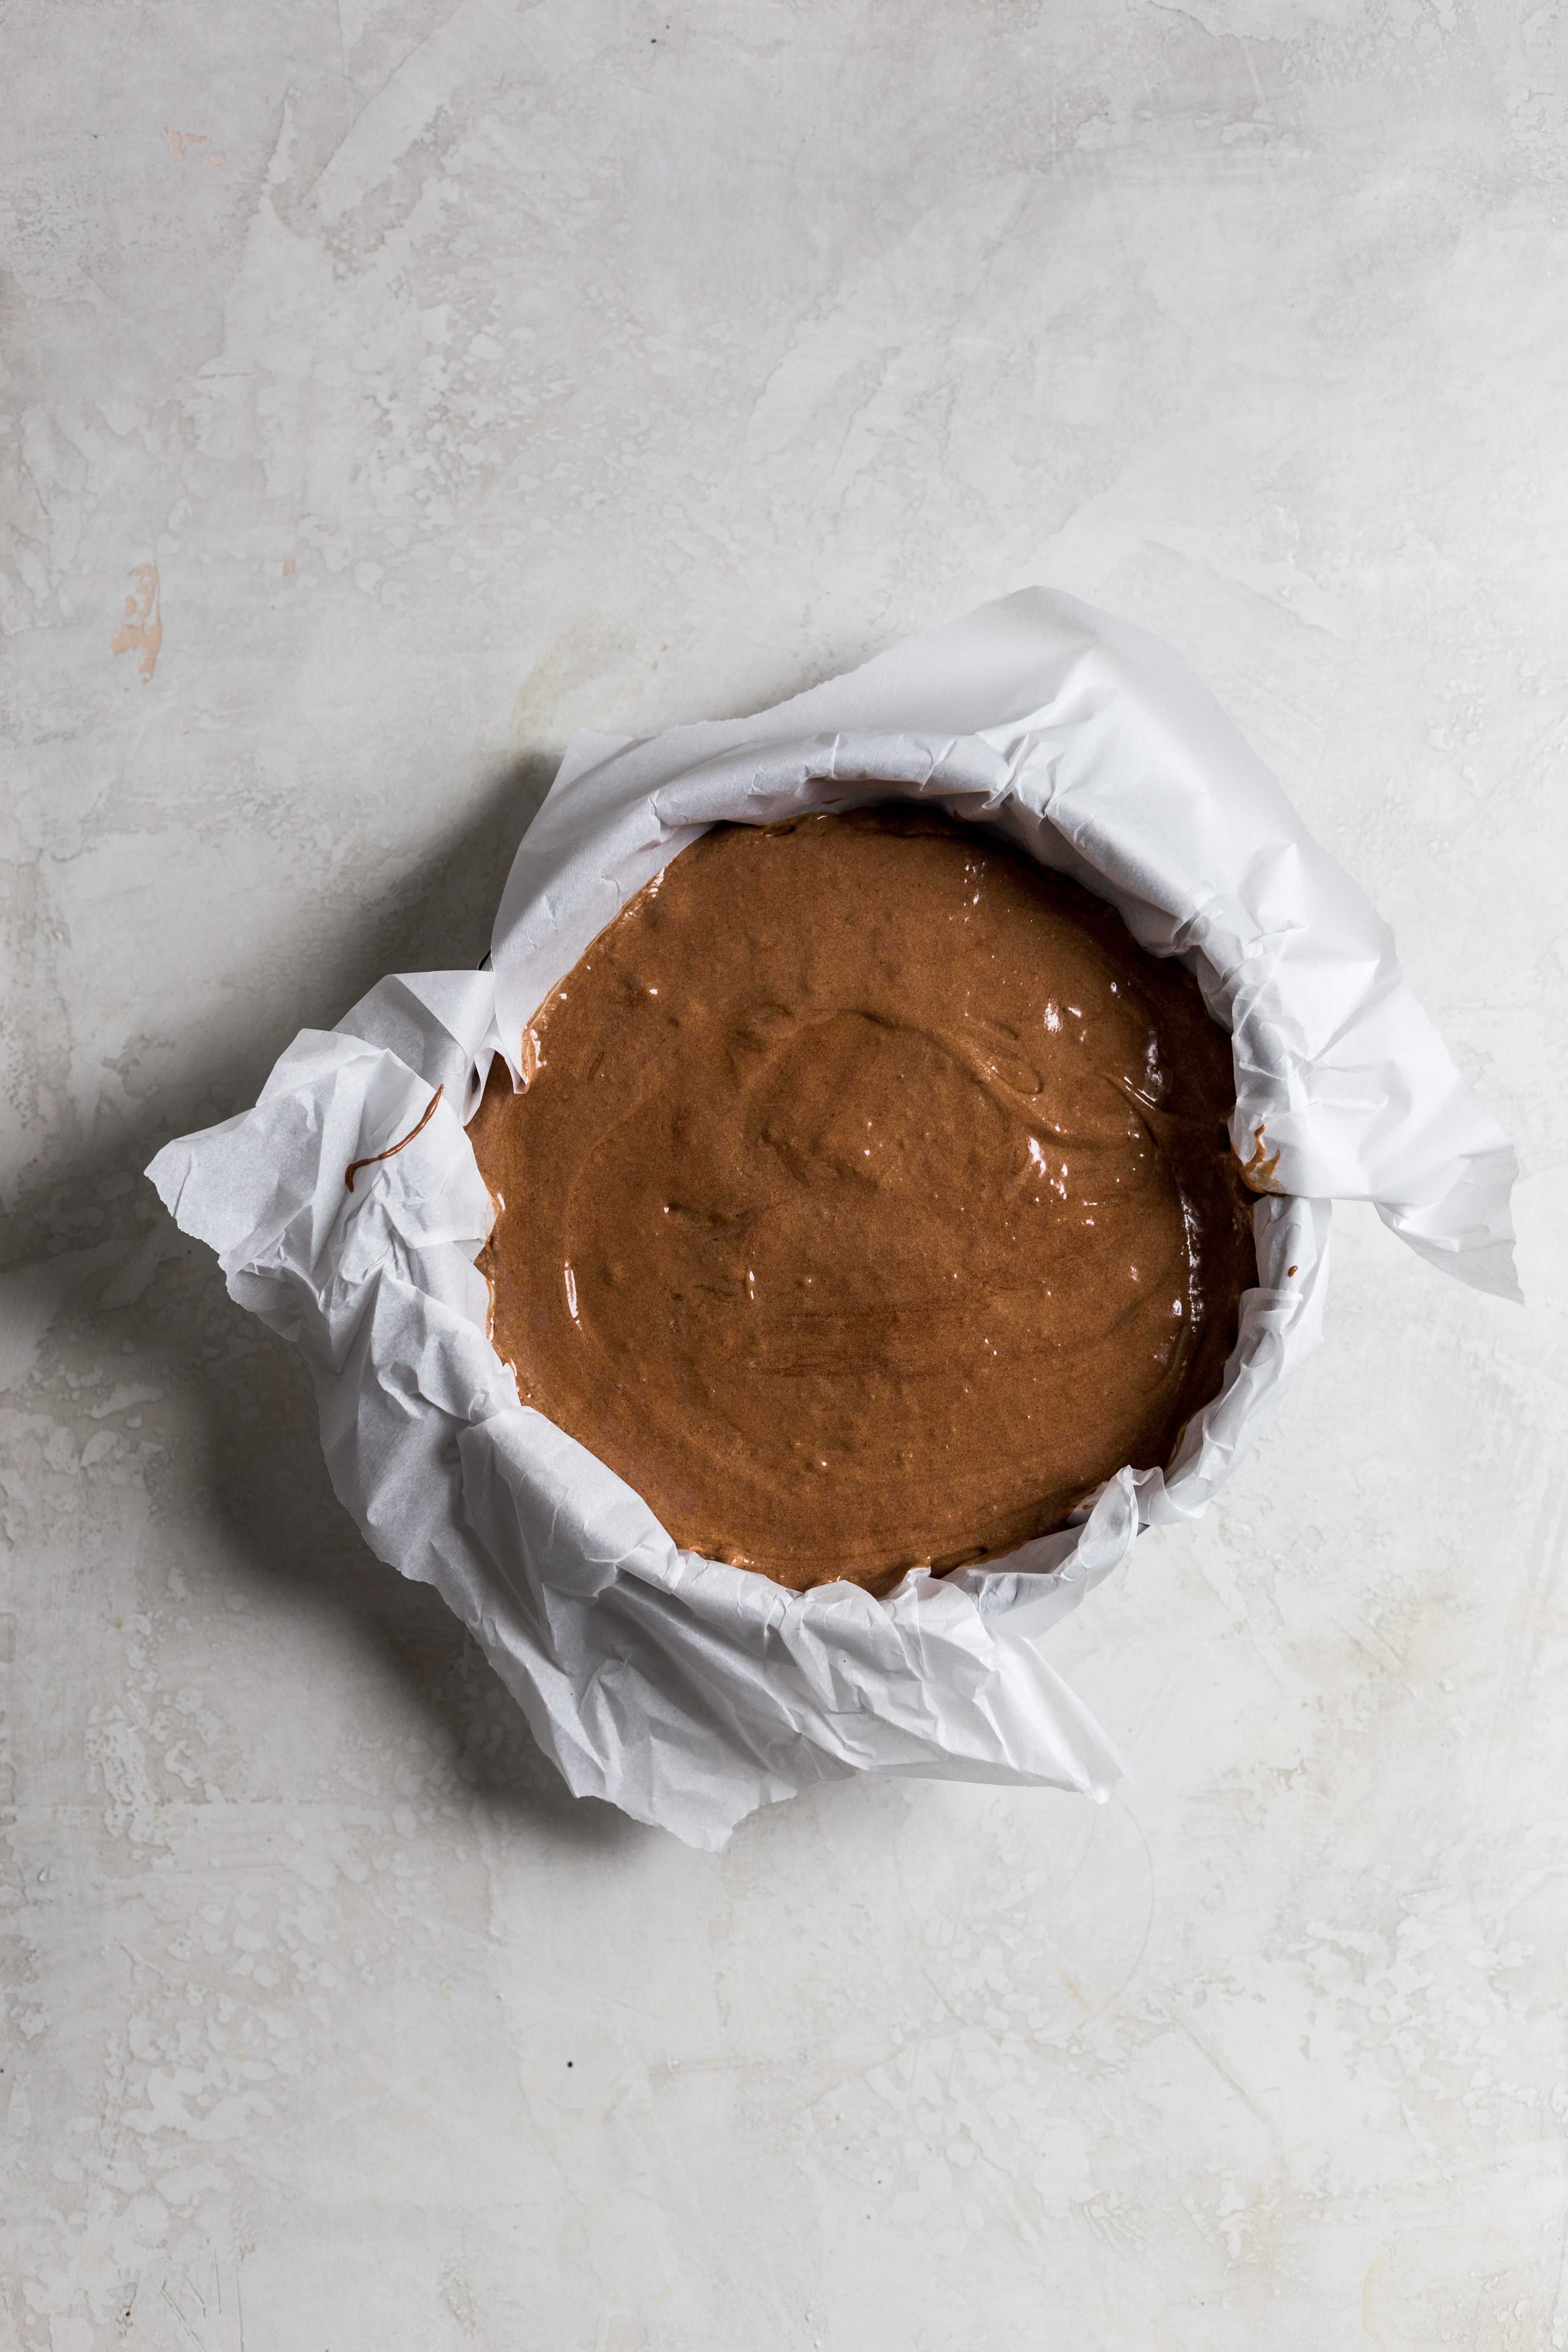
Chocolate cake batter in a parchment paper lined spring form pan
Bake the cake.
The cracked top of a chocolate cake in a springform pan lined with parchment paper.
Crackled tops on a cake.

Tips on separating eggs:

  • Be really careful when separating the egg yolks from the whites. The whites will not whip if even the smallest amount of yolk gets into the white. If it does, you will have to start over again.
  • You will need 3 bowls. 1 is your mixing bowl and 2 are small bowls.
  • Crack the egg, and pour it into your hand. Let the white drip from your fingers into one small bowl. Place the yolk into the other small bowl.
  • Pour the white into the mixing bowl and then repeat the process one at a time. Pour the egg white into the mixing bowl only after ensuring that no small yolk parts got mixed in.
  • This ensures that if you get a small amount of yolk into one of your whites, you wont ruin the rest of the egg whites you already cracked!
  • You can also crack the egg and separate the yolk from the white by pouring it back and forth between the cracked egg shells but this give you more of a chance of piercing the yolk and it running loose.

Tips on whipping egg whites

  • When whipping the egg whites don’t dump all the sugar in at once, it will be too heavy for the whites to whip up all that sugar at one time. Instead slowly add the sugar over 1-2 minutes.
  • Whip until stiff peaks form about 2-3 minutes. A stiff peak is when you take the whip off the mixer and turn it upside down and the egg white stands up stiffly without drooping all the way down. Check the picture above for what you want it to look it!

How to fold egg whites

  1. Always fold egg whites into the rest of your batter no matter what you are baking. Never the other way around or they will deflate.
  2. The whole point of whipping egg whites is to create lightness and lift in your cakes. This is what takes the place of the flour. If they deflate, the cake wont rise as high.
  3. Using a spatula, take some egg whites and dump it on top of the chocolate mixture. Lightly dip the spatula into the middle of the batter and then go around the bowl folding and turning the spatula as you go. Not stirring.
  4. Keep doing the same motion- starting from the middle, bringing the spatula toward you. Then folding to the outer edges of the bowl until most of the white streaks are gone.
  5. Continue this process until all the whites are folded in. The batter should be uniform in color and thick.

Yield

This recipe feeds 10-12 people. Definitely make 2 if you want leftovers!

Serving the cake

Serve this cake with a dusting of confectioners’ sugar. Use a small sifter to sift the sugar all over the top of the cake. Either serve it in the pan with the parchment paper, or lift it out carefully and serve on a cake plate.


You can also top the cake with whipped cream and fresh berries or some vanilla ice cream!
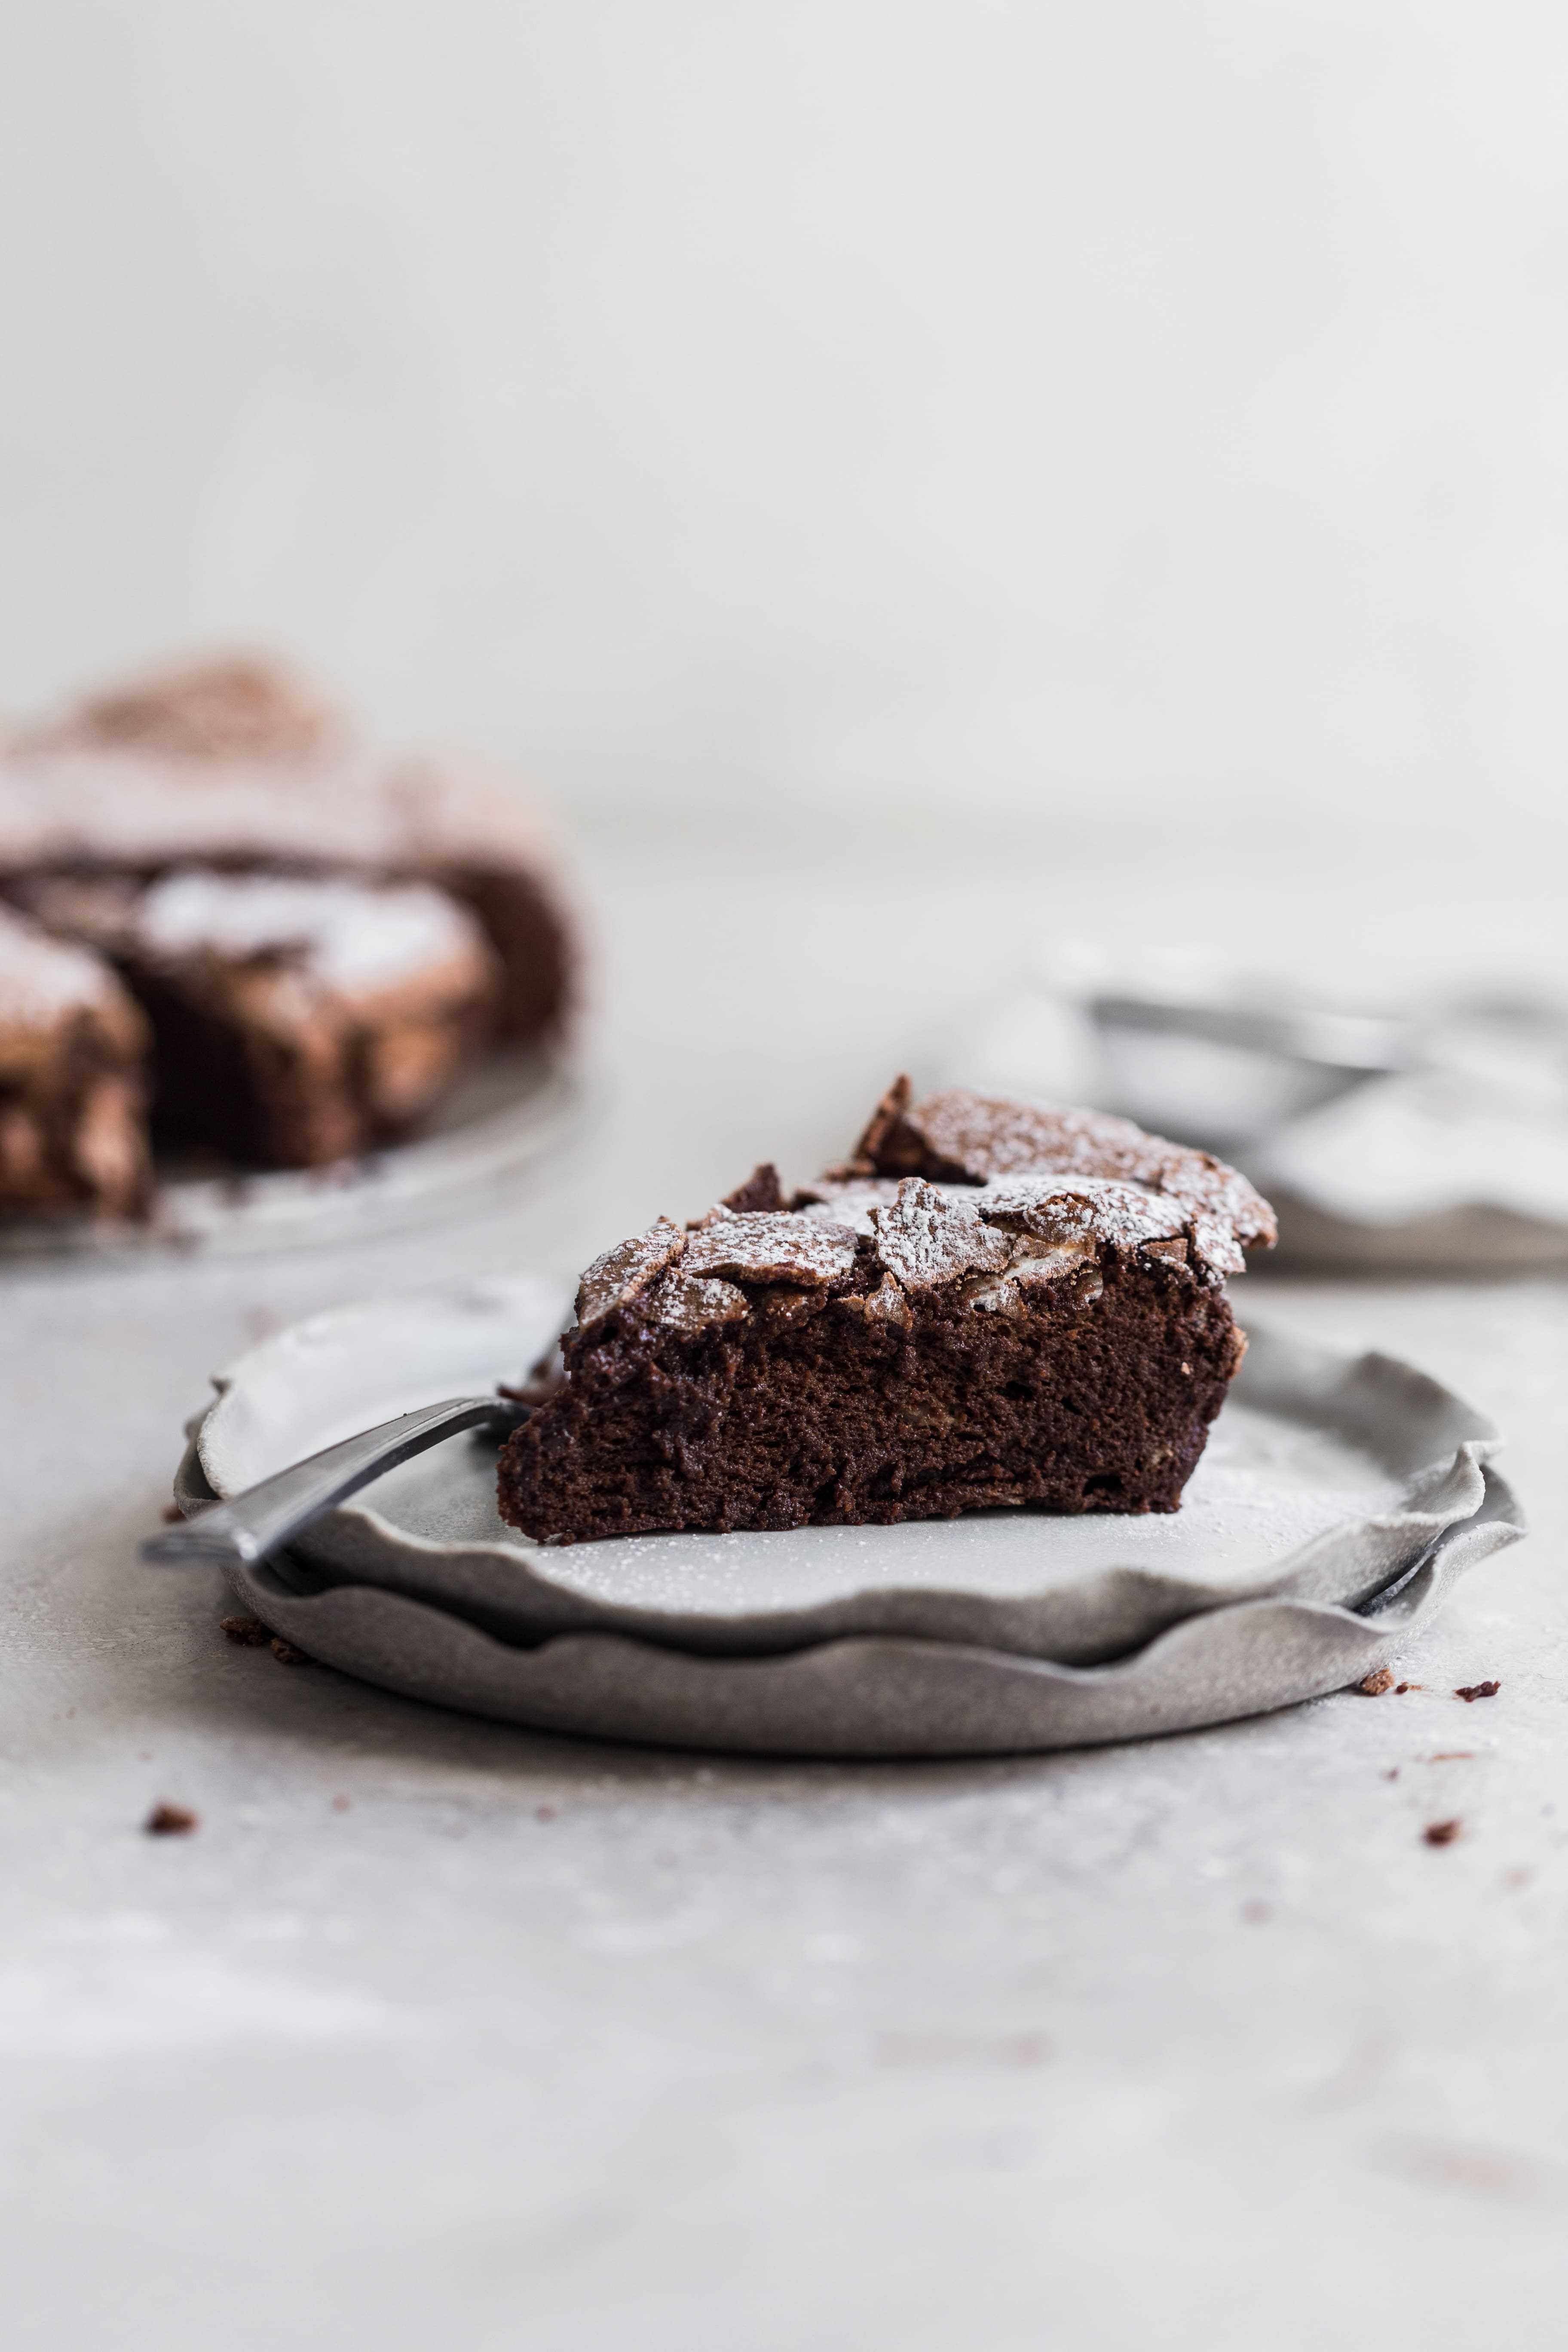
A straight on photo on a slice of chocolate cake sitting on gray plates that have ruffled edges

Storing and freezing

Storing– To store this cake, cover it lightly with plastic wrap and leave it on your countertop. Do not store this in an airtight container.

Do not cover the cake completely. If you cover it completely (like in a cake dome) then the crunchy meringue tops (totes my favorite part) will melt into the cake. To keep the crunchy top, make sure you leave a little spot open when you cover it in plastic wrap that lets a little bit of air in.

Don’t worry about the cake drying out. Because there is no flour it won’t get stale! Also just so you know, this does not need to be refrigerated.

Freezing– I do not recommend freezing this cake, the texture will not be the same as when it is made fresh.

Recipe tips

  • Use a pyrex 8″ bowl to melt the chocolate and butter. The reason I specify the size is because you will be adding in the whipped egg whites into this bowl and I have noticed that my whites tend to deflate less when I use a smaller size bowl rather than a larger one.
  • Make sure the bowl you are using to melt the butter and chocolate is completely dry before you add the chocolate to it, otherwise the chocolate may seize up!
  • To make the brewed coffee use 1/2 teaspoon of instant coffee and top it with 1 tablespoon hot or boiling water. I usually just eyeball this!
  • You can leave out the coffee and substitute it with 1 tbsp vanilla extract.
  • Make sure to read the tips on how to separate, whip, and fold the egg whites for recipe success!
  • Do not over bake, otherwise the cake wont be as light as it should be.

Recipe FAQ

Why do I need to fold the egg whites? Folding the egg whites ensures that the cake stays light and airy and not dense like other cakes.

Why doesn’t my cake have the cracked top? You may have over whipped or under whipped your egg whites, or you deflated them when you folded them into the batter. It could also be because the cake is over baked.

What makes this cake light and fluffy? It’s from the whipping of the egg whites into a meringue that creates a light and fluffy structure to the cake.

Can I double the recipe? I don’t recommend it because the egg whites might not be able to lift a heavier batter. Rather I would say make two.

More decadent chocolate cake recipes:

  • A chocolate coffee cake with a slice cut out on a wooden cake stand.
    Moist and Rich Chocolate Coffee Cake
  • A closeup of a slice of banana chocolate chip snack cake.
    Easy and Moist Banana Chocolate Chip Cake
  • Two slices of chocolate loaf cake on a white plate.
    Moist and Easy Chocolate Loaf Cake
  • A one bowl chocolate cake with chocolate buttercream and sprinkles sheet cake on a gray background.
    The Best Fluffy One Bowl Chocolate Cake
FeedFeed
The top of a flourless chocolate cake with 2 slices cut out.

Light and Fluffy Flourless Chocolate Cake

This flourless chocolate cake recipe has only 5 ingredients! It is super light and airy and not dense like other recipes. Even without the flour, this easy cake is still fluffy, spongey, and delicious-it's almost like magic! You will love this gluten free cake!
4.11 from 29 votes
Print Pin SaveSaved! Rate
Course: Cake, Cakes, Dessert
Cuisine: American
Diet: Kosher
Keyword: flourless chocolate cake, gluten free chocolate cake, kosher for passover chocholate cake, light and fluffy flourless chocolate cake, light flourless chocolate cake, the best gluten free chocolate cake
Prep Time: 15 minutes
Cook Time: 55 minutes
Total Time: 1 hour 10 minutes
Servings: 12 People
Calories: 238kcal
Author: Sam Adler

Equipment

  • Stand mixer
  • pyrex bowl

Ingredients

  • 1/2 cup unsalted butter or margarine
  • 8 oz semi sweet chocolate or chocolate chips About 1 1/3rd cups
  • 1 tbsp brewed instant coffee Sub vanilla extract
  • 6 large eggs separated
  • 1/2 cup granulated sugar

Instructions

  • Preheat the oven to 300° F and line a 9” springform pan with parchment paper.
  • Melt the chocolate and butter together in a microwave safe bowl- preferably an 8’’ bowl- for 30 seconds at a time, mixing in between until the chocolate is completely melted. Cool. Prepare the tablespoon of instant coffee with hot water. Pour it into the chocolate and mix.
    A glass bowl filled with melted chocolate
  • Separate the eggs by adding the whites into the mixing bowl of a stand or hand mixer, and the yolks into the chocolate mixture. Mix the chocolate mixture with a spatula until combined.
    A mixing bowl with one egg white in it next to a small glass bowl with about egg white in it next to another glass bowl with egg yolks
  • Using the whisk attachment whip the egg whites on high speed, pouring in the sugar slowly while whipping. Continue whipping until stiff peaks form. You know the whites are ready when you take the beater out, flip it upside down and the tip of the egg white can hold itself up.
    A beater standing up with stiff peal egg white on the end
  • Fold 1/3rd of the egg whites into the chocolate mixture at a time making sure not to deflate them. Fold until there are no white streaks left then continue.
    Whipped egg whited on top of chocolate batter in a glass bowl with a spatula sticking out
  • Pour the batter into the springform pan and bake for 50-55 minutes until little cracks start to form on the top and the cake is no longer jiggly in the middle.
    Chocolate cake batter in a parchment paper lined spring form pan
  • Cool and dust with confectioners sugar (optional). Leave uncovered until serving.
    The cracked top of a chocolate cake in a springform pan lined with parchment paper.

Notes

You can use baking chocolate or chocolate chips
You can use a regular cake or tin pan if you don’t have a springform pan
The cracks may melt into the cake if you cover it completely. It wont get stale because there is no flour.
To make the brewed coffee use 1/2 teaspoon of instant coffee and top it with 1 tablespoon hot or boiling water. I usually just eyeball this!

Nutrition

Nutrition Facts
Light and Fluffy Flourless Chocolate Cake
Amount Per Serving (1 Slice)
Calories 238 Calories from Fat 153
% Daily Value*
Fat 17g26%
Saturated Fat 10g63%
Cholesterol 126mg42%
Sodium 45mg2%
Potassium 109mg3%
Carbohydrates 20g7%
Fiber 1g4%
Sugar 18g20%
Protein 4g8%
Vitamin A 389IU8%
Calcium 23mg2%
Iron 1mg6%
* Percent Daily Values are based on a 2000 calorie diet.

I love when you share my recipes!!

1634 shares

Filed Under: Chocolate Cakes Tagged With: Chocolate

About Sam Adler

Sam Adler is a Le Cordon Bleu professionally trained pastry chef, Saveur Blog Award winner, food photographer, and food blogger over on FrostingandFettuccine.com. She has been featured in numerous online and in-print publications including Taste of Home Magazine, Saveur Magazine, The Feed Feed, and Food Blogger Pro. Sam lives in Hollywood florida with her husband, two young kids, and french bulldog. When she’s not baking and dancing in her kitchen you can find her at her favorite yoga spot.

Reader Interactions

Comments

  1. Katerina says

    March 30, 2020 at 6:26 am

    5 stars
    I love that cracked top – doesn’t it just give the cake wonderful character? And I love that you have put coffee into this cake – absolutely a winner!

    Reply
    • Sam says

      April 01, 2020 at 3:36 pm

      Thank you SO much Katerina! Yes I love to add coffee to my chocolate desserts, I feel like it gives it that extra deep flavor!!I am so happy to hear you loved this, thank you so much for your 5 star review!!

      Reply
  2. Grace says

    April 06, 2020 at 5:51 pm

    This looks so good Sam! I’m so excited to try it sometime!

    Reply
    • Sam says

      April 07, 2020 at 2:27 pm

      Thank you so much Grace! Let me know when you make it!!

      Reply
  3. Daniela Bitton says

    July 26, 2020 at 4:42 am

    This is my go-to chocolate cake recipe – so easy to follow and always comes out delicious!! Totally foolproof. Thank you Sam!

    Reply
    • Sam says

      July 26, 2020 at 11:56 am

      Hi Danila! I am so happy to hear that thank you so much!

      Reply
  4. cynthia says

    September 19, 2020 at 1:41 am

    5 stars
    It’s not complex and easy, though I do sweat a bit making the meringue. It is delicious, and I don’t know why they’re a bit thicker than yours even though I used a 9″ round pan.

    Reply
    • Sam says

      September 21, 2020 at 2:44 pm

      As long as it was delicious, it doesnt matter how thick 🙂 Thank you so much for your 5 star review!

      Reply
  5. Merium says

    March 22, 2021 at 5:08 pm

    Can’t wait to make this!! Do you have any creative suggestions for what to do with the 6 egg yolks? all i can think of is an omelette 😂

    Reply
    • Sam says

      April 16, 2021 at 6:16 pm

      I like to save them for lemon curd! I have a recipe on my site if you search lemon meringue cookies.

      Reply
      • Kat says

        February 13, 2023 at 9:35 pm

        I must be misreading the recipe, but I thought you add the egg yolks to the chocolate mixture. Do you only add some?

        Reply
        • Sam Adler says

          February 14, 2023 at 9:50 am

          Nope you add all of the egg yolks to the chocolate mixture!

          Reply
  6. Alana L. says

    March 27, 2021 at 10:37 pm

    5 stars
    Hooooooly cow, Sam! You really outdid yourself with this one. I served it to my family for Passover and EVERYONE loved it. Nobody missed the flour at all.

    My grandma wouldn’t stop raving about the “delicious cake.” And everybody else chimed in with how much they loved the taste, very similar to a brownie but not as dense! Truly amazing. Thank you for the great recipe and for making me look like a rockstar baker 😉❤️

    Reply
    • Sam says

      April 16, 2021 at 6:16 pm

      AWW Alana! Thank you so much for making this for your fam for the holiday! So glad you guys enjoyed it!! And thank you of course for your sweet comment and review, so appreciate you!!

      Reply
  7. Eva says

    May 19, 2021 at 2:27 pm

    5 stars
    I have made this probably 6 times since Easter! It’s so yummy and made with things I always have on hand. This is my family’s new favorite. We made a strawberry Grand Marnier sauce and fresh whipped cream to go on top .

    Reply
    • Sam Adler says

      July 18, 2021 at 5:32 pm

      omggg that sounds so good, I have got to try it! SO glad you love this recipe, thank you so much for leaving a review and rating!

      Reply
  8. Laney says

    April 13, 2022 at 11:05 pm

    5 stars
    I am OBSESSED with this recipe! I make it for Passover but it’s easy enough for any day! You nailed it!

    Reply
    • Sam Adler says

      April 18, 2022 at 9:10 am

      YAYAYAY so happy you love it!!!!

      Reply
  9. Kelly Kardos says

    April 14, 2022 at 12:34 pm

    I’m making this this Passover Sam!

    Reply
    • Sam Adler says

      April 18, 2022 at 9:10 am

      Yay! Cant wait to hear how it is Kelly!

      Reply

Leave a comment & rate this recipe Cancel reply

Do you love this recipe? If so, I would be so grateful if you left a star rating with your comment! Star ratings help other people find my recipes so they can make them too. Thank you for your support!

XO, Sam

Recipe Rating


Primary Sidebar

Search

Hi! Im Sam Adler,

I'm a professionally trained pastry chef and food photographer.
This is a place where you will find easy yet impressive looking desserts. I also share a ton of food photography resources too! What can I say, I love pretty & delicious baked goods! Learn more about me!

As Featured In:

Logo images of media places Sam Adler has been featured in
Saveur Blog award winner for best food Instagram

samadlerphotography

👋🏻 2022! Will be celebrating this year on th 👋🏻 2022! Will be celebrating this year on the couch with this in my lap. No sharing allowed! Those 3 spoons are all mine 😂😂 

🍾🥂HAPPY NEW YEAR 🍾🥂
.
.
.
#newyearseve #2023goals #cookieskillet #skilletcookie #giantchocolatechipcookie #chocolatechipcookies #chocolatechipcookie #cookiephotography #foodphotographyandstyling #foodstylingandphotography #foodphotographer #foodstylist #foodstylists #castironbaking #castironskillet #castiron @lodgecastiron
Recap of all the cookie boxes!!! This year’s @ta Recap of all the cookie boxes!!! This year’s @taylorswift theme has got to be my fave (see my last reel for the explanation of each cookie!) but I have so much fun every year making these! Which one is your fave?! 

#cookieboxes #cookiebox #cookiegifts #cookiegiftbox #holidaycookies #taylorswift #TaylorSwiftcookies #homemadecookies #customcookies #cookiedecorating #cookiesofinstagram #cookiedesign #cookiephotography #holidaycookiebox #holidaygiftsets #holidaygifts #ediblegifts #swiftie #swiftiesforever #taylornation @taylornation
ARE YOU READY FOR IT?! 2022 Cookie Box is @taylors ARE YOU READY FOR IT?! 2022 Cookie Box is @taylorswift themed!! 
1. “Like a rainbow with all of the colors” sprinkle cookies 
2. “Lover” heart sugar cookies 
3. “Lavender Haze” shortbread (made with lavender and a pearly shimmer powder)
4. “Midnight” cookies AKA my chocolate brownie cookies 
5. “Red lip classic” sugar cookies 
6. More midnight cookies- (dusted with powdered sugar to look like the midnight cloudy sky)
7. “Bejeweled” sugar cookies (Navy bc black fondant was out of stock)
8. @taylorswift famous chai cookies 

Merry Christmas if you’re celebrating and hope you have a happy New Year’s Day!
.
.
.

#cookiebox #taylorswift #taylorswiftcookies #holidaycookiebox #swifties #swiftie #swiftieforever #holidaycookies #cookieseason #cookiedecorating #cookiebox #cookieboxes #taylorswiftlover #taylorswiftlyrics #taylorswiftvideo #sugarcookies #shortbread #browniecookies #christmascookies #christmascookiebox #lavenderhaze
#ad This year for Chanukah we’re switching it up #ad This year for Chanukah we’re switching it up from classic sufganiyot to make these fun donut fries! Puffy, golden, and delicious, dip your “fries” into melted chocolate or raspberry jelly and celebrate all week long! @aldiusa makes it super easy with their amazing selection of high quality products at seriously unimaginable prices. Run to your nearest @aldiusa to find all the ingredients you need to make these and have a Happy Chanukah!
Find the recipe below!

#ALDILove
Prep time: 1 hr 45 mins
Cook time: 1 min
Yield: 40 donut fries
2 pack Baker’s Corner Active Dry Yeast
1 1/2 cup warm water
1/3 cup Sugar
2 Simply Nature Grade A Organic Cage Free Brown Eggs
2 tbsp Stonemill Pure Vanilla Extract
1/3 cup Carlini Pure Vegetable Oil
5-6 cups Baker’s Corner All Purpose Flour
1 tsp Kosher salt
½ cup Baker’s Corner Powdered Sugar
For Dipping:
1 cup Baker’s Corner Dark or Milk Chocolate Morsels
Simply Nature Organic Raspberry Preserves
Method:
•Mix the yeast with water in a mixer bowl and let stand for 10 mins until frothy. Add the
sugar, eggs, vanilla, and oil to the bowl and mix until well combined.
•Start adding only 5 cups of flour and salt, and knead/mix on medium speed in a stand mixer
fitted with the dough attachment for 5 minutes until a soft, non-sticky dough forms. If the
dough seems sticky, add ¼ cup flour to the dough until it no longer sticks to the bowl when
mixing.
•Let the dough rest in the bowl for an hour to double in size. 
•Punch down the dough and remove it from the bowl onto a lightly floured surface. Using a
lightly floured rolling pin, roll it out into a rectangle. About 18”x 15” and 1/2 of an inch in
thickness. 
•Using a pizza cutter, cut in half vertically. Then slice thin strips horizontally. You want them
thin as they will puff up while frying.
•Let the fries rest for another 15 mins. 
•Meanwhile, using a deep fryer or a large pot, heat your oil to 350 degrees F. Fry the donut
fries 30 seconds per side, then drain on a paper towel.
•Dust the donut fries with powdered sugar and set aside.
•Microwave 1 cup of dark or milk chocolate for 30 seconds at a time until melted. Scoop
jelly into another bowl. Dip the fries in the chocolate or jelly!
Happy birthday @taylorswift 👸🏼 hope it feels Happy birthday @taylorswift 👸🏼 hope it feels like a perfect night and you’re not weepin in a party bathroom. IYKYK
.
.
Also here’s to wishing me getting those tix!
.
.
.
#swiftie #swifties #happybirthday #taylorswift #taylorswifttickets #birthdaycake #birthdaycakes #birthdaycandles #caramelcake #carameldripcake #caramelbirthdaycake #cakephotography #cakephotography📷 #cakedecorating #cakedesign #cakesofinstagram #cakepic #cakepictures
I sure do like these gingersnap cookies babe 😂 I sure do like these gingersnap cookies babe 😂 

.
.
.
#gingersnaps #gingersnapcookies #gingersnap #christmascookies #christmascookie #holidaycookies #holidaycookie #cookierecipes #tinyhands #holidaybaking #cookieseason  #cookiesofinstagram #cookiegram #cookielover
Load more please Follow me on Instagram!

Categories

Archives

Privacy Policy  | Disclosure Policy


Support by Foodie Digital

Footer

↑ back to top

About

  • About
  • Web Stories
  • Privacy Policy

Disclosure

As an Amazon Associate I earn from qualifying purchases.

Disclosure Policy

Contact

  • Contact
  • Work with me

Copyright © 2023 Samantha Adler | Frosting & Fettuccine | Support by Foodie Digital

1634 shares