• Skip to primary navigation
  • Skip to main content
  • Skip to primary sidebar
  • Recipes
    • Recipe Search
    • Recipe Index
    • Bars & Brownies
    • Breakfast
    • Cakes
    • Cookies
    • Cupcakes
    • Frosting
    • Fruit Desserts
    • Muffins
    • One Bowl Desserts
    • Pies & Tarts
  • About Me
  • Food Photography
    • Work with Me
    • Classes and Workshops
  • Shop

Frosting & Fettuccine

Home » Recipe Search » Decorating Tutorials

Aug 19, 2018(last updated October 31, 2021)

How to Decorate a Cake with Flowers

5 from 1 vote
BySam Adler
Jump to Recipe Print Recipe

This post might have affiliate links, please check out my full disclosure policy.

Learn everything you need to know about how to decorate a cake with flowers for weddings, birthdays and more! This detailed post will give you a bunch of ideas and tips on how you can create a beautiful floral cake.

A white cake on a brown cake stand decorated with a rainbow of fresh flowers demonstrating how to decorate a cake with flowers

If you’ve been around these parts a while, then I think you know that I love to decorate a cake with flowers. Fresh (non-edible) flowers, to be exact. I think I would even go far enough to say that it’s my favorite way to decorate my cakes.

Decorating with non edible flowers:

There’s something so dainty and rustic about putting flowers on a cake, plus the options are endless.

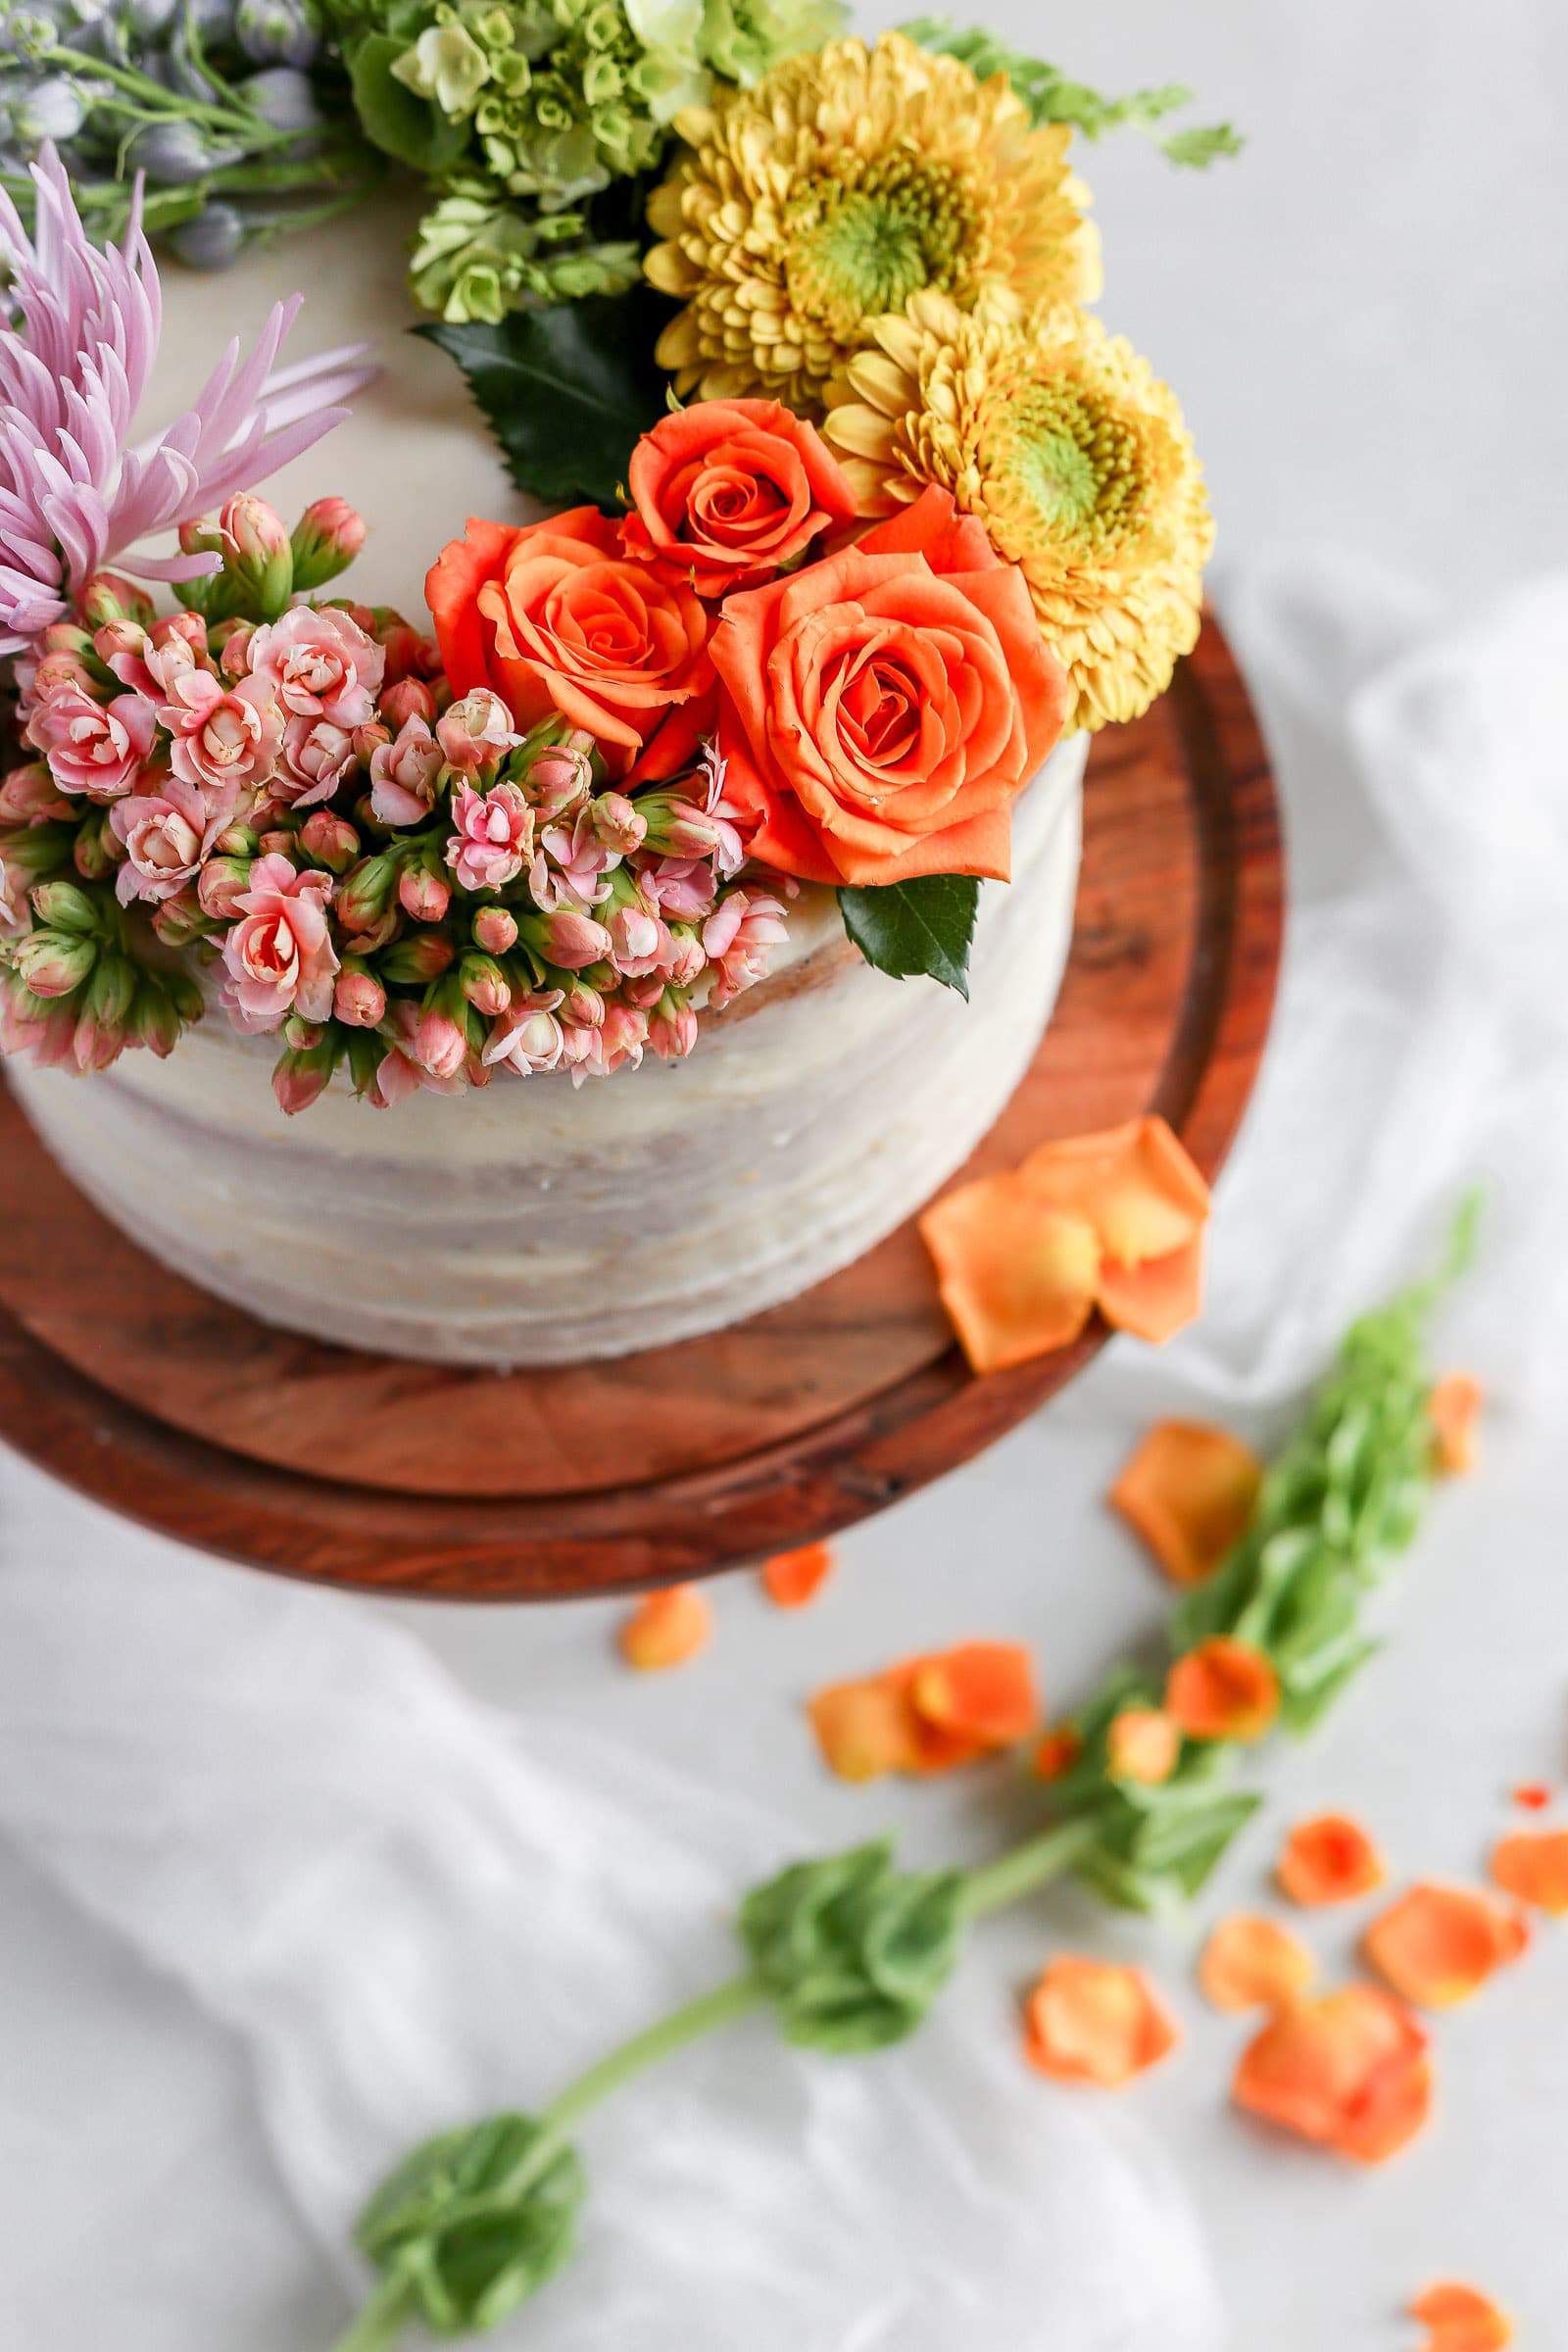
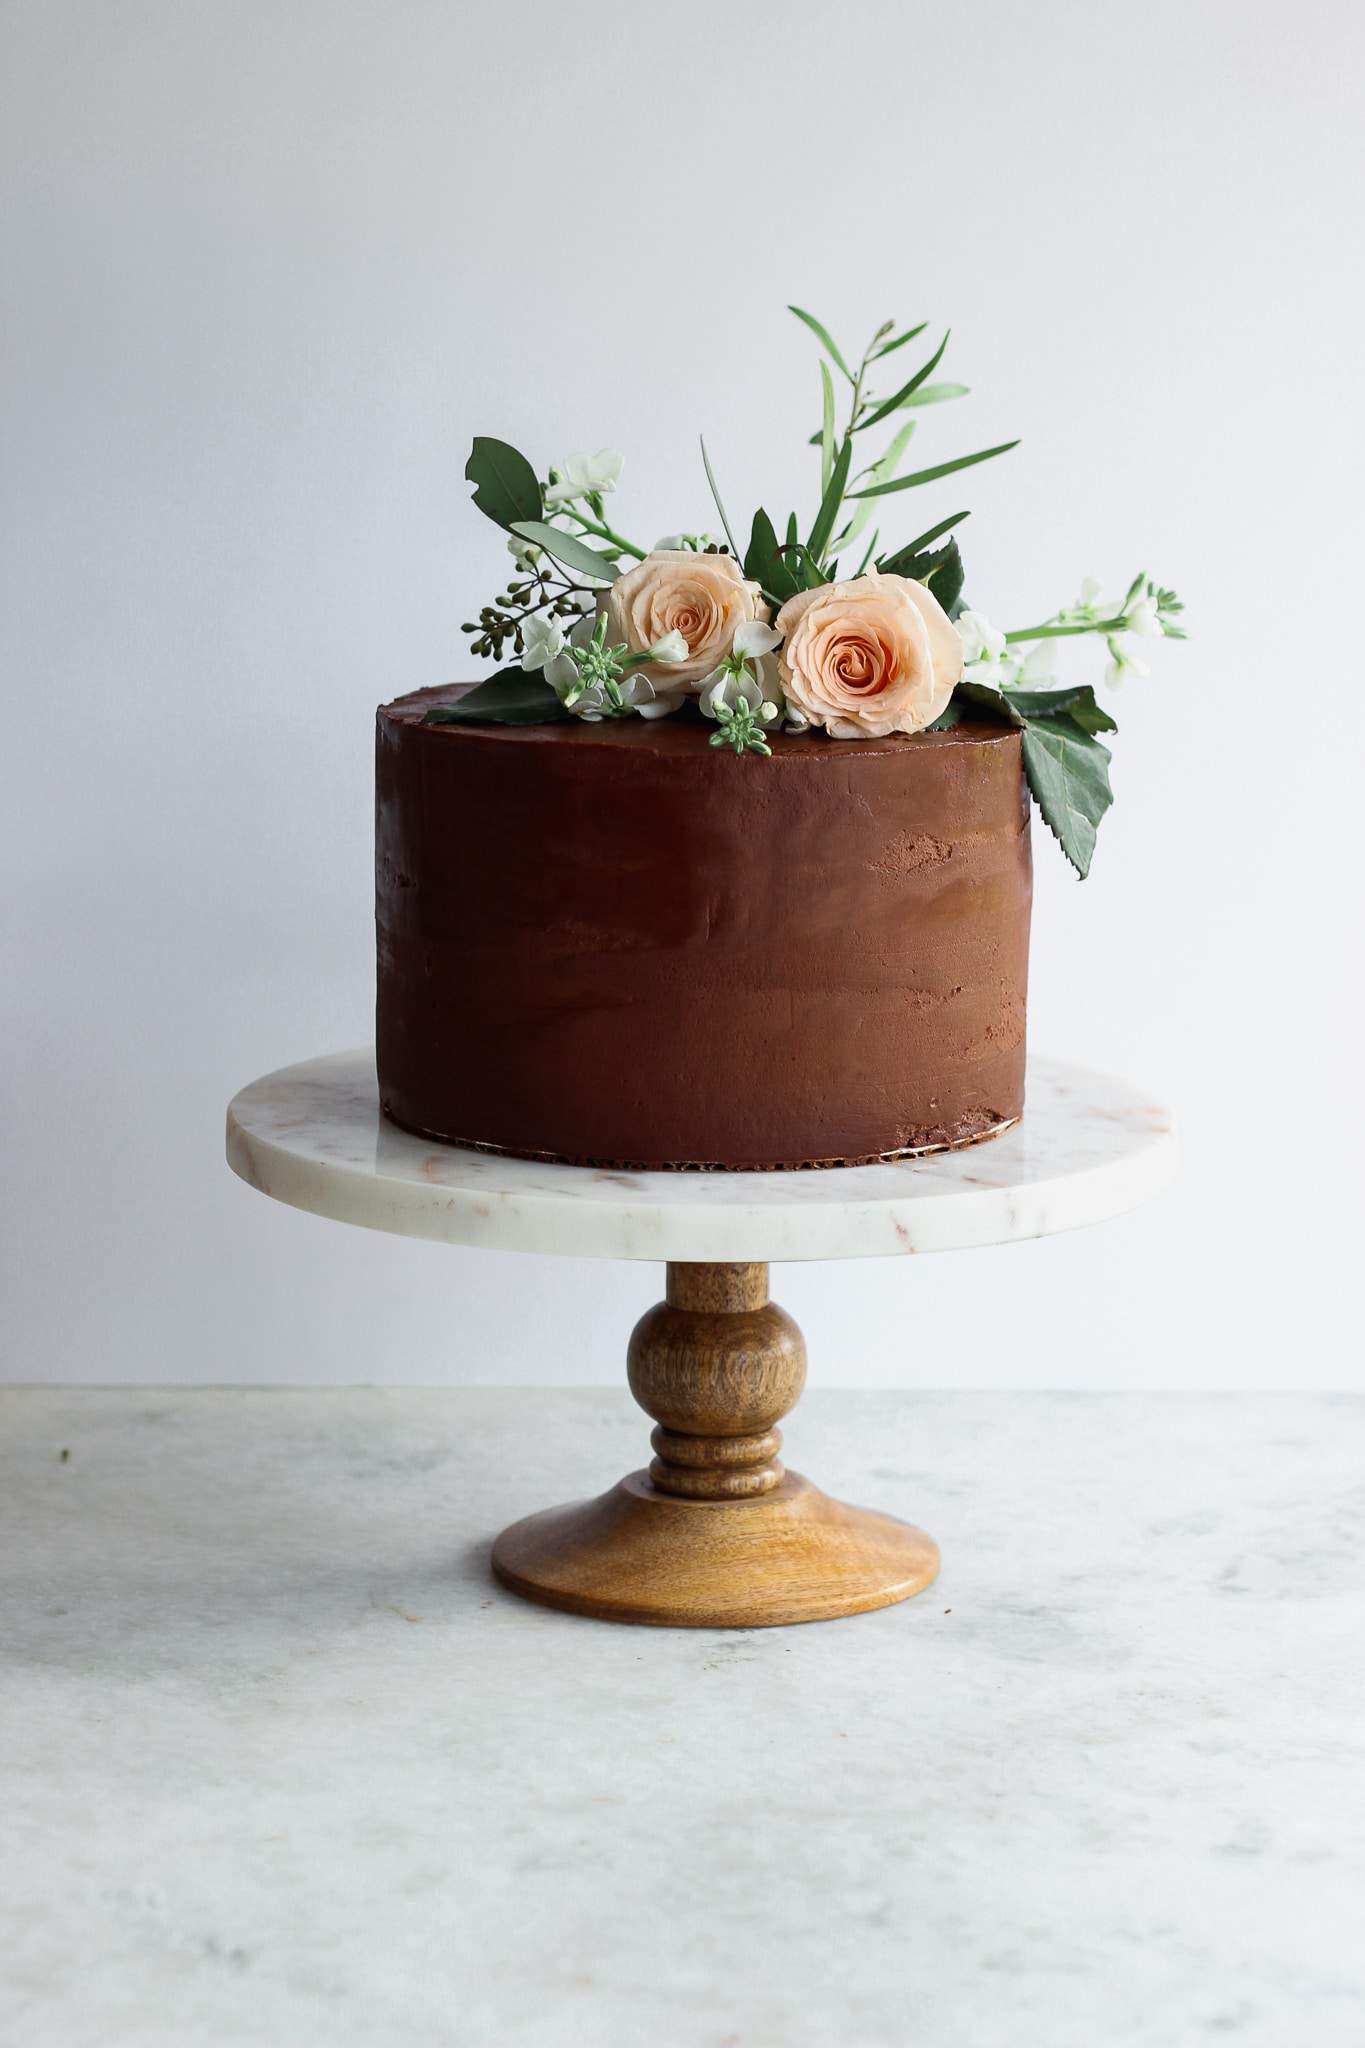
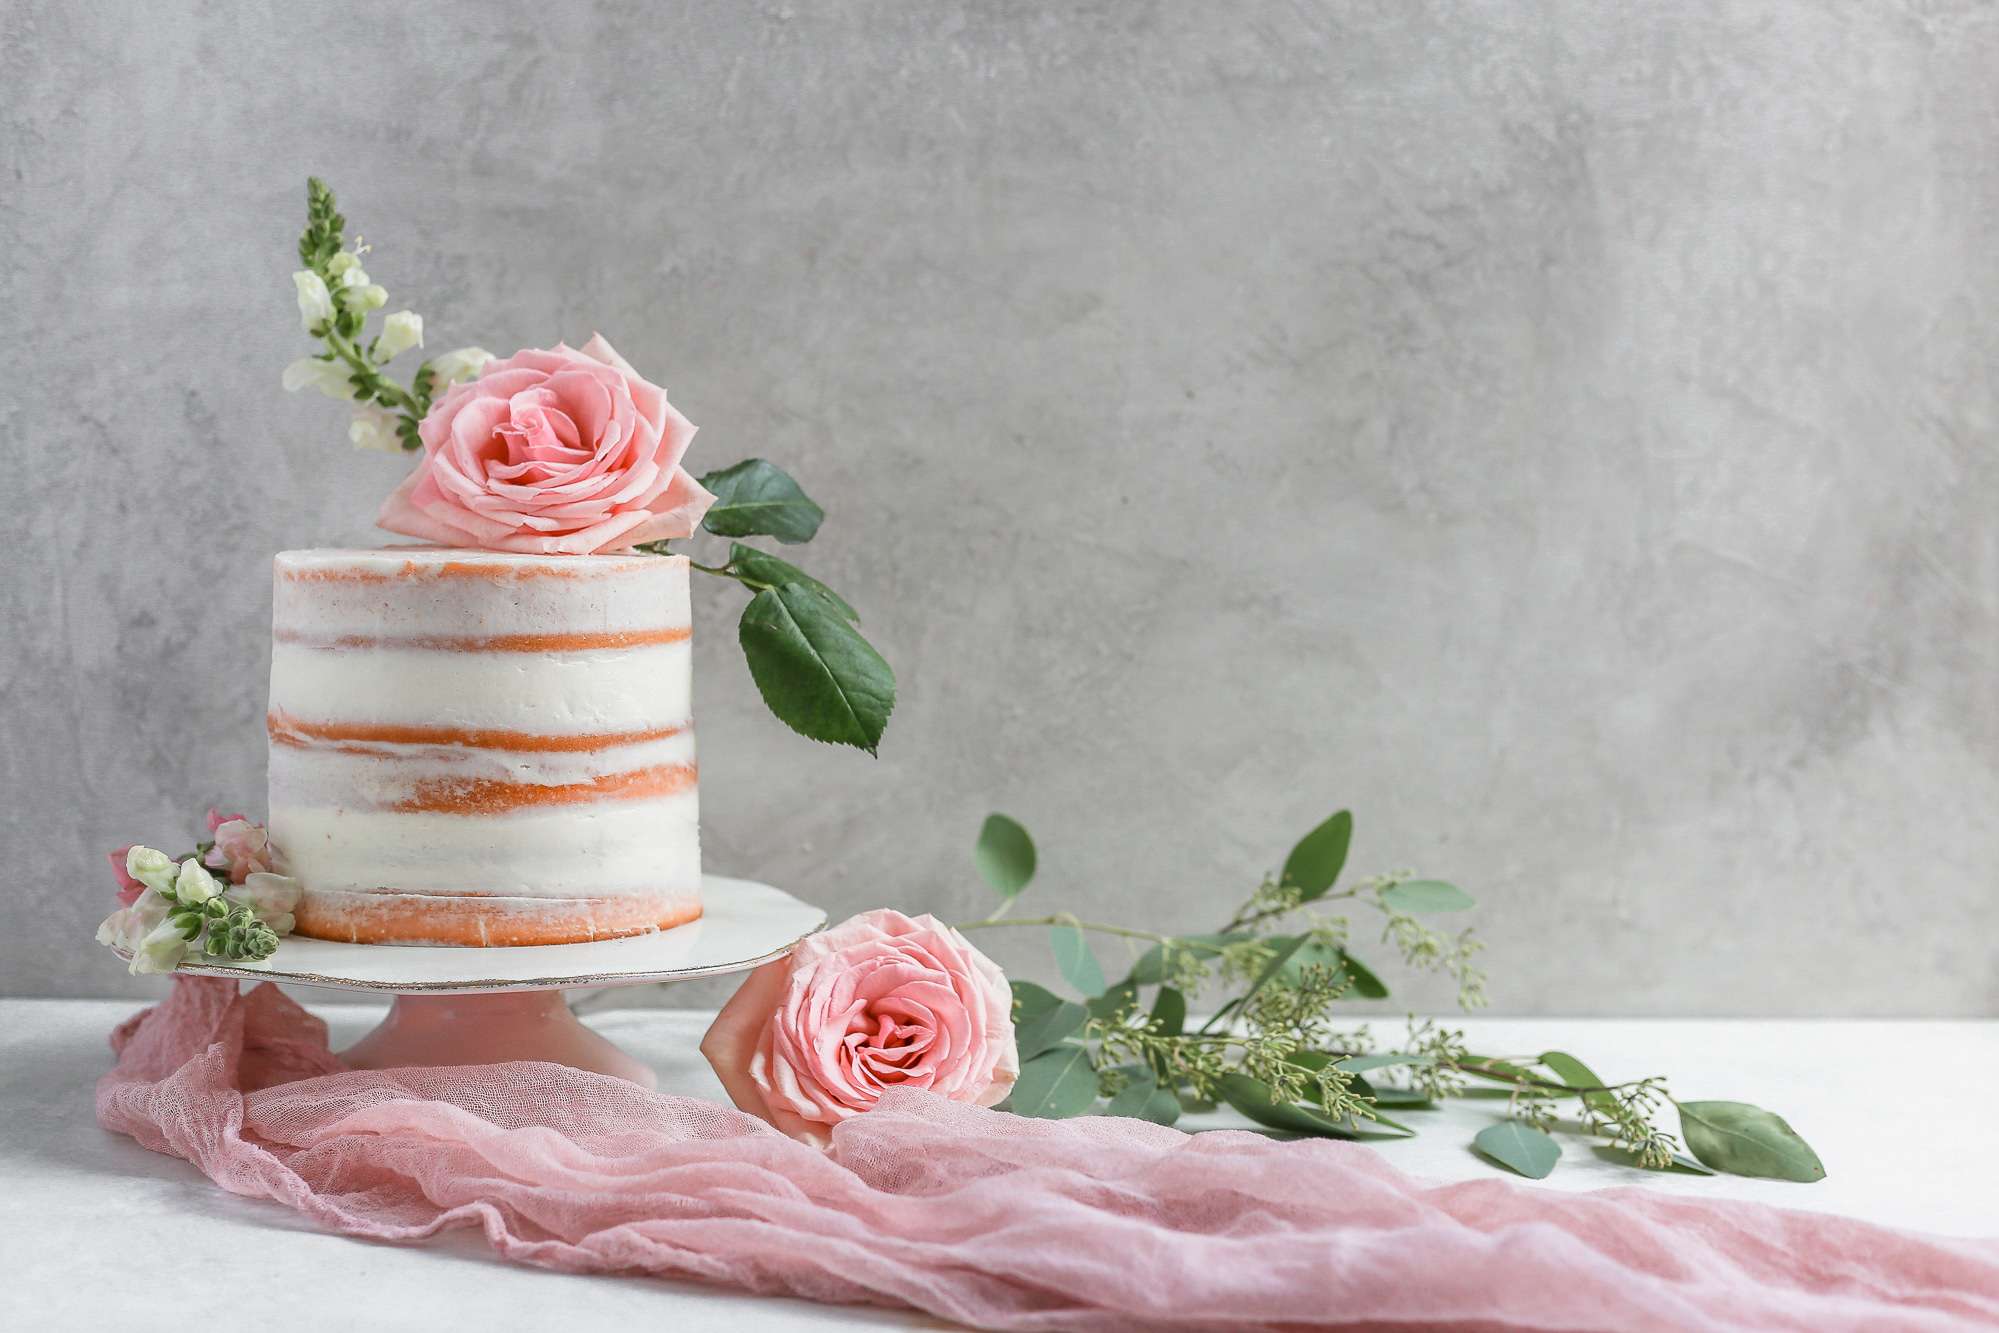
You can make a bold statement with a bunch of flowers in the same varying hues, or you can simply place one or two pastel colored flowers off the side of a cake for a girlish touch.

Examples of both right here!

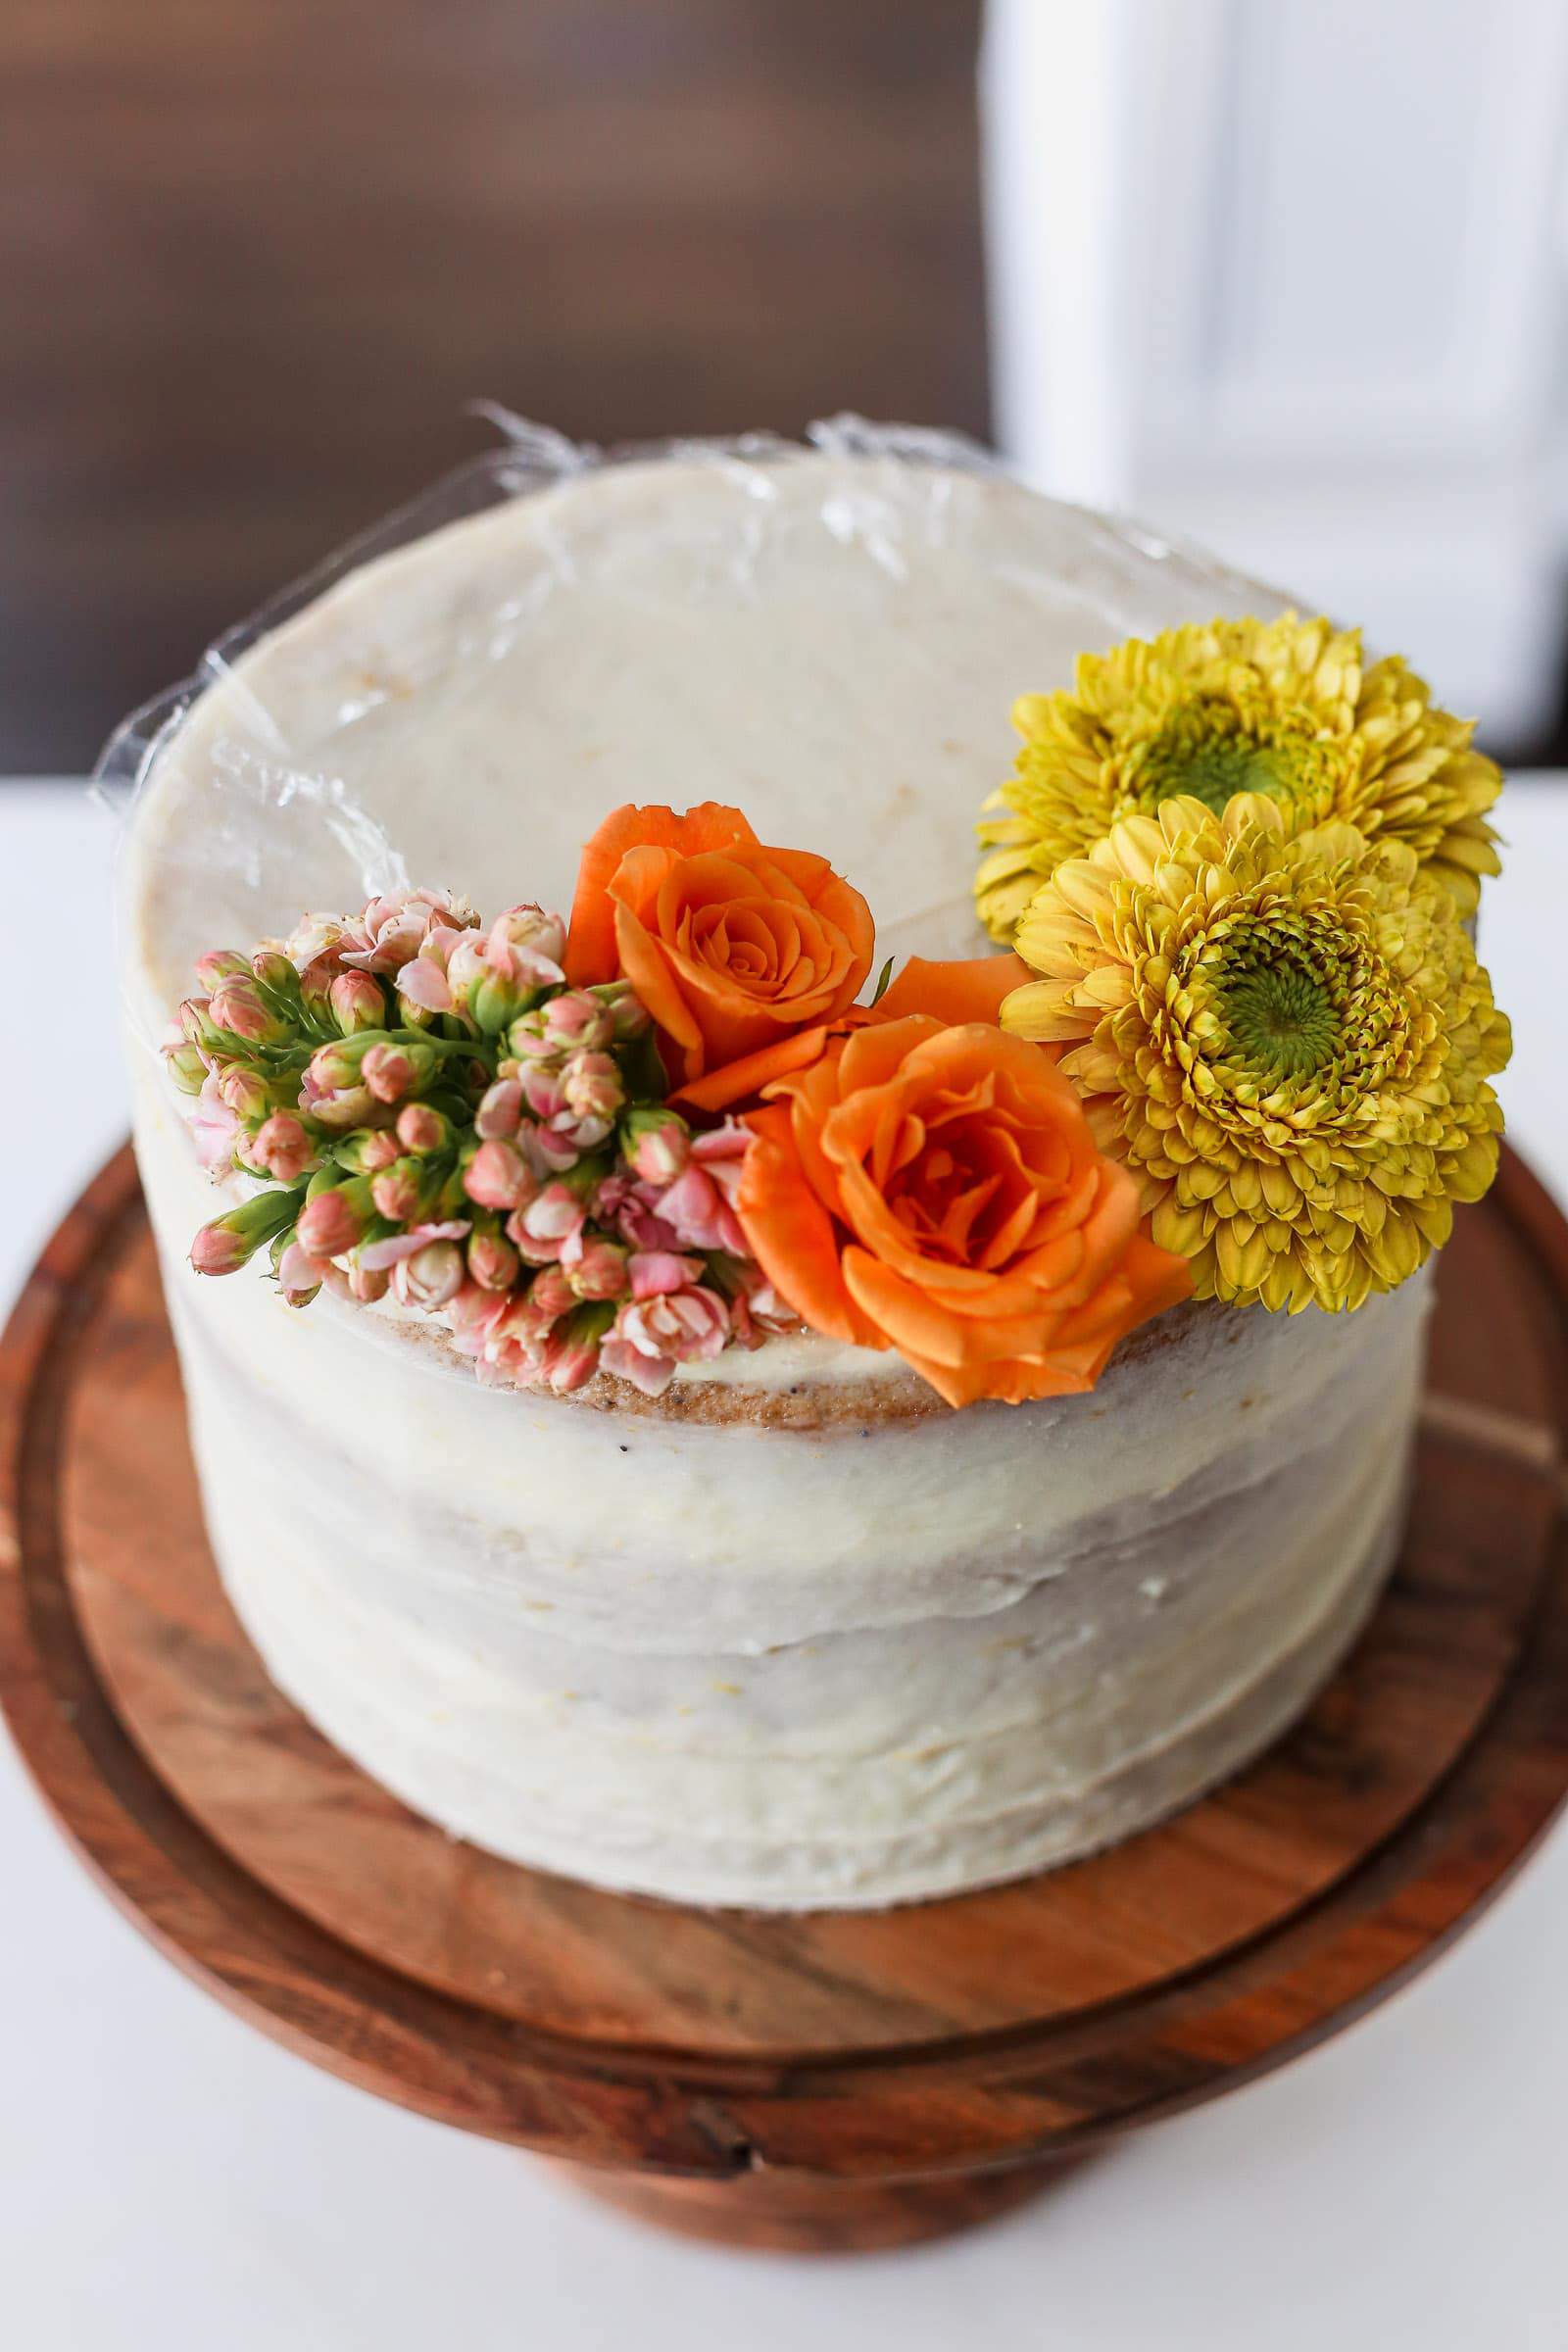
Bold and Dramatic Cake

A pink cake decorated with fresh flowers with a tutorial on how to decorate a cake with flowrers

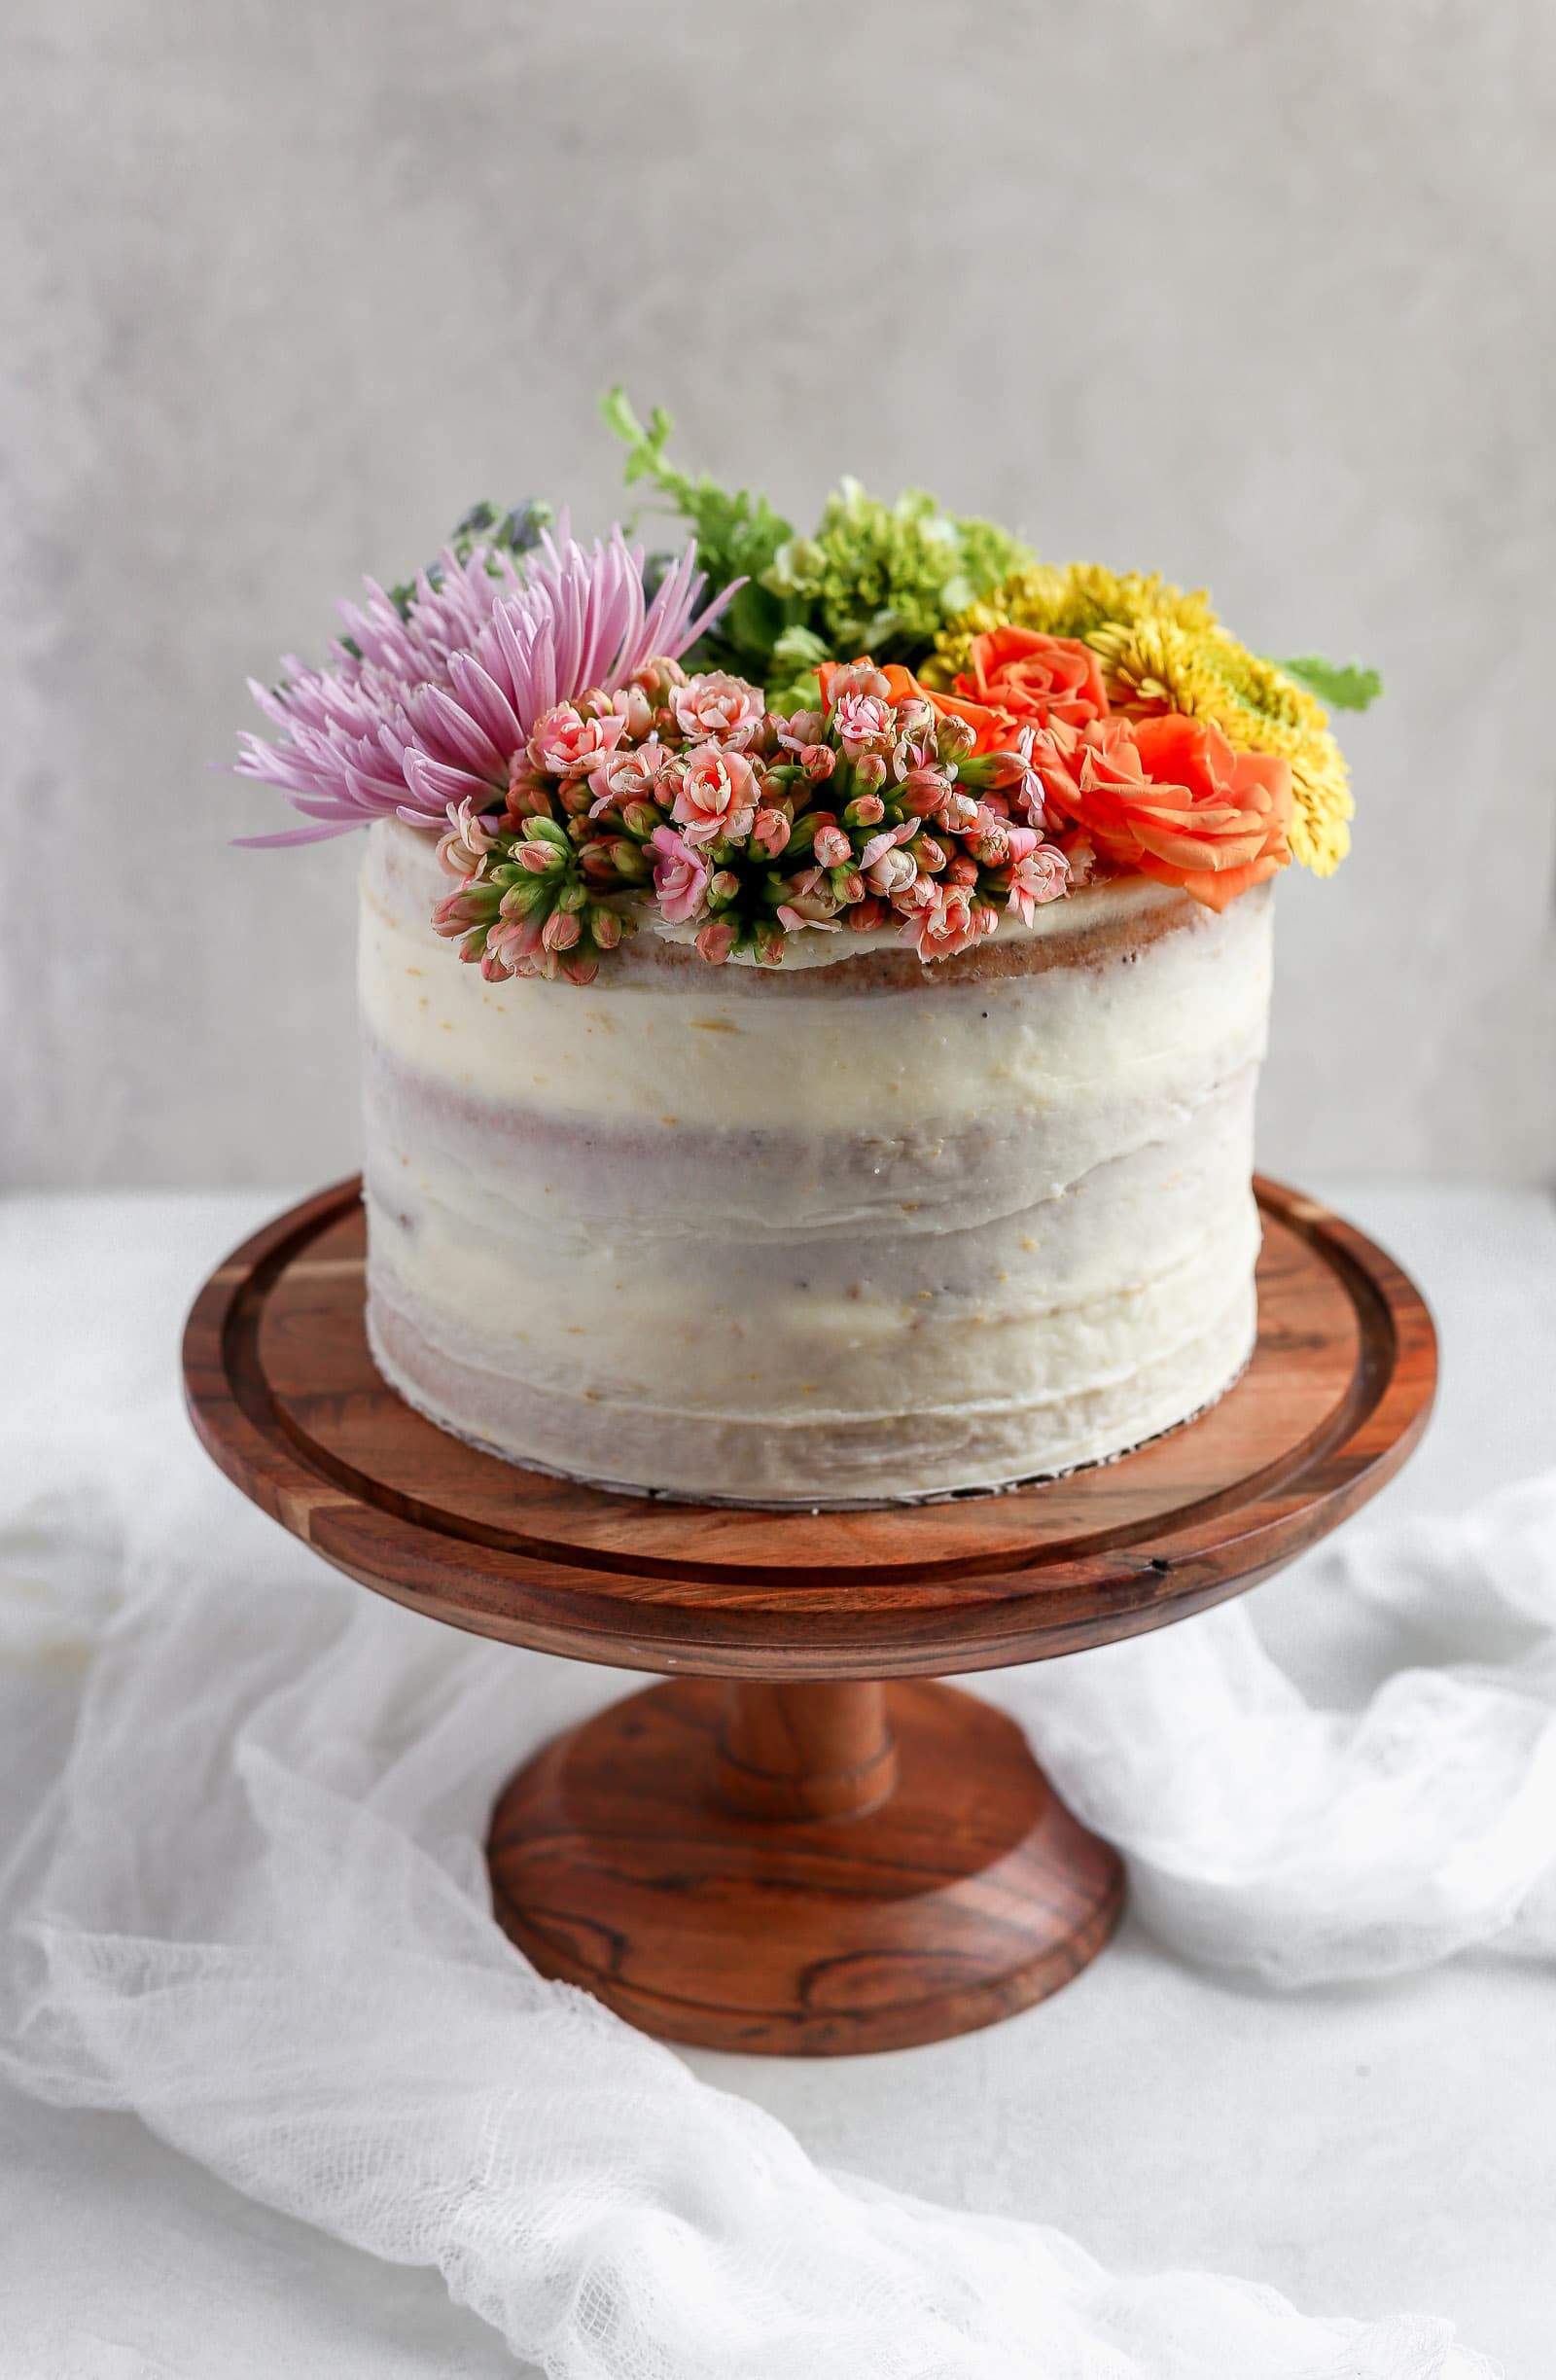
Dainty and Girly Cake

A chocolate cake with fresh flowers on a white stand, demonstrating how to decorate a cake with flowers

Tools Needed:

  • a frosted cake
  • flowers
  • a sink
  • a towel
  • scissors
  • plastic wrap

I think one of the things I love most about decorating cakes with flowers actually is that it requires no piping bags or equipment at all.

This might sound weird, but I really dislike working with buttercream; especially when you need multiple colors of it.

You need a lot of bowls to mix the colors, then you (I***) inevitably make a huge mess, while your (my***) hand cramps from all the mixing, and you (I, again***) haven’t even gotten to putting the colors in the piping bags yet.

A naked cake decorated with pink roses on a cake stand with pink cheesecloth on a gray board

How to decorate a cake with flowers

But how do you safely decorate a cake with non-edible flowers? Amazing question! It’s super simple, let me tell you!

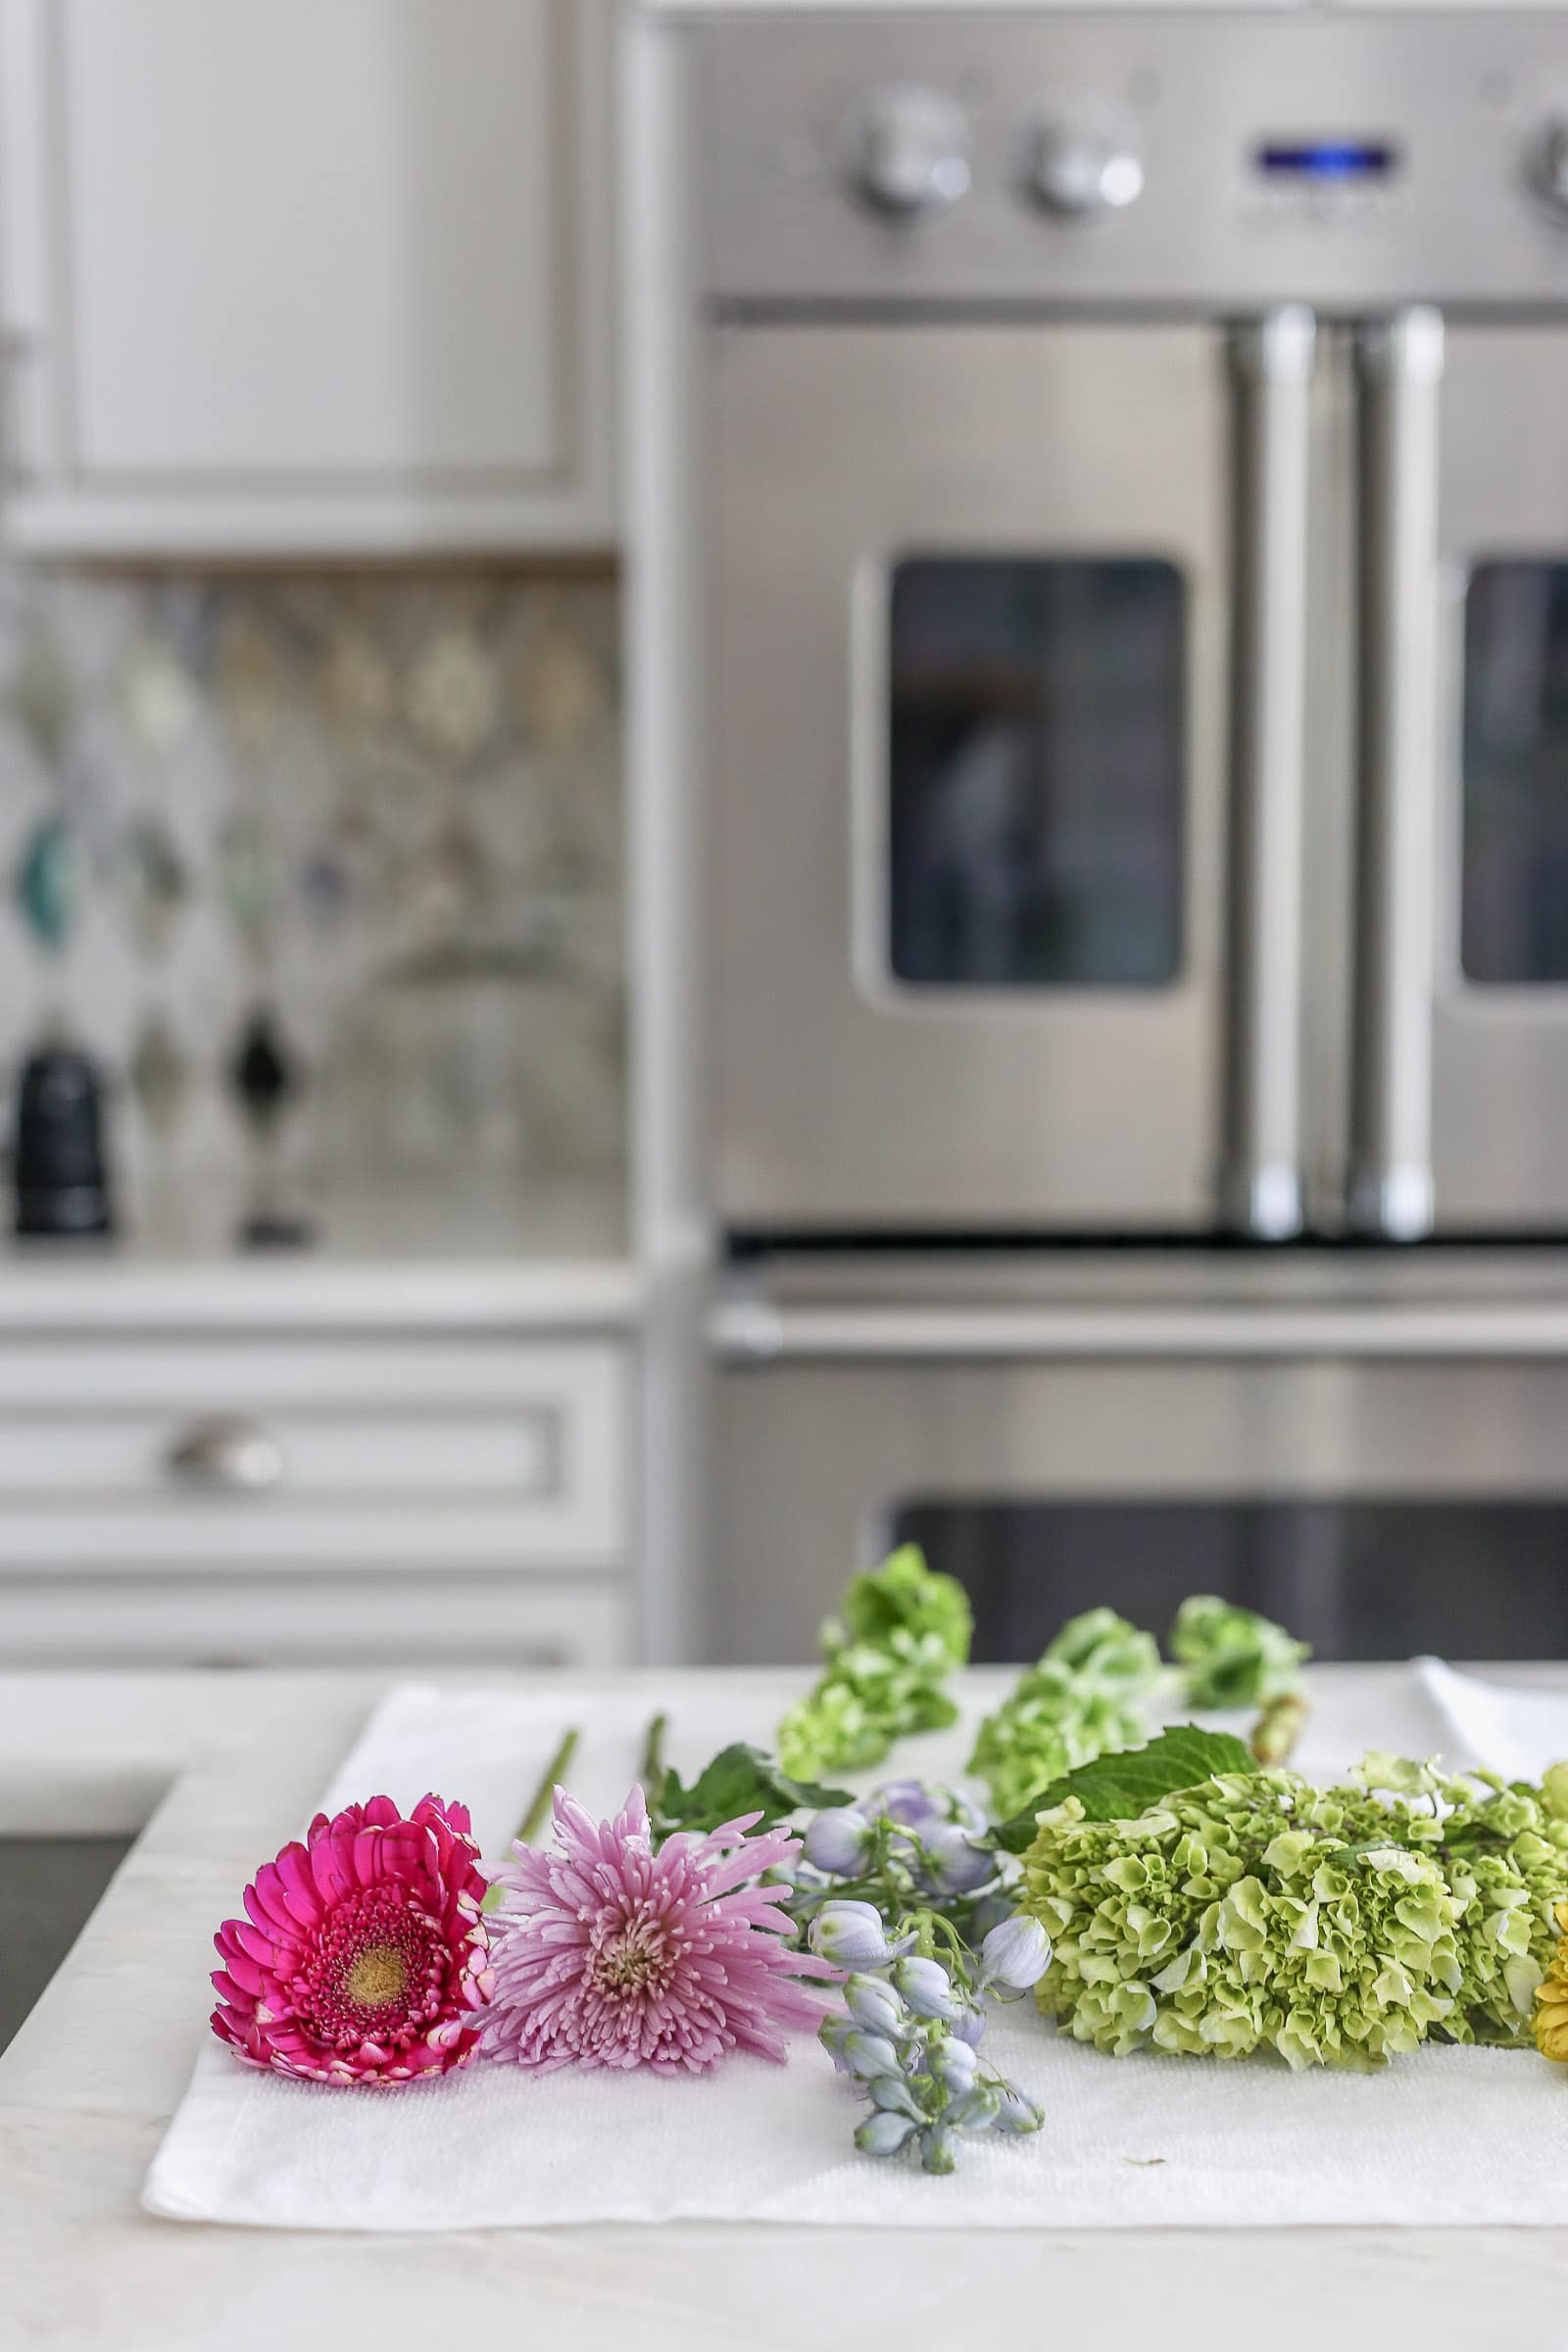
1. Choose the right type of flowers

First, the best kind of flowers to use obviously are organic, pesticide-free flowers. If that’s not an option, it’s totally fine, there are ways around it.

Pro tip though: when you buy your flowers DO NOT put the flower food in the water while you prep. I mean obviously, but just a disclaimer if you are someone who always uses flower food and would do it mindlessly.

2. Cut the stems

Next, take your flowers and cut them as short as you think you might need. For flowers that will lay flat on their own, you can cut the stems shorter, but for flowers that might need a little stability, leave a little bit of the stem to stick into the cake.

3. Wash the entire flower

Now comes the washing. You need to wash every single part of the flower that you are putting on the cake. So stem, leaves, petals, the whole deal.

Washing the inside of the flower isn’t really for pesticides because no one is actually eating the flower. It’s more so that you don’t find a bug come out of one of them and onto your cake. yeah. ew. gross. Wash those petals!

Washing a purple flower in the sink, before demonstrating how to decorate a cake with flowers.

4. Dry the flowers

Now dry them good. Shake the flowers out and dry them well with paper towels. If I’m using roses, I make sure to turn them upside down, because sometimes water will pool up in their petals.

Clean fresh flowers drying on a towel before demonstrating how to decorate a cake with flowers.

5. Start decorating!

Now on to the decorating! You can do this one of two ways.

If you are just placing your flowers onto the cake (flat) without actually sticking them in, you can place a piece of wax paper or plastic wrap over the area of the cake where you will be placing the flowers, and decorate away!

You can use little dabs of buttercream to keep the flowers in place. Make sure you cover the area completely so no one sees your tricks, and if a petal or two gets onto the cake, I’m sure it’s fine because you washed it well anyways (right?).

A white cake demonstrating how to decorate a cake with flowers.

If your flowers need more stability and you need to stick the stems in the cake, the other way to decorate a real flower cake is to wrap the stems in plastic wrap. It’s super simple, just a little time consuming.

Take a small piece of plastic wrap and wrap it around the whole stem up to the base of the flower. Now you can stick it into your cake, and your cake will still be safe to eat.Small bunch of flowers with the stems wrapped in plastic ready to demonstrate how to decorate a cake with flowers.

More tips for decorating cakes with flowers

  • It’s best to decorate with fresh flowers on the same day you will be eating the cake, but if that’s impossible, do it as close to the time as you can and store the cake with flowers on it in the fridge. Beware that if you wait too long (+24 hours), the flowers may wilt.
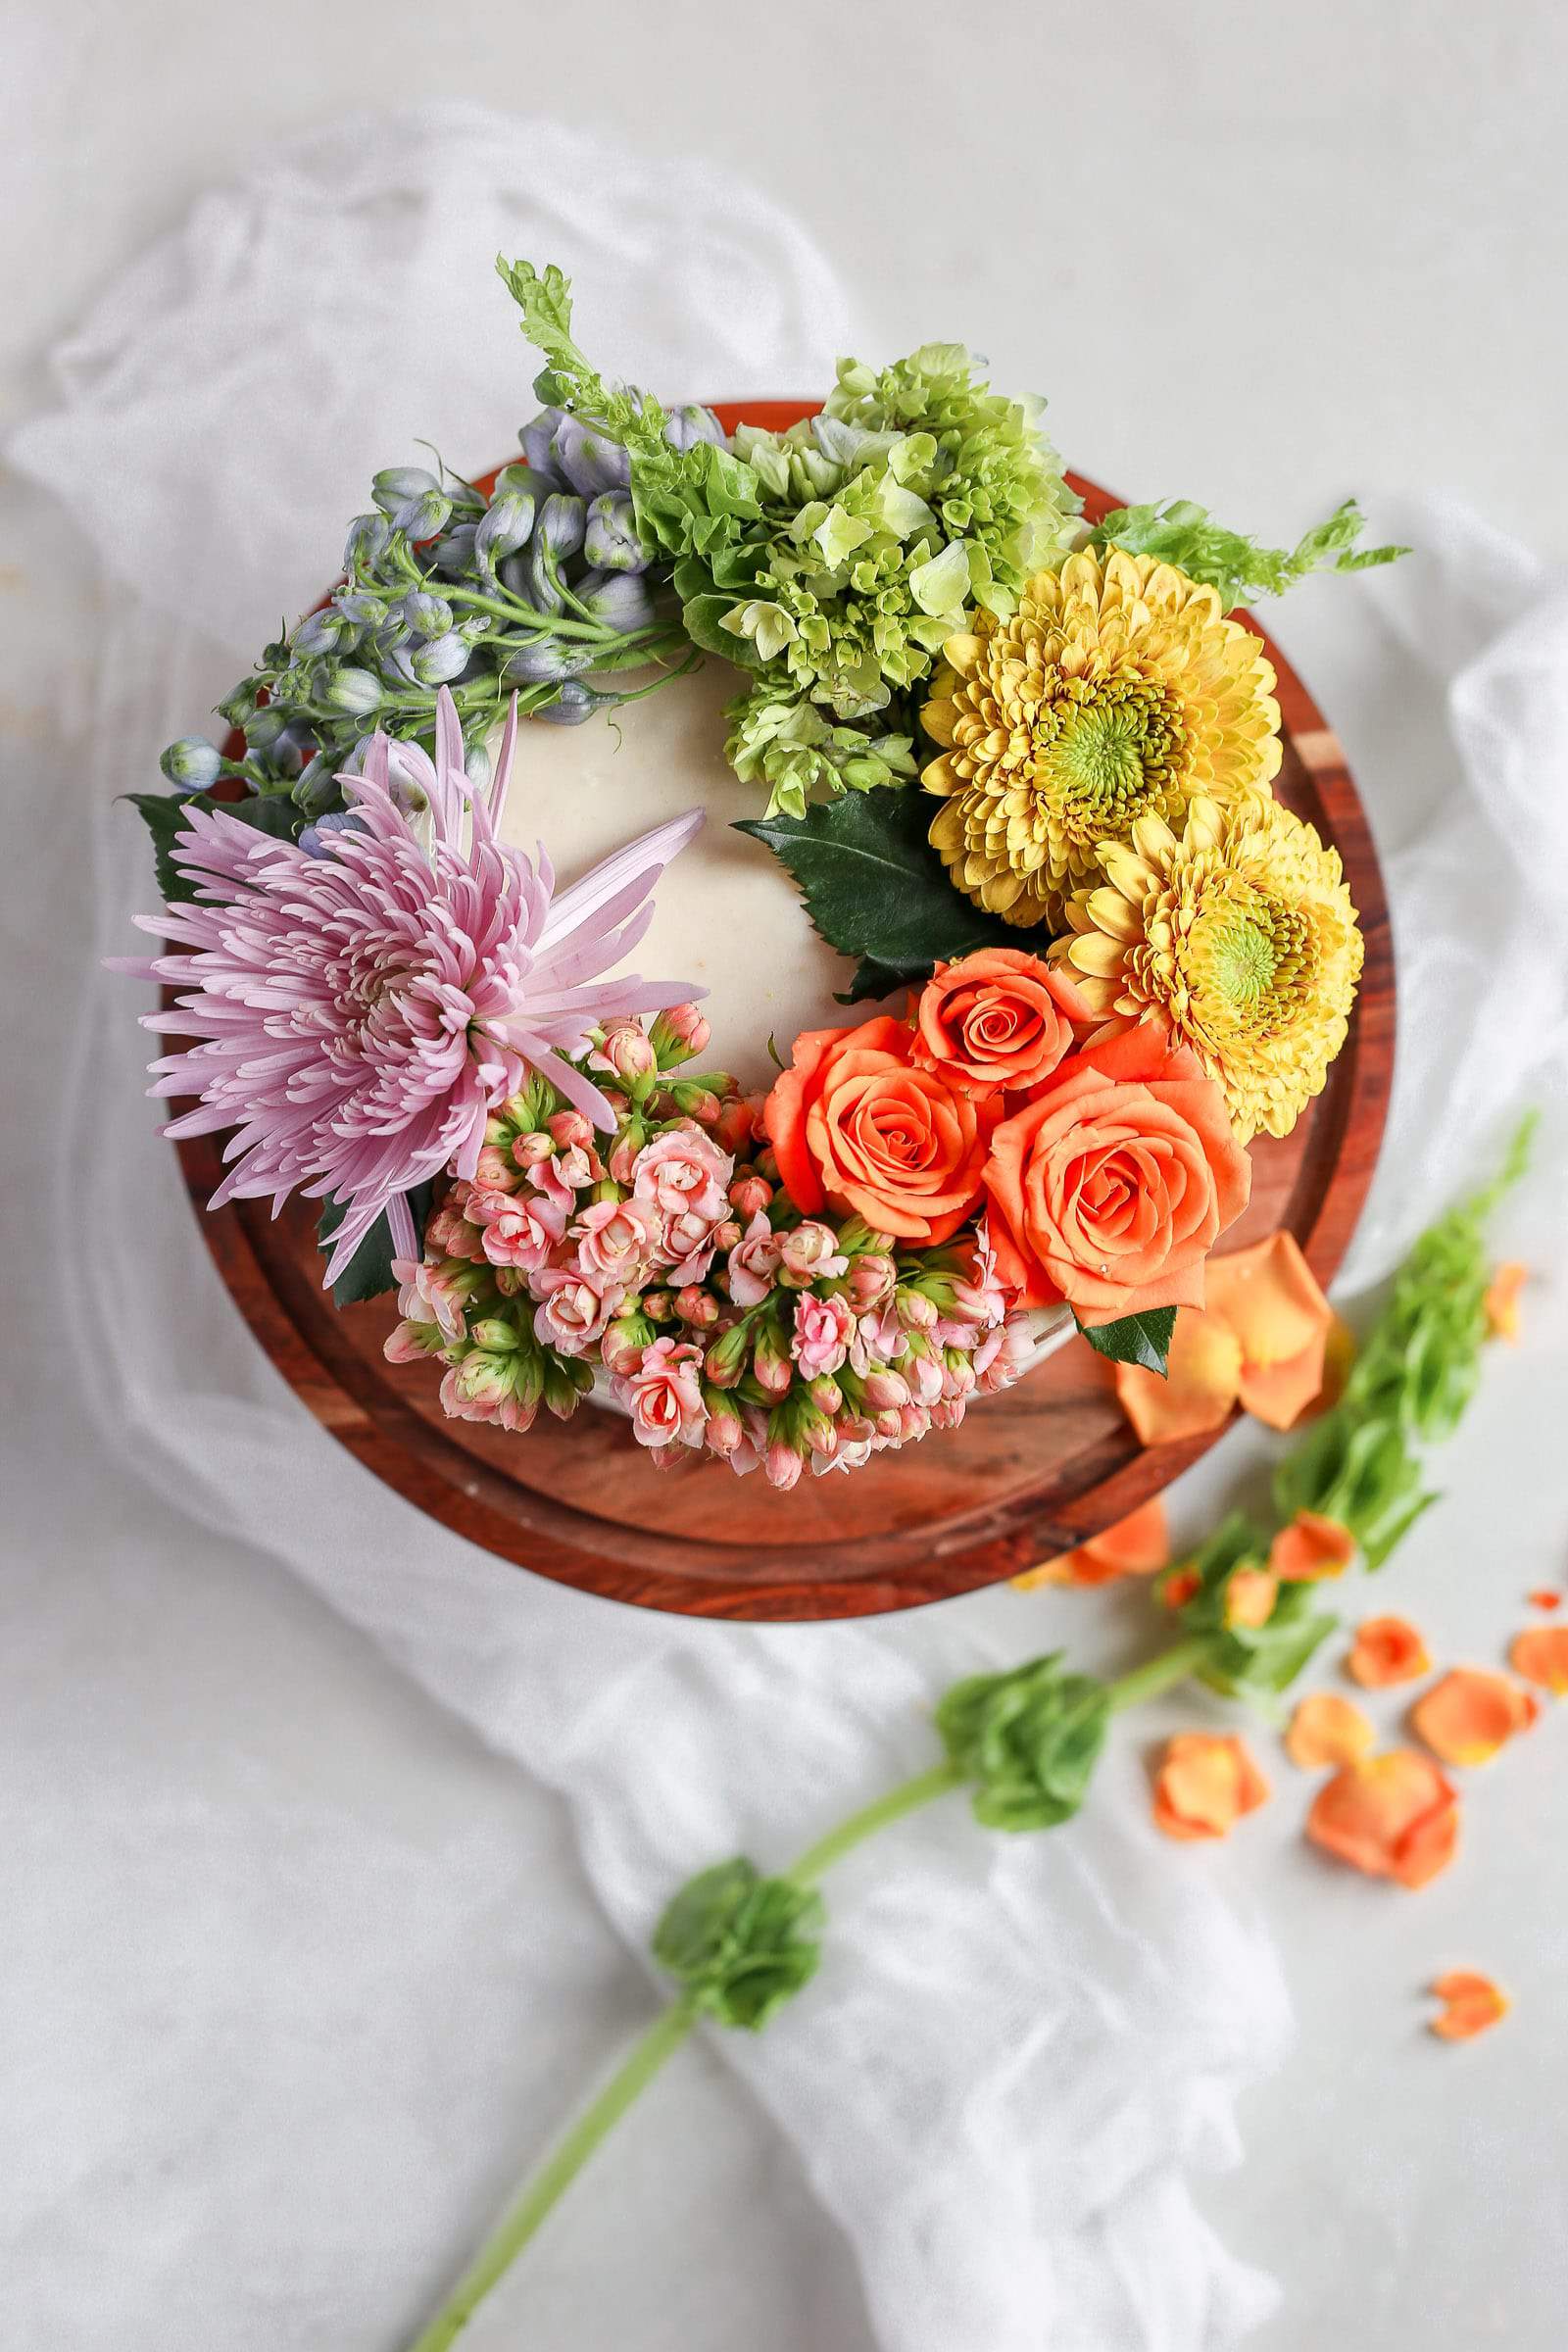
  • You can also play around with height with the flowers. Sometime I like to stack a bunch on one side and leave the other side open.
  • Or you can go horizontal and play with the way leaves look hanging off the sides of the cake for a dramatic effect. Like I said, endless options!
  • You can also use edible flowers! My fellow real flower cake loving friend Karlee, over on Olive and Artisan, has some super helpful tips on how to do that, plus she found an online store that will ship edible flowers to you! So getting on that, thanks girl!

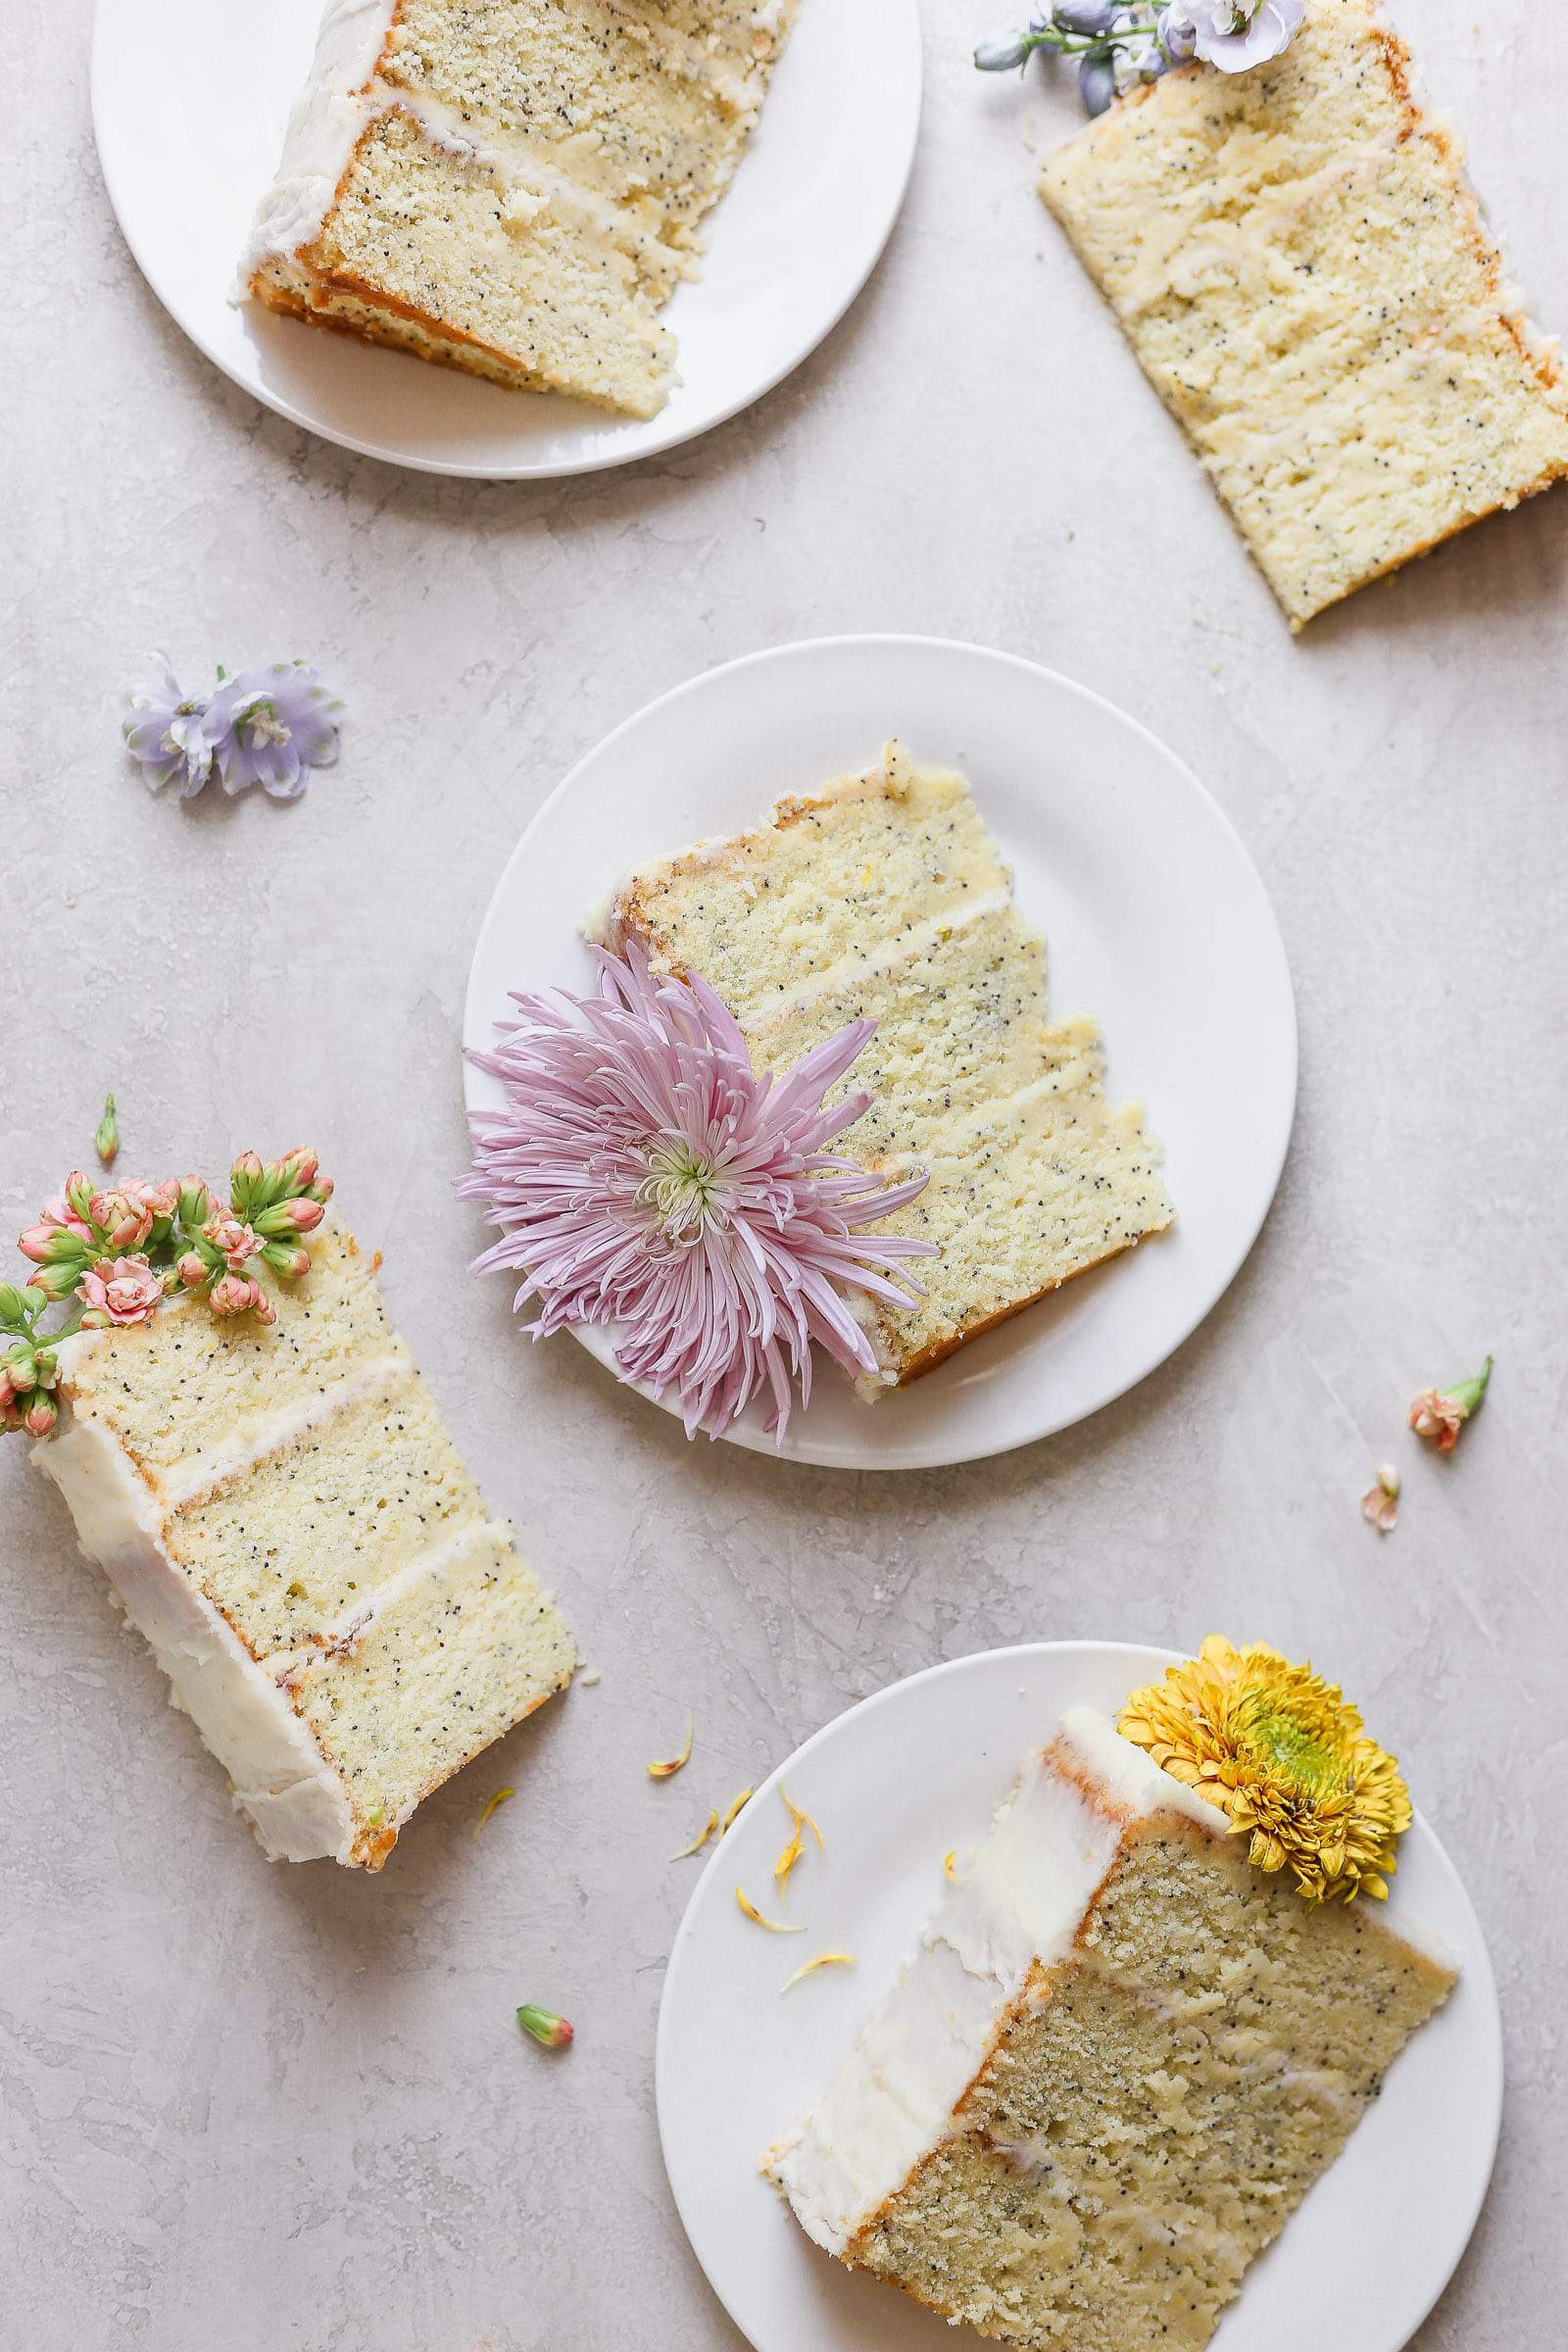
I should also mention that cakes with flowers look pretty too once you cut the cake into slices. Remember when you were 5 and everyone at birthday parties would scream I WANT THE FLOWER but there was only like 3 for 25 kids?

Well, now don’t be surprised if that happens again, but this time there’s enough for everyone.

A white cake on a brown cake stand to show how to decorate a cake with flowers.

Voila, that’s it!

See, I told you it was super simple to decorate a cake with flowers!

Usually the hard part for me is deciding on the design. Sometimes I have an idea in mind, like for this one, I wanted to do a rainbow theme so I went out looking for specific colors.

Other times, I have no idea and just buy what looks nice in the store and figure it out when I get home.

A lemon poppyseed cake on plates after demonstrating how to decorate a cake with flowers.

If you are looking for an easy cake to practice this on, my one bowl vanilla cake is a great one to try.

Or if you are struggling with how to make your cakes look more professional, be sure to read this post first for 10 tips on that and then start decorating away!

I would love to see any of your flowers on cake creations! Tag or send me your pics on Instagram!

Happy flowers on cake decorating, friends!

A white cake on a brown cake stand decorated with a rainbow of fresh flowers demonstrating how to decorate a cake with flowers

More tutorials to try:

  • How to Make a Pull Apart Cupcake Cake
  • How to Build an Epic Cheeseboard
  • How to Create a Cookie Gift Box

Need more cake recipes?

  • One Bowl Chocolate Cake with Chocolate Buttercream
  • Easy and Chocolatey Red Velvet Cake
  • Giant S’mores Cookie Cake
  • Unicorn Cake
  • Orange Cardamom Cake with Rose Buttercream
A white cake on a brown cake stand decorated with a rainbow of fresh flowers
Print
5 from 1 vote

How to decorate a cake with flowers

Learn everything you need to know about how to decorate a cake with flowers for weddings, birthdays and more!
Prep Time30 mins
Active Time30 mins
Total Time1 hr
Course: Cake
Cuisine: American
Keyword: decorating a cake with flowers, flower cake, how to decorate a cake
Yield: 1 cake
Author: Sam Adler
Cost: $10

Equipment

  • a sink
  • scissors
  • plastic wrap
  • Paper or kitchen towels

Materials

  • 1 Frosted Cake
  • Flowers of your choice

Instructions

  • Choose the flowers you want to decorate the cake with. Pesticide free and edible flowers are best.
  • Cut the stems of the flowers to as short as you think you need them for the cake.
  • Wash the entire flower from stem to petals, then dry well on a towel.
  • When the flowers are dry you can wrap the stems or bottoms in plastic wrap and then stick them on the cake. If using edible flowers you don't need the plastic wrap. Alternatively you can place plastic wrap on the cake and then place the flowers on top making sure to cover up all the plastic area so it's not visible.
  • Start decorating the cake!

Notes

DO NOT place the flowers you want to use on your cake in a vase with flower food. That is poisonous! Just use fresh water instead.
Decorate as close as possible to the event for the flowers to look their best. Keep the cake in the fridge to keep the flowers looking crisp.

I love when you share my recipes!!

3871 shares

Filed Under: Decorating Tutorials Tagged With: Lemon

About Sam Adler

Sam Adler is a Le Cordon Bleu professionally trained pastry chef, Saveur Blog Award winner, food photographer, and food blogger over on FrostingandFettuccine.com. She has been featured in numerous online and in-print publications including Taste of Home Magazine, Saveur Magazine, The Feed Feed, and Food Blogger Pro. Sam lives in Hollywood florida with her husband, two young kids, and french bulldog. When she’s not baking and dancing in her kitchen you can find her at her favorite yoga spot.

Reader Interactions

Comments

  1. Sandy says

    August 19, 2018 at 11:56 am

    Super impressive post my friend! Love it!

    Reply
    • Sam says

      August 19, 2018 at 4:39 pm

      Thank you so much Sandy!! So much love!

      Reply
  2. Sandy says

    August 19, 2018 at 11:58 am

    Ugh typo!

    Reply
  3. Debby says

    August 19, 2018 at 12:30 pm

    Stunnnnnning!!!! These pictures are to die for!!!!

    Reply
    • Sam says

      August 19, 2018 at 4:38 pm

      Thank you so much Debby!!!

      Reply
  4. jaye says

    August 19, 2018 at 1:20 pm

    thanks for the tips! this was very informative; now i NEED flowers AND cake!

    Reply
    • Sam says

      August 19, 2018 at 4:38 pm

      Of course Jaye!! YES!! always cake and flowers!!

      Reply
  5. Lauren says

    August 22, 2018 at 7:57 pm

    This is such an awesome post. I’ve always wanted to try decorating with flowers. For your cake did you stick the flowers in the cake or lay them on top?

    Reply
    • Sam says

      August 26, 2018 at 9:39 pm

      Thank you so much! I used both methods. The roses and pink flowers were stuck in and all the others were laid flat! Let me know how it works if you try it!

      Reply
  6. sue | the view from great island says

    September 26, 2018 at 12:21 am

    This is such a fun post, now I need to take a walk around the block with a pair of shears 😉

    Reply
    • Sam says

      October 02, 2018 at 10:23 pm

      Yay! Thanks Sue, would love to go on that walk with you!

      Reply
  7. Lewis Johnson says

    January 30, 2019 at 3:31 pm

    Those cakes are gorgeous.

    Reply
    • Sam says

      January 30, 2019 at 5:18 pm

      Thank you so so much!

      Reply
  8. Arleen says

    February 27, 2019 at 8:51 am

    You have inspired me to try fresh flowers on my next cake for my literary club social! Thanks!

    Reply
    • Sam says

      February 28, 2019 at 4:45 pm

      Ahhh! I’m so happy to hear that Arleen! I’m sure it will be gorgeous!

      Reply
  9. Eshara says

    January 31, 2022 at 3:38 am

    I’m gonna try this tomorrow for my mom’s birthday! She seems to not enjoy too many frosting anymore so this would be delightful option! THANK YOU SO MUCH!

    Reply
    • Sam Adler says

      January 31, 2022 at 11:25 am

      So welcome! Please let me know how it turns out!!

      Reply
  10. Lewis says

    July 12, 2022 at 6:21 am

    Awseome

    https://seattleprofessionalmovers.com/

    Reply
    • Sam Adler says

      July 13, 2022 at 9:33 am

      Thank you!

      Reply

Leave a comment & rate this recipe Cancel reply

Do you love this recipe? If so, I would be so grateful if you left a star rating with your comment! Star ratings help other people find my recipes so they can make them too. Thank you for your support!

XO, Sam

Recipe Rating


Primary Sidebar

Search

Hi! Im Sam Adler,

I'm a professionally trained pastry chef and food photographer.
This is a place where you will find easy yet impressive looking desserts. I also share a ton of food photography resources too! What can I say, I love pretty & delicious baked goods! Learn more about me!

As Featured In:

Logo images of media places Sam Adler has been featured in
Saveur Blog award winner for best food Instagram

samadlerphotography

👋🏻 2022! Will be celebrating this year on th 👋🏻 2022! Will be celebrating this year on the couch with this in my lap. No sharing allowed! Those 3 spoons are all mine 😂😂 

🍾🥂HAPPY NEW YEAR 🍾🥂
.
.
.
#newyearseve #2023goals #cookieskillet #skilletcookie #giantchocolatechipcookie #chocolatechipcookies #chocolatechipcookie #cookiephotography #foodphotographyandstyling #foodstylingandphotography #foodphotographer #foodstylist #foodstylists #castironbaking #castironskillet #castiron @lodgecastiron
Recap of all the cookie boxes!!! This year’s @ta Recap of all the cookie boxes!!! This year’s @taylorswift theme has got to be my fave (see my last reel for the explanation of each cookie!) but I have so much fun every year making these! Which one is your fave?! 

#cookieboxes #cookiebox #cookiegifts #cookiegiftbox #holidaycookies #taylorswift #TaylorSwiftcookies #homemadecookies #customcookies #cookiedecorating #cookiesofinstagram #cookiedesign #cookiephotography #holidaycookiebox #holidaygiftsets #holidaygifts #ediblegifts #swiftie #swiftiesforever #taylornation @taylornation
ARE YOU READY FOR IT?! 2022 Cookie Box is @taylors ARE YOU READY FOR IT?! 2022 Cookie Box is @taylorswift themed!! 
1. “Like a rainbow with all of the colors” sprinkle cookies 
2. “Lover” heart sugar cookies 
3. “Lavender Haze” shortbread (made with lavender and a pearly shimmer powder)
4. “Midnight” cookies AKA my chocolate brownie cookies 
5. “Red lip classic” sugar cookies 
6. More midnight cookies- (dusted with powdered sugar to look like the midnight cloudy sky)
7. “Bejeweled” sugar cookies (Navy bc black fondant was out of stock)
8. @taylorswift famous chai cookies 

Merry Christmas if you’re celebrating and hope you have a happy New Year’s Day!
.
.
.

#cookiebox #taylorswift #taylorswiftcookies #holidaycookiebox #swifties #swiftie #swiftieforever #holidaycookies #cookieseason #cookiedecorating #cookiebox #cookieboxes #taylorswiftlover #taylorswiftlyrics #taylorswiftvideo #sugarcookies #shortbread #browniecookies #christmascookies #christmascookiebox #lavenderhaze
#ad This year for Chanukah we’re switching it up #ad This year for Chanukah we’re switching it up from classic sufganiyot to make these fun donut fries! Puffy, golden, and delicious, dip your “fries” into melted chocolate or raspberry jelly and celebrate all week long! @aldiusa makes it super easy with their amazing selection of high quality products at seriously unimaginable prices. Run to your nearest @aldiusa to find all the ingredients you need to make these and have a Happy Chanukah!
Find the recipe below!

#ALDILove
Prep time: 1 hr 45 mins
Cook time: 1 min
Yield: 40 donut fries
2 pack Baker’s Corner Active Dry Yeast
1 1/2 cup warm water
1/3 cup Sugar
2 Simply Nature Grade A Organic Cage Free Brown Eggs
2 tbsp Stonemill Pure Vanilla Extract
1/3 cup Carlini Pure Vegetable Oil
5-6 cups Baker’s Corner All Purpose Flour
1 tsp Kosher salt
½ cup Baker’s Corner Powdered Sugar
For Dipping:
1 cup Baker’s Corner Dark or Milk Chocolate Morsels
Simply Nature Organic Raspberry Preserves
Method:
•Mix the yeast with water in a mixer bowl and let stand for 10 mins until frothy. Add the
sugar, eggs, vanilla, and oil to the bowl and mix until well combined.
•Start adding only 5 cups of flour and salt, and knead/mix on medium speed in a stand mixer
fitted with the dough attachment for 5 minutes until a soft, non-sticky dough forms. If the
dough seems sticky, add ¼ cup flour to the dough until it no longer sticks to the bowl when
mixing.
•Let the dough rest in the bowl for an hour to double in size. 
•Punch down the dough and remove it from the bowl onto a lightly floured surface. Using a
lightly floured rolling pin, roll it out into a rectangle. About 18”x 15” and 1/2 of an inch in
thickness. 
•Using a pizza cutter, cut in half vertically. Then slice thin strips horizontally. You want them
thin as they will puff up while frying.
•Let the fries rest for another 15 mins. 
•Meanwhile, using a deep fryer or a large pot, heat your oil to 350 degrees F. Fry the donut
fries 30 seconds per side, then drain on a paper towel.
•Dust the donut fries with powdered sugar and set aside.
•Microwave 1 cup of dark or milk chocolate for 30 seconds at a time until melted. Scoop
jelly into another bowl. Dip the fries in the chocolate or jelly!
Happy birthday @taylorswift 👸🏼 hope it feels Happy birthday @taylorswift 👸🏼 hope it feels like a perfect night and you’re not weepin in a party bathroom. IYKYK
.
.
Also here’s to wishing me getting those tix!
.
.
.
#swiftie #swifties #happybirthday #taylorswift #taylorswifttickets #birthdaycake #birthdaycakes #birthdaycandles #caramelcake #carameldripcake #caramelbirthdaycake #cakephotography #cakephotography📷 #cakedecorating #cakedesign #cakesofinstagram #cakepic #cakepictures
I sure do like these gingersnap cookies babe 😂 I sure do like these gingersnap cookies babe 😂 

.
.
.
#gingersnaps #gingersnapcookies #gingersnap #christmascookies #christmascookie #holidaycookies #holidaycookie #cookierecipes #tinyhands #holidaybaking #cookieseason  #cookiesofinstagram #cookiegram #cookielover
Load more please Follow me on Instagram!

Categories

Archives

Footer

↑ back to top

About

  • About
  • Web Stories
  • Privacy Policy

Disclosure

As an Amazon Associate I earn from qualifying purchases.

Disclosure Policy

Contact

  • Contact
  • Work with me

Copyright © 2023 Samantha Adler | Frosting & Fettuccine | Support by Foodie Digital

3871 shares