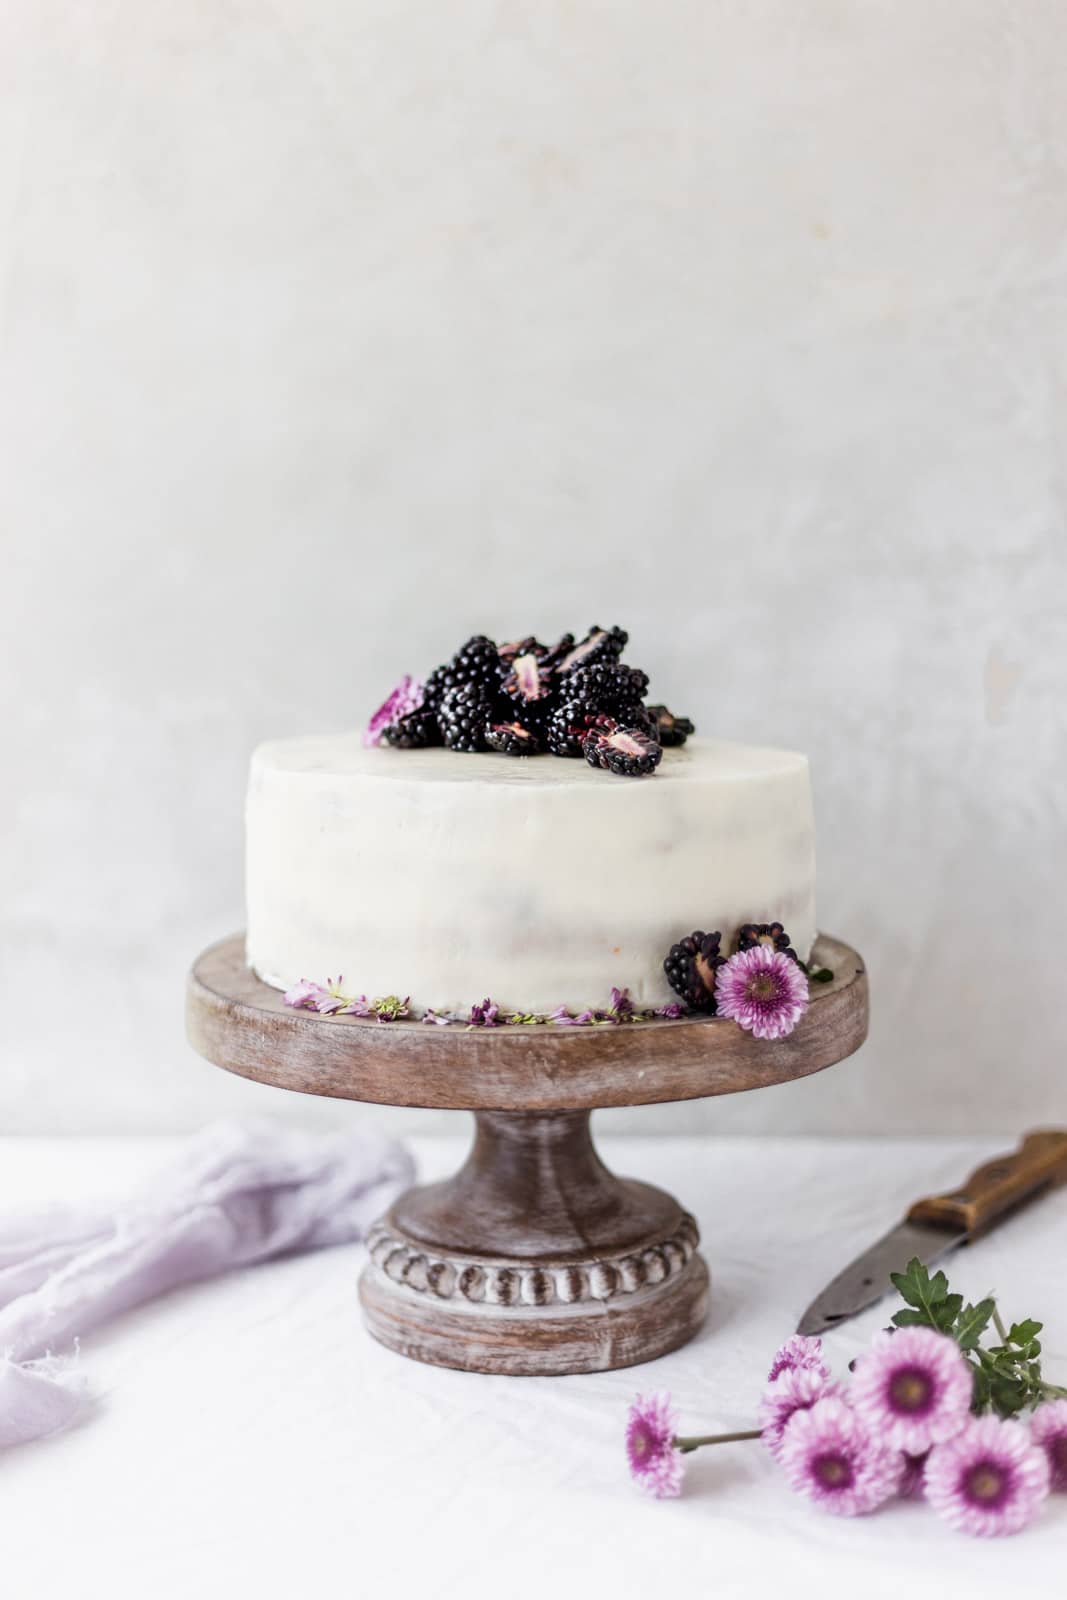
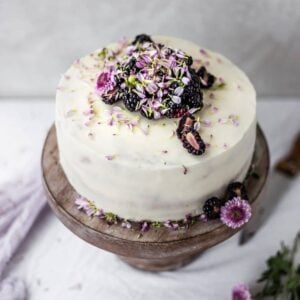
Easy and Moist Blackberry Cake
This blackberry cake is super fluffy and filled with a delicious white chocolate buttercream. It’s the perfect cake to make if you have a ton of blackberries and have no idea what to do with them! The fluffy layers of cake are studded with blackberries making this a delicious cake to bring to a spring or summer party!
This is my newest favorite flavor combo. As a trained pastry chef, I have made a lot of cakes and played with a ton of flavors.
Honestly I think that both of these ingredients (blackberries, and white chocolate!) are highly underrated in the baking world. But when you put them together- Bam! It’s like magic.
The tartness from the blackberries balances so well with the sweetness of the white chocolate- a total match made in heaven! This cake is topped with a decadent white chocolate buttercream frosting and is perfect for spring or summer!
The cake layers are light and fluffy but hold well as a layer cake. If you want to switch it up you can use my ultimate cream cheese frosting, or even this orange buttercream frosting to fill and frost the cake. I just know it would be a huge hit wherever it is served!!
These are the ingredients you need
- unsalted butter
- granulated sugar
- eggs
- all purpose flour
- baking powder
- baking soda
- kosher salt
- whole milk yogurt
- orange juice
- fresh or frozen blackberries
How to make a blackberry cake
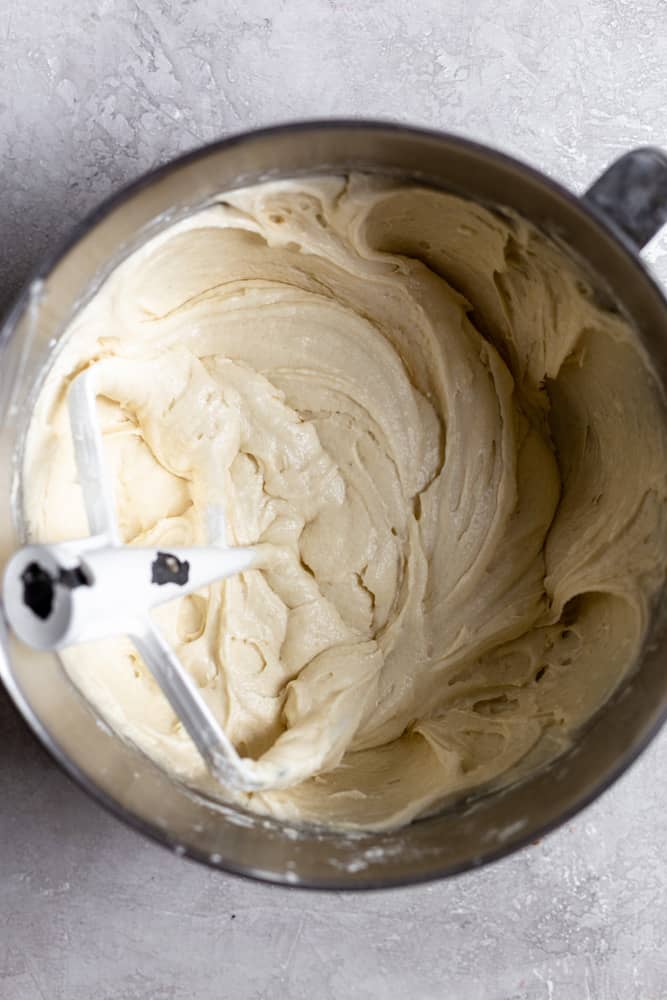
Making this cake is easy because your stand or hand mixer will do all the work!
- Step 1: Cream the butter and sugar, until a smooth paste forms.
- Step 2: Add the eggs.
- Step 3: Separate the dry ingredients from the rest of the wet ingredients.
- Step 4 : Alternate adding the dry ingredients with the wet ingredients, starting and ending with the dry.
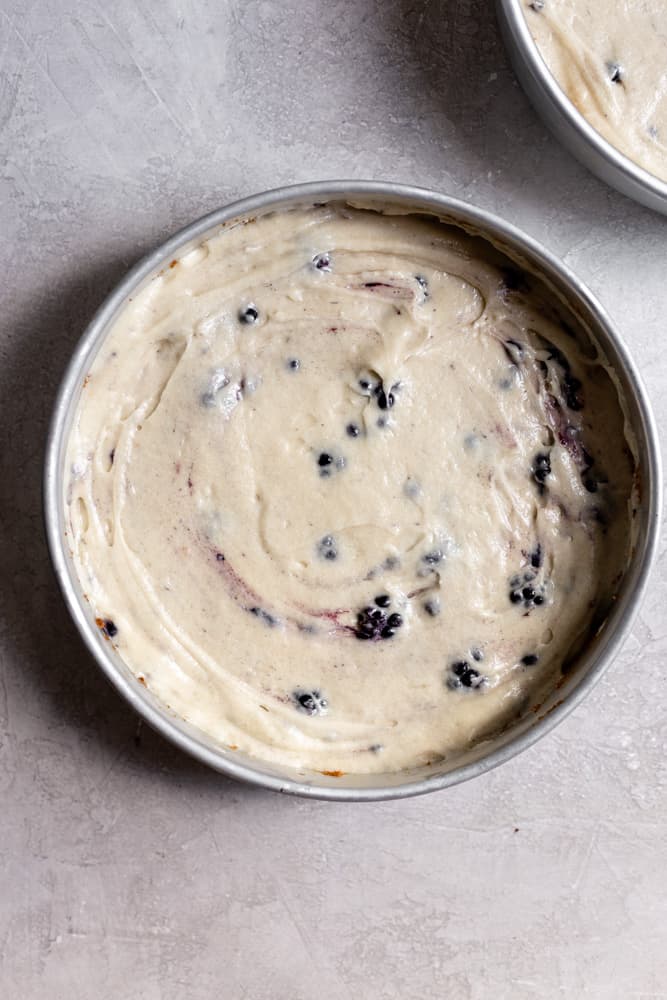
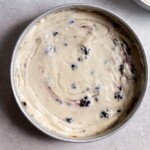
- Step 5: Dust the blackberries with flour and add to the batter.
- Step 6: Bake!
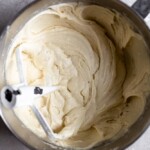
- This is what the batter will look like when it’s mixed correctly:
Mixing method
There is a method to this baking madness and a reason why you can’t just dump all your ingredients into a bowl.
The reason for switching off like that is because you are using a cake mixing method called the creaming method.
The creaming method starts with creaming the butter and sugar together until fluffy.
This ensures that the butter incorporates a lot of air, which will in turn make your cake light and fluffy.
You have to switch off adding the dry and the wet ingredients because the flour needs to absorb the moisture from the wet ingredients. It won’t be able to do that if you just dump it all in at the same time.
Also, in order for your blackberries not to sink to the bottom of the cake, you need to dust them with a little bit of flour first.
Just place the blackberries in a small bowl and dust them with flour. Now add them to the cake batter and mix slowly with a spatula so they don’t get broken up.
Prepare the cake pans
I always suggest heavily lining your cake pans with a thick layer of baking spray. Preferably one that has flour added to it like Baker’s joy.
You can alternatively cut out parchment paper girls that are the same size as your pan and line them like that.
Make sure to avoid a situation where you can’t get the cake out of the pan.
These wilton cake pans are my favorite! You can either bake this recipe in 2 8″ cake pans or 3 6″ cake pans.
How to bake
Bake at 350° F for 30- 35 minutes for 8 inch pans and 28- 30 mins for 6″ pans.
Cakes are always done when the edges start to pull away from the cake pan. Or, if you insert a toothpick in the middle and it comes out clean.

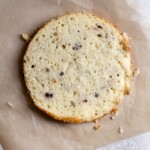
I level off my cake layers so they have flat tops and stack nicely. This also makes it easier to fill and frost.
Take a long serrated knife and steadily cut off the top. It doesn’t have to be perfect!
How to make the white chocolate buttercream:
To make the buttercream you will need your stand or hand mixer. Wash it out if you used it to make the cake!
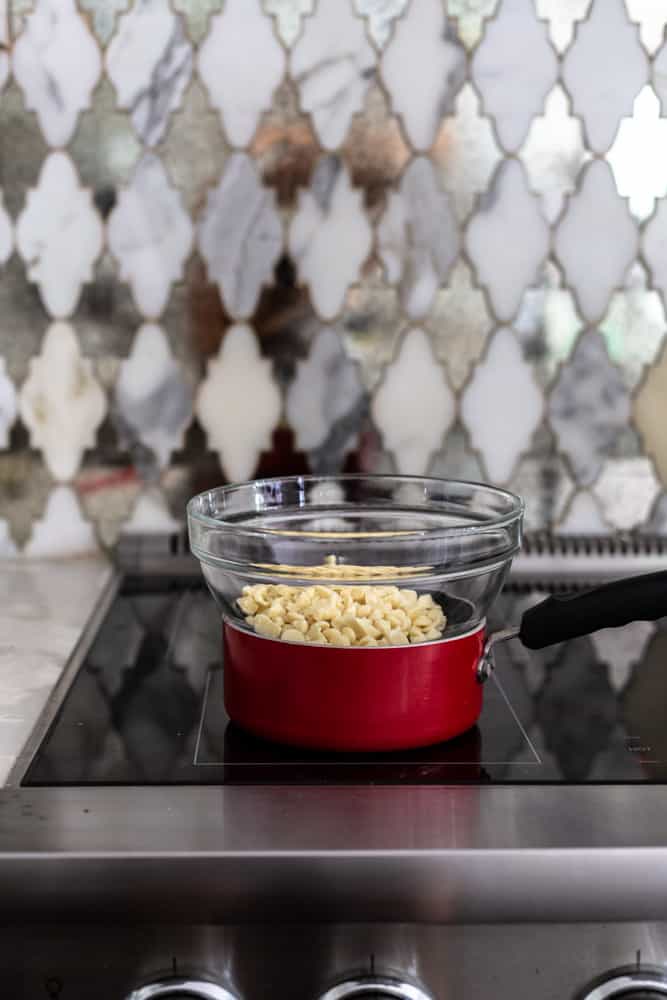
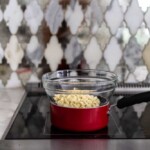
First melt the white chocolate either in the microwave or over a double boiler.
White chocolate has the tendency to seize up so be careful when melting. Either microwave it for 30 seconds at a time, stirring in between. Or use a double boiler.
A double boiler is a small pot with an inch of water simmering over the stove with a bowl sitting on top of it.
Place the chocolate in the bowl. The steam from the water will melt the chocolate. Stir the chocolate until it melts, then set it aside to cool.
Tips on using a double boiler:
- Make sure the bowl is big enough to sit on top of the pot without hitting the water underneath.
- You only need a small amount of water to make steam. An inch is perfect
- Do not let any water get into the chocolate or the chocolate will harden and seize up!
- Let it cool for 5 minutes before making the buttercream
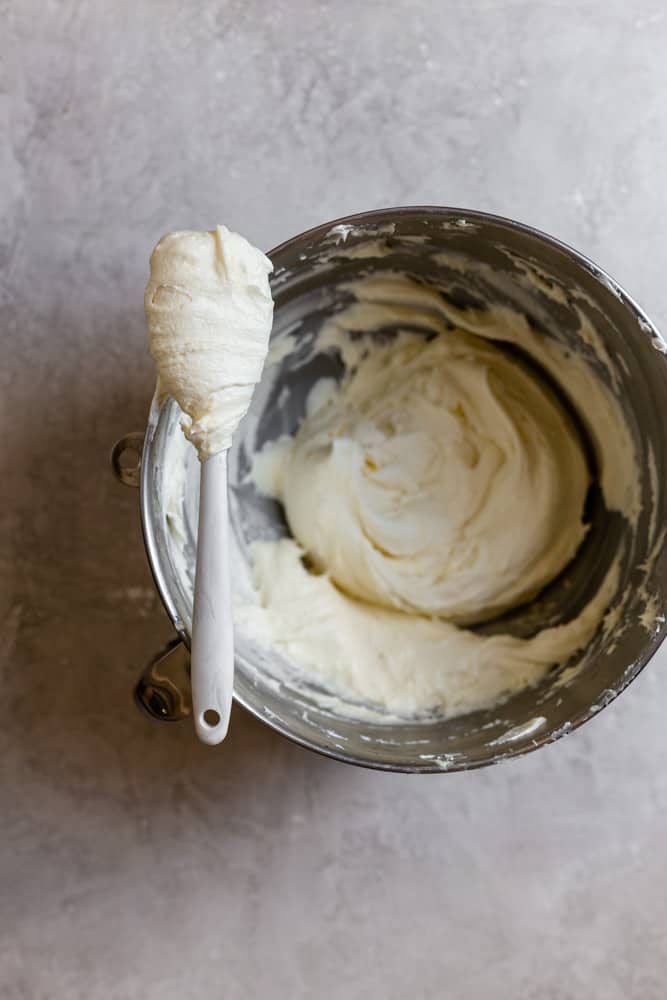
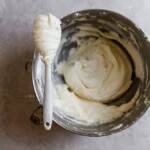
With the chocolate cooling, now add the softened butter and confectioners sugar to the bowl of a mixer.
Whip starting on low speed then moving up higher to combine. Slowly pour in the cooled melted chocolate, and the cream.
Mix until combined and scrape down the sides as needed.
Frosting the cake:
This buttercream recipe will make enough to fill and frost 2, 8″ cake layers or 3 6″ cake layers.
If your’e not sure how to fill and frost you can learn how to decorate your cakes like a pro!
It’s not as hard as you might think!

A few more tips on making this cake:
- You can freeze it! Make sure you wrap it tightly in plastic wrap, and you can freeze it for up to 2 months. Defrost on the counter.
- Try making this into a bundt cake– just bake for 15 minutes longer and make sure you spray the pan really well. My favorite baking spray is Baker’s Joy.
- Add some lemon zest to the batter for a nice zing!
- Learn how to frost and decorate this cake– check out this post on how to decorate your cakes or this post on how to decorate your cakes with flowers.
Easy and Moist Blackberry Cake
Ingredients
For the cake
- 1 cup unsalted butter, softened
- 2 cups granulated sugar
- 3 eggs, large
- 2 1/2 cups all purpose flour
- 1 tsp baking powder
- 1/2 tsp baking soda
- 1/2 tsp kosher salt
- 1 cup yogurt, whole milk
- 1/4 cup orange juice
- 6 ounces blackberries, fresh or frozen
- 2 tbsp all purpose flour, for dusting blackberries
For the White Chocolate Buttercream
- 1 cup white chocolate chips , melted, about 6 oz
- 1 cup unsalted butter, softened
- 3 cups confectioners sugar
- 1 tsp cream
Instructions
- Preheat the oven to 350° F and spray 2 9” baking pans with baking spray or line with parchment paper.
- In the bowl of a stand mixer fitted with the paddle attachment, cream the butter and sugar on medium speed for 1 minute until fluffy and pale yellow in color.
- Add in the eggs one at a time, stopping the mixer before each addition. You may have to scrape down the sides-stop the mixer.
- In a medium size bowl combine the flour, baking powder, baking soda and salt.
- In a large mixing cup or a small bowl, combine the yogurt and juice.
 Add in ⅓ of the flour mixture, and mix on low until incorporated into the mix. Then add in ½ of the yogurt and juice mixture (while still on low). Then another ⅓ of the flour, the last of the juice, and the last of the flour mixture. Stopping to scrape down the sides as needed.
- Toss the blackberries with 2 tablespoons of flour so they don’t sink to the bottom of your cake, and CAREFULLY mix them slowly into the batter. You don’t want to break them up so be careful with mixing.
- Pour the batter evenly into the two baking pans and bake for 30-35 minutes until the edges of the cake are golden brown and break away from the pan- or when the top of the cake feels firm and not jiggly.
For the White Chocolate Buttercream
- In the bowl of a stand mixer fitted with the paddle attachment, cream the butter and confectioners sugar on medium speed until fluffy.
- Add in the cooled, melted white chocolate and mix again on medium speed moving up to high for 30 seconds.
- Stop the mixer, scrape down the sides, and add in the half n half. Continue mixing on medium speed until light and fluffy. If you want it thinner, add in another ½ teaspoon half n half until the consistency is where you want it.

Can I use egg whites instead of whole eggs? If yes, how many?
Hi Janice! I don’t recommend skipping out on the egg yolk as they help give the cake structure 🙂
Can you store white chocolate buttercream to reuse?
Hi! I havent tried it but if you want to you can store it at room temp for 5 days.
Hi! If I wanted to use 2 8inch round pans how would I adjust the ingredients?
Hey Samantha! You dont have to adjust the recipe at all, it may take a few more minutes to bake so just check on it 🙂
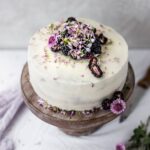
What flower petals did you use to decorate this one? Are they edible?
Hi Heather, I dont remember the names of these but you can get edible flowers at whole foods! Also I have a whole post on how to decorate a cake with flowers too.
Hello,
Can I use blueberries instead. If so do I need to modify anything?
Thanks,
Totally! No modifying needed!
This turned out incredibly. I added some orange zest to my buttercream for a little brightness.
What a great idea! Thank you so much for letting me know Brianna, so glad you loved it!
Delicious!
I’m so glad you tried it Vivian! Thank you so much for your kind words and review!
Loved this; great taste, easy, moist. Made as Bundt cake. Cut frosting in half, added vanilla. I added more blackberries as they are a big fruit. Blueberries & Cranberries would taste good too, I believe! Thanks for sharing.
Such great ideas! Thanks for letting me know Ann! So glad you loved this recipe!
Do you mash/slice/process the blackberries in any way before adding to the cake?
Depends on how big they are. If they are smaller then I leave them alone but if they are large then I cut them in half.