• Skip to primary navigation
  • Skip to main content
  • Skip to primary sidebar
  • Recipes
    • Recipe Search
    • Recipe Index
    • Bars & Brownies
    • Breakfast
    • Cakes
    • Cookies
    • Cupcakes
    • Frosting
    • Fruit Desserts
    • Muffins
    • One Bowl Desserts
    • Pies & Tarts
  • About Me
  • Food Photography
    • Work with Me
    • Classes and Workshops
  • Shop

Frosting & Fettuccine

Home » Recipes » Cheesecakes

May 9, 2022

Creamy Cherry Cheesecake with Chocolate Crust

5 from 1 vote
BySam Adler
Jump to Recipe Print Recipe

This post might have affiliate links, please check out my full disclosure policy.

This chocolate cherry cheesecake recipe is oh-so delicious. It starts with a chocolate cookie crust, then is filled with a creamy cheesecake filling with plenty of tart red cherries. Then, the whole thing is topped with another layer of chocolate! Talk about a swoon-worthy baked cheesecake. I also divulge my cheesecake water bath hack to avoid cracking!

A slice of chocolate cheesecake with cherries in the middle sitting on two plates. The larger one is pink the smaller one is gray. There is a spoon on the pink plate.

I am so excited to be partnering up again with Oregon Fruit to bring you this crazy creamy cherry cheesecake. As a trained pasty chef, cheesecake is actually one of my favorite things to make! This one is made with a chocolate crust AND topped with more chocolate to make this dessert extra special. 

Making cheesecake doesn’t have to be scary, make sure you read my 5 tips for making perfect homemade cheesecake, this is a total foolproof way of making a cheesecake! If you already love making cheesecake then you should totally try my coffee cheesecake, my mini cheesecake bites, or my cheesecake bar recipe!

Why you will love this recipe

Today we are celebrating National Cherry Month! So what better way to celebrate than to make a delicious cherry dessert.

Secondly, have you ever tried cherries and chocolate together? 

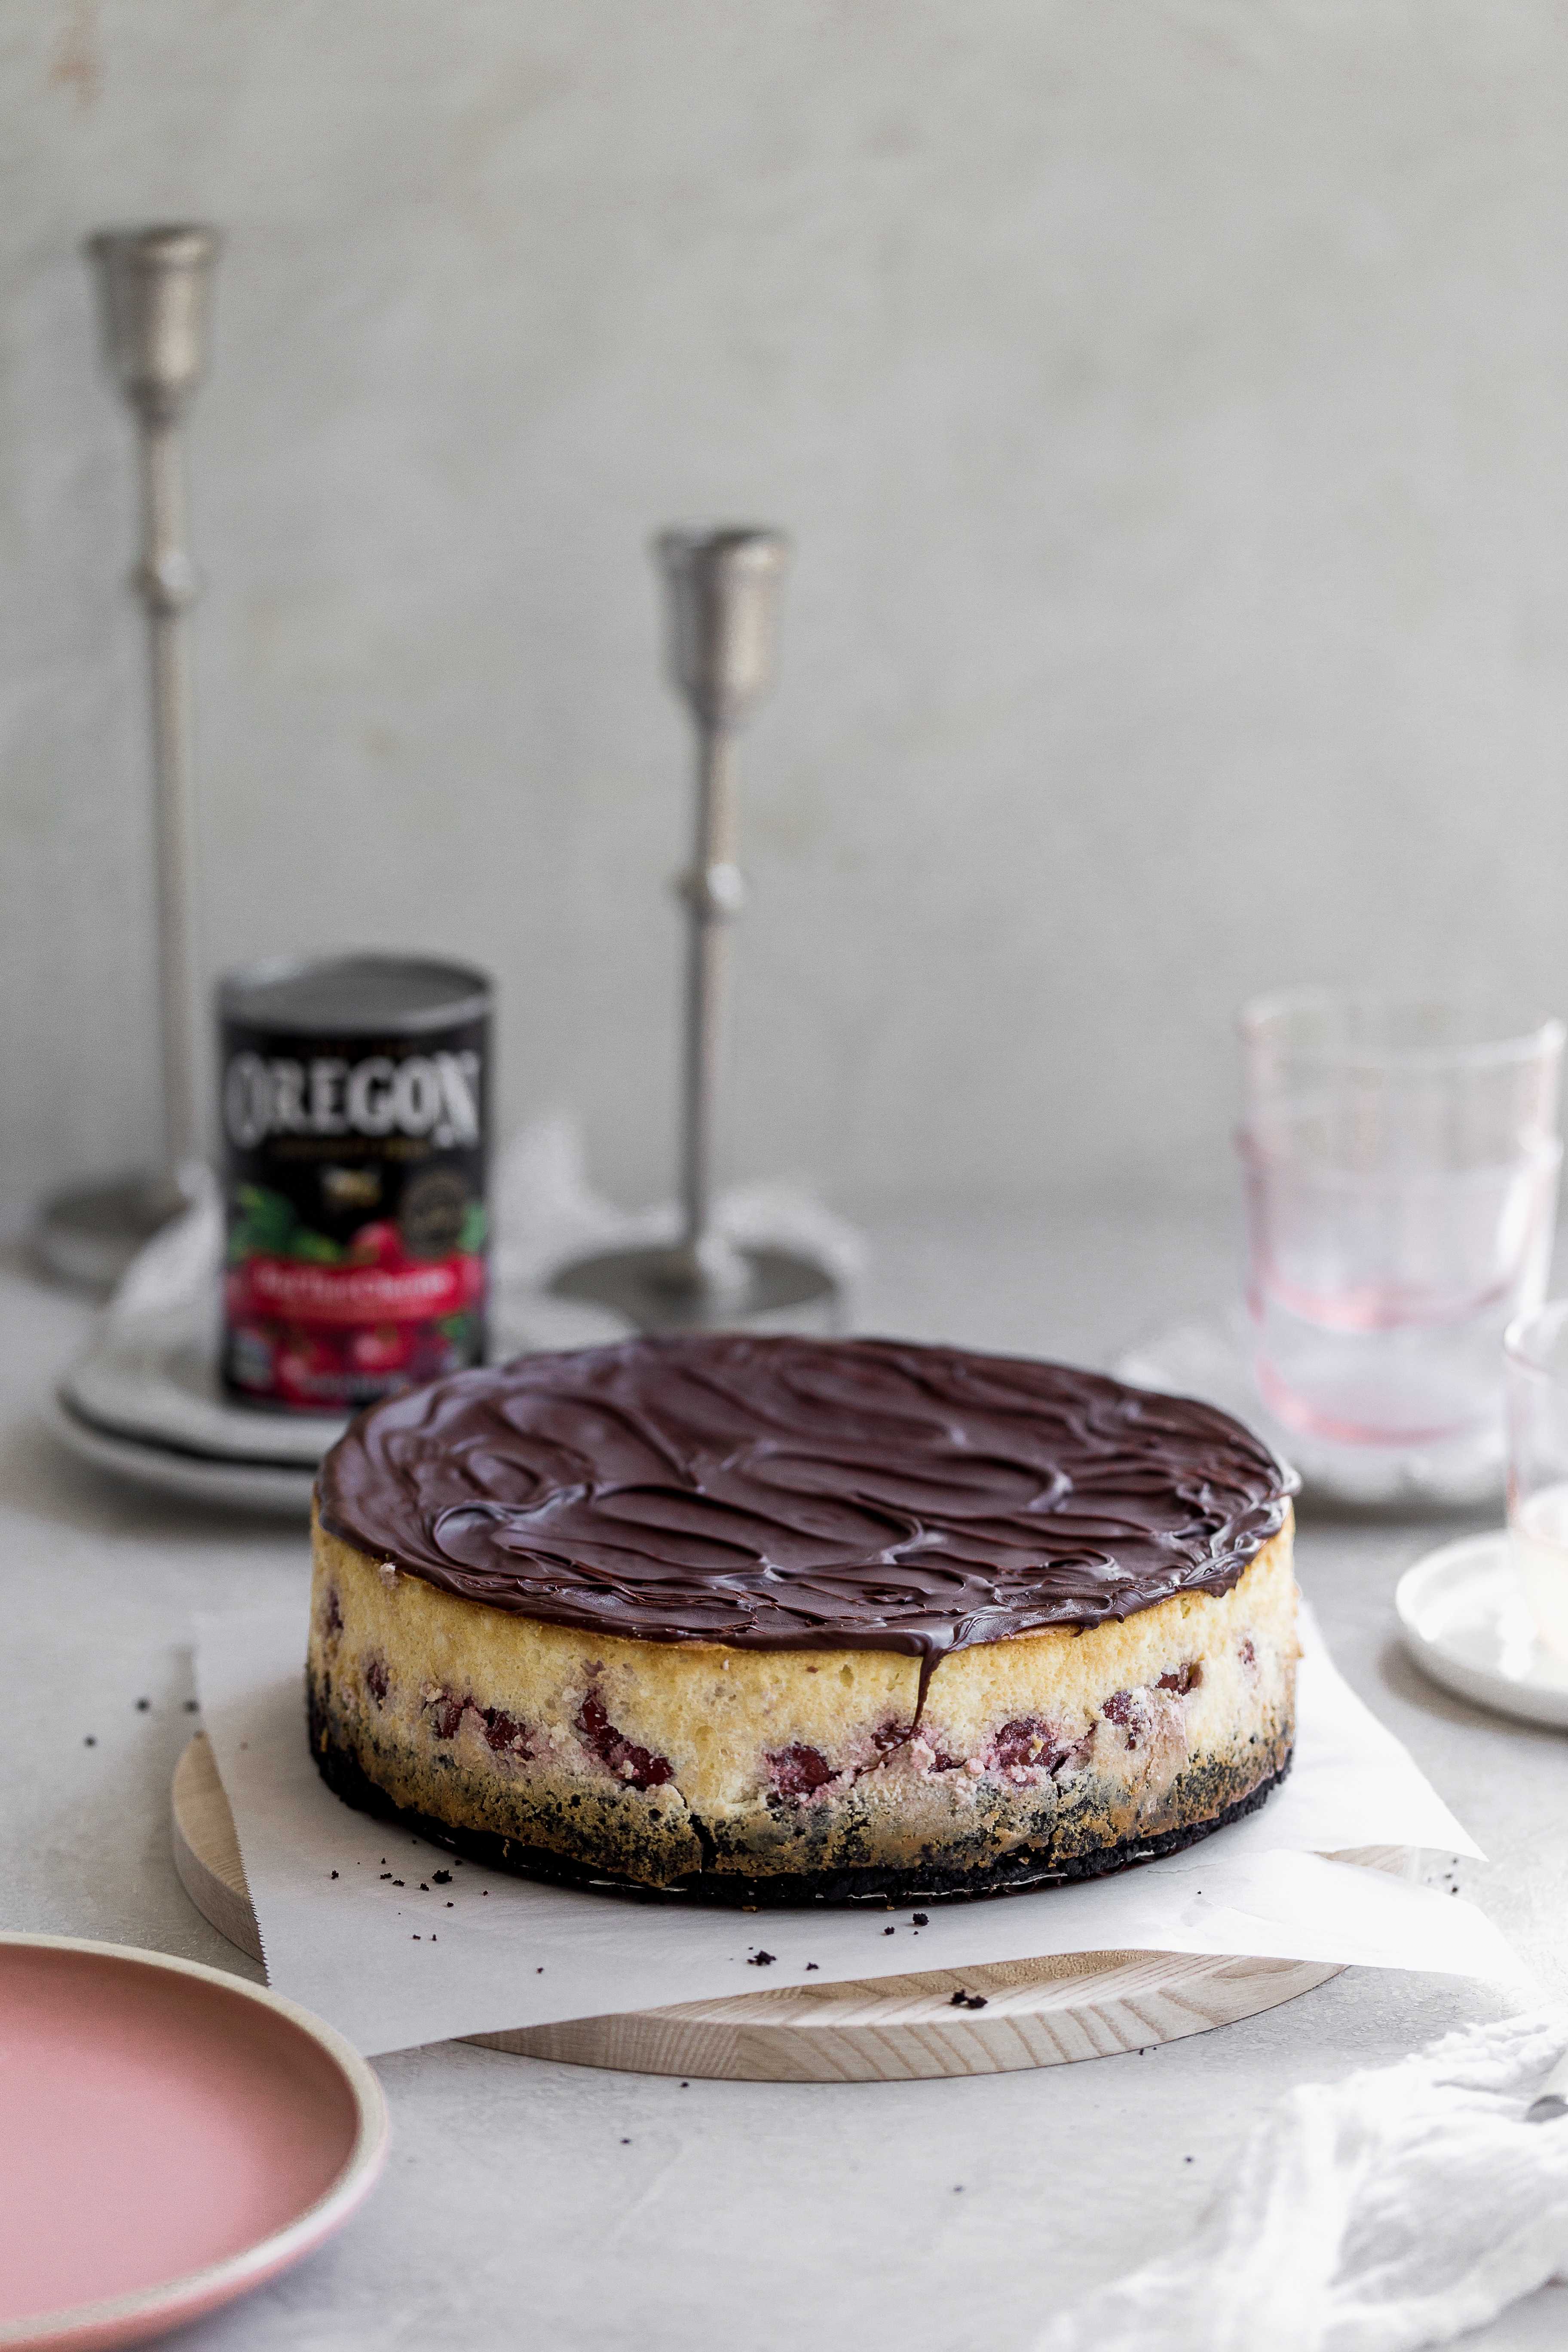
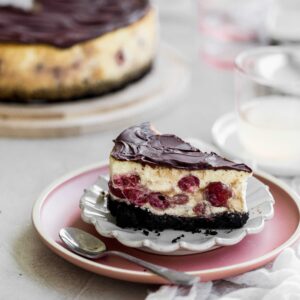
The combination of flavors is extremely deep and rich. The juicy tartness of the cherries pairs so well with decadent, irresistible chocolate. So much so that I sandwiched the cherry cheesecake filling between two different kinds.

The crust is made out of crunchy chocolate cookies and the topping is swirled with a cup of melted semi sweet chocolate. 

Ingredients needed:

  • Chocolate sandwich cookies- the base of the crust
  • Butter- to mix with the cookies to make the crust
  • Oregon Fruit Red Tart Cherries. These are the best for baking!
  • Cream Cheese– I like to buy the block for ease of measuring.
  • Granulated Sugar- for sweetness
  • Sour cream- sour cream adds the tangy flavor to cheesecake
  • Half n Half- to thin it out a little
  • Eggs– to bind the ingredients
  • Flour- Flour helps to bind as well as helps to prevent cracks
  • Chocolate chips- to top the cheesecake

How to make cherry chocolate cheesecake

chocolate cheesecake crust in a springform pan
Make the cookie crust
A smooth no crack cheesecake on a gray background with an can of Oregon fruit red tart cherries on its side.
Bake the cheesecake

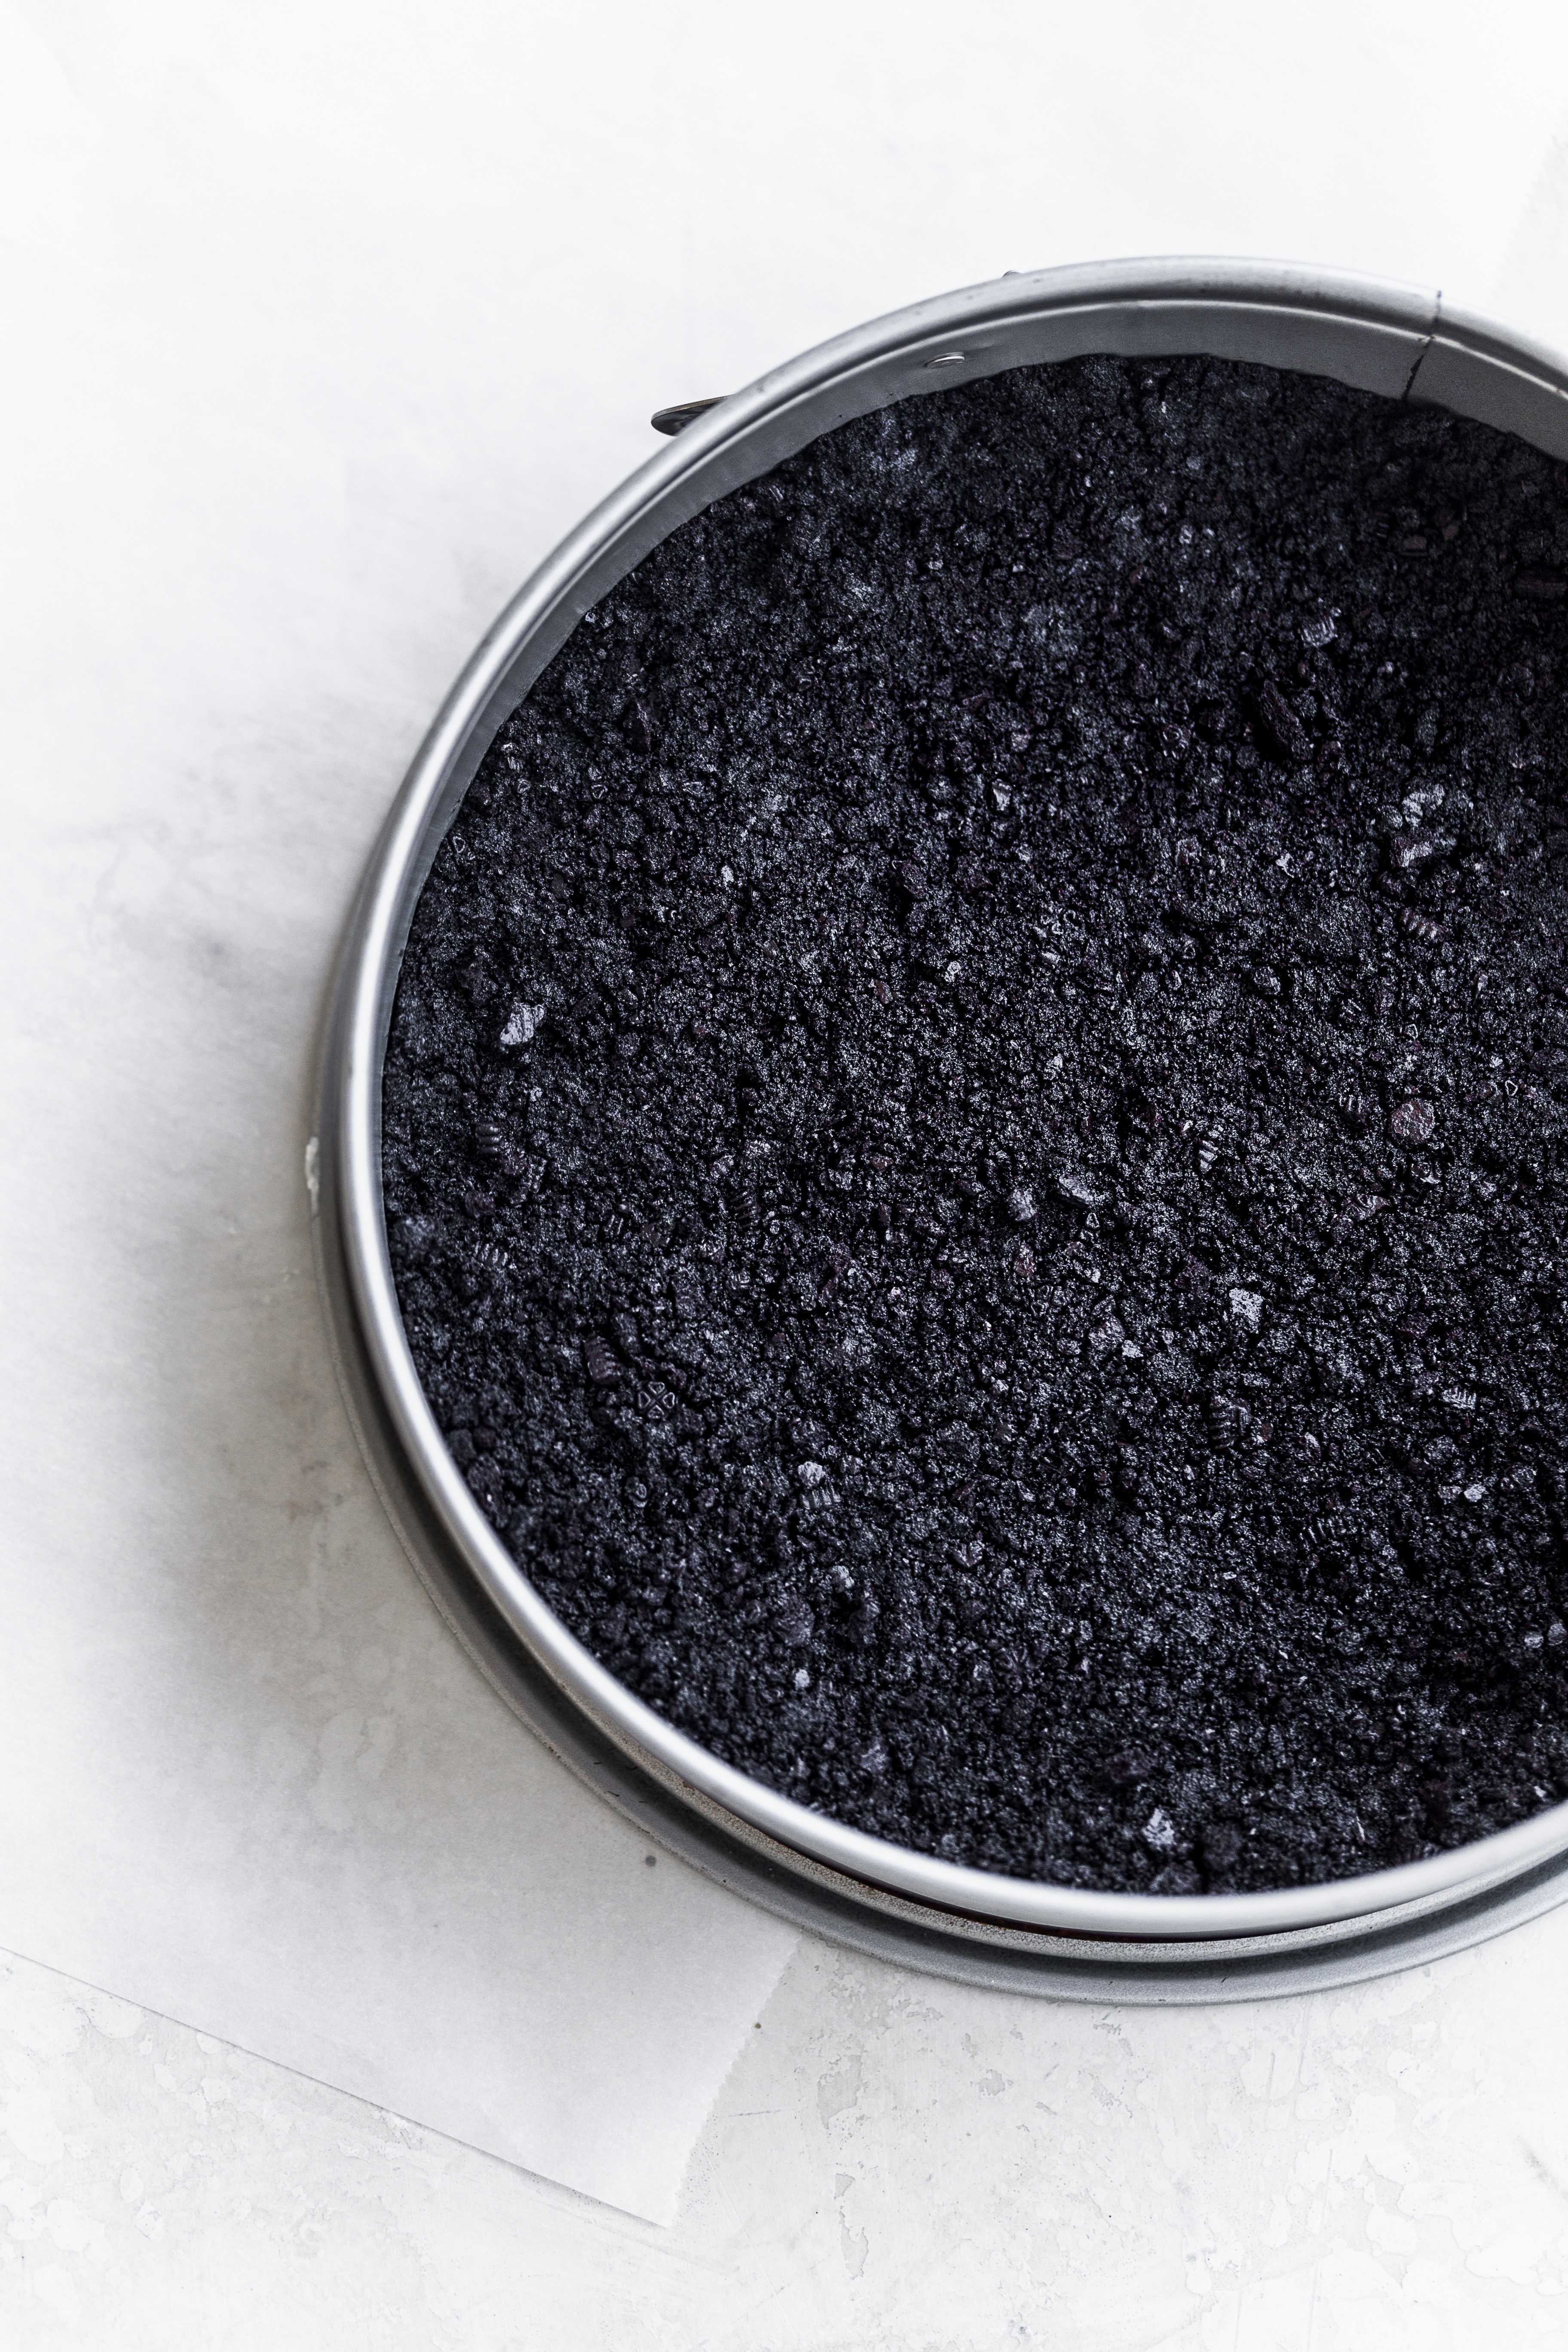
Make the cookie crust:

  • Make the chocolate cookie crust by separating the cookie sandwiches and removing the cream filling. Then smash the cookies with a rolling pin in a plastic bag or pulsing in your food processor. 
  • Pour melted butter over the crushed cookies, press into a springform pan, and bake!  Warning- It will smell so good in about 8 minutes, thats when you know its done.
  • Cool it on the counter while you make the filling.

Make the cream cheese and cherry filling:

  • Combine the cream cheese, sour cream, sugar, and half n half cream in the bowl of a stand or hand mixer. Mix until smooth, then add in the eggs one at time mixing in between each one.
  • Add in the vanilla and flour and keep mixing until it’s mostly smooth, about 1 minute.
  • It’s TOTALLY fine if you have some small lumps, you just don’t want any large ones.

Add the cherries!

  • You’ll need 2 14.5oz cans of Oregon Fruit Red Tart Cherries. Open the cans, drain the cherries, and dry them off as best you can. 
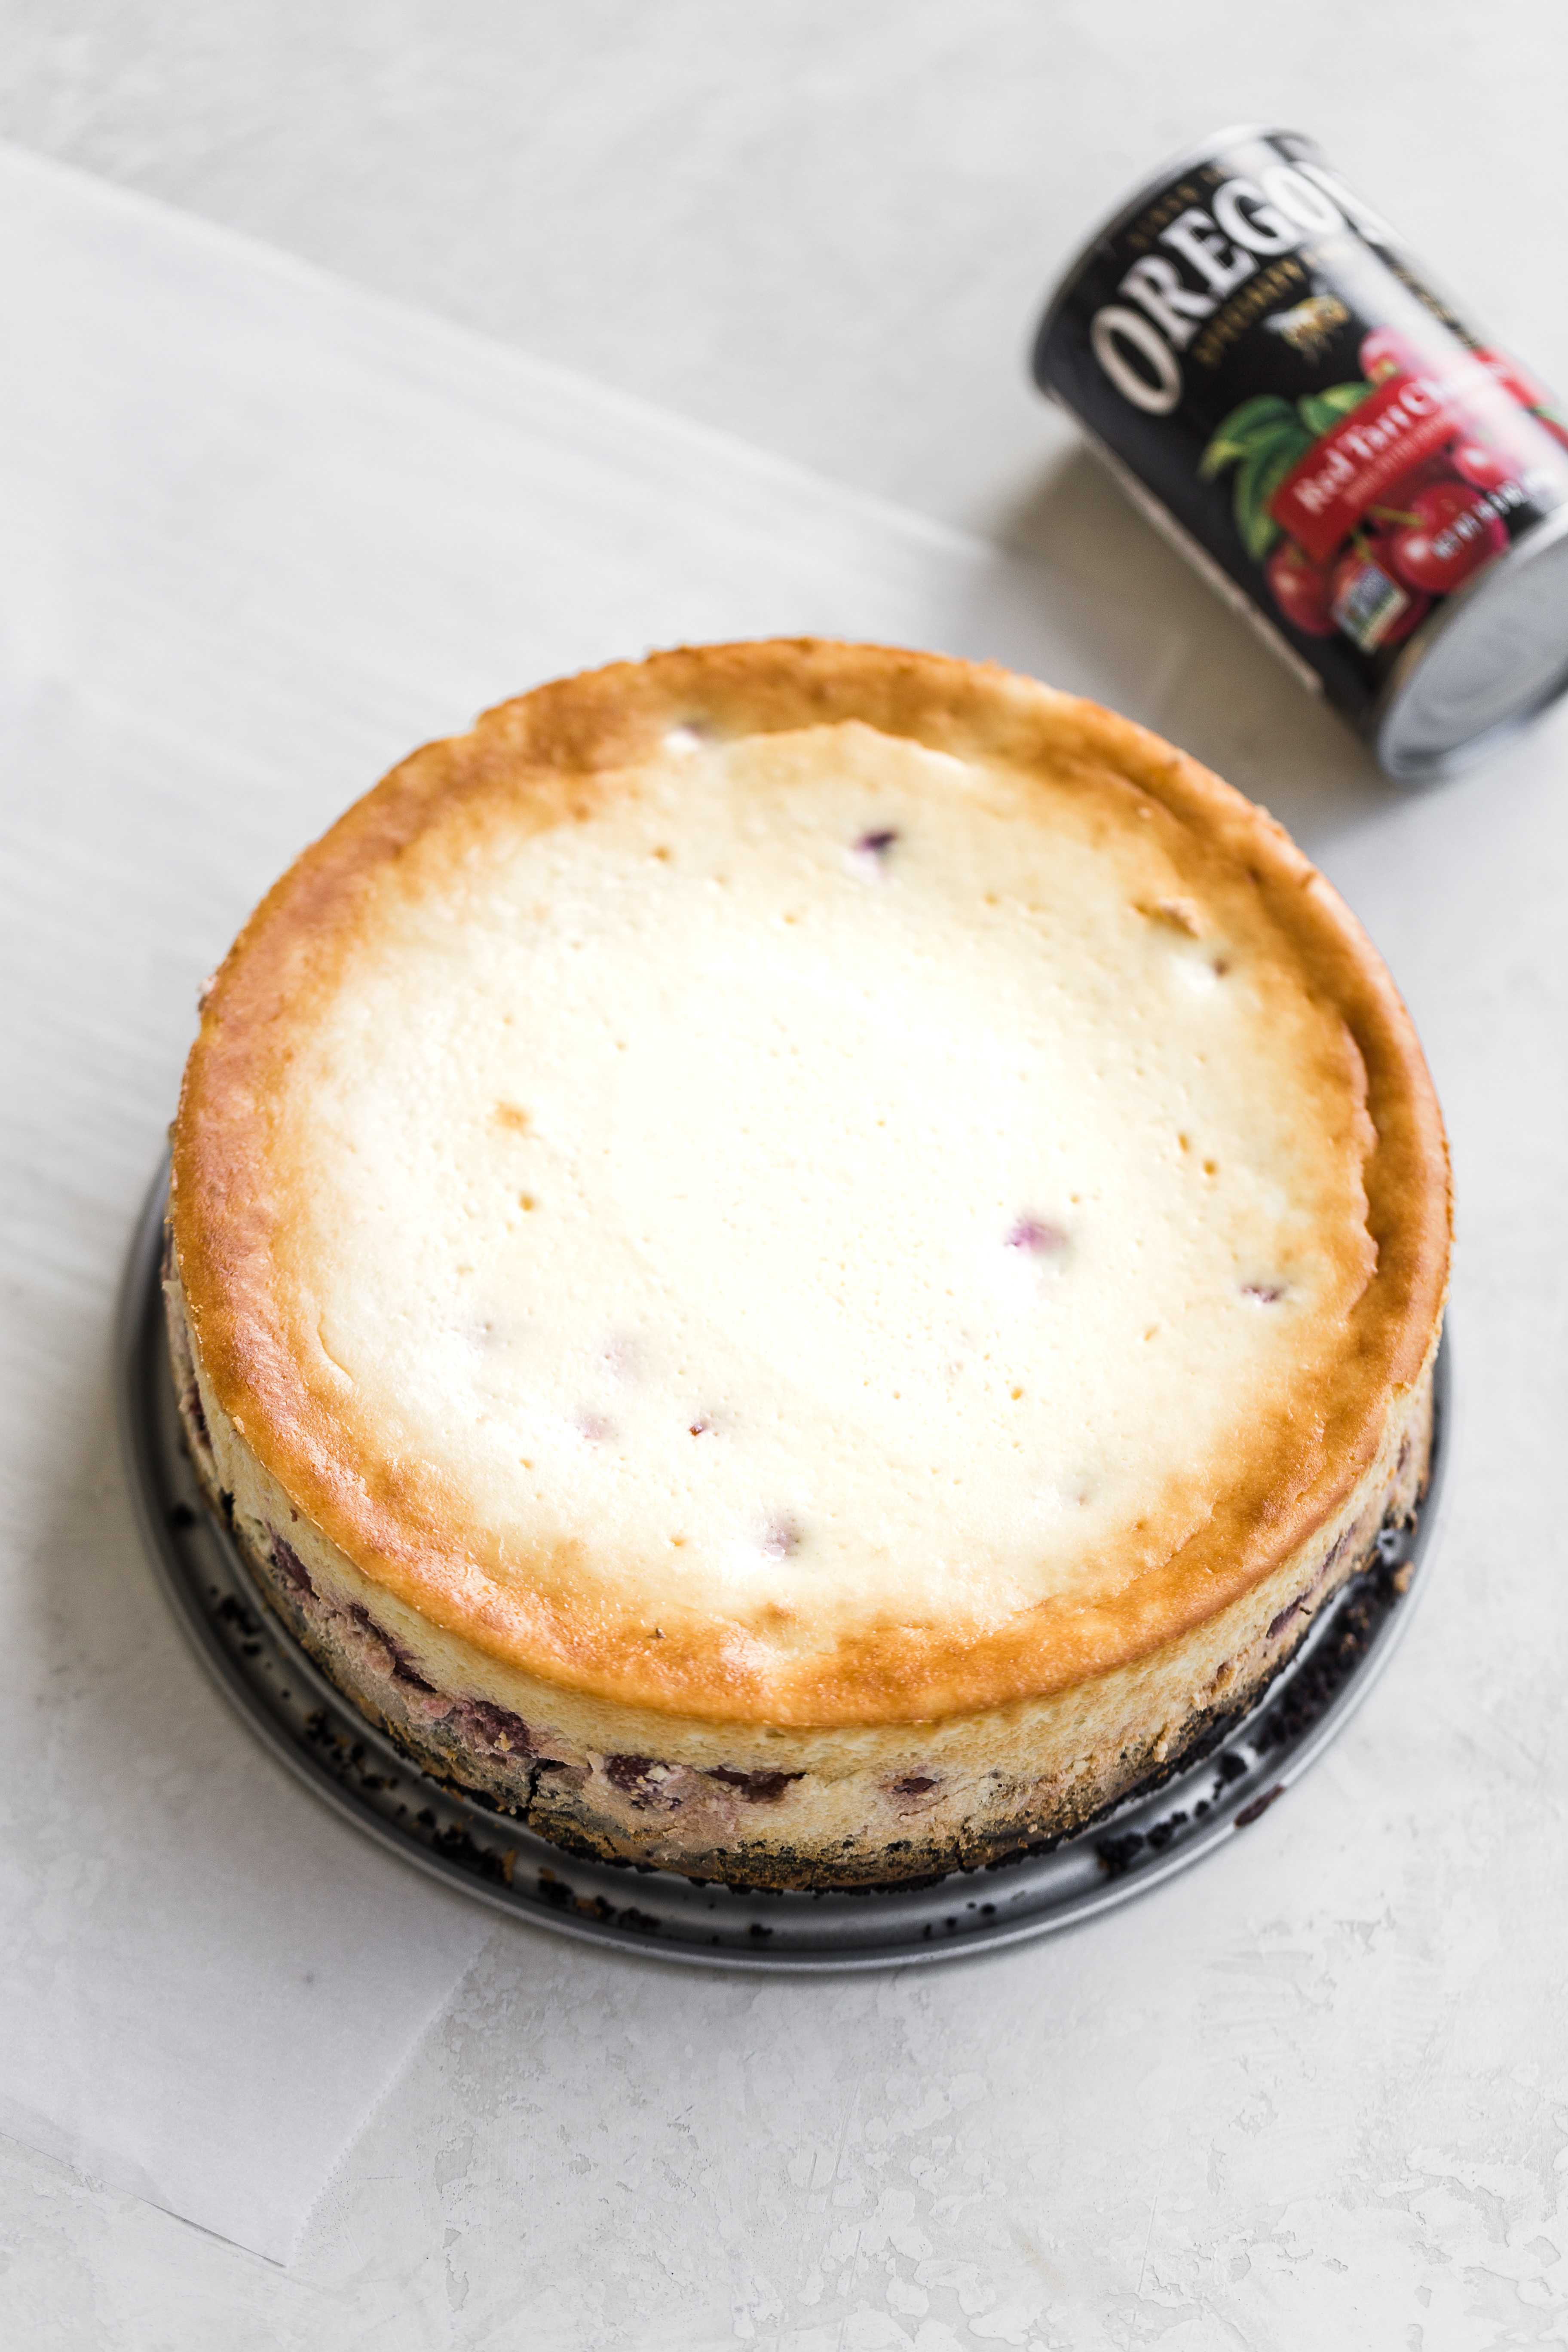
  • Fill 1/2 of the cheesecake batter into the springform pan over the chocolate crust. Pour half of the cherries on top, and then the rest of the cheesecake batter on top of the cherries. 
  • Next, carefully drop the rest of the cherries on top of the batter and poke them down with your finger so they get under the top layer of the batter and you can barely see them. This will ensure you get cherries in every bite!

Bake the cheesecake:

This is something I think a lot of people fear because of all those recipes that tell you to use a water bath.

I am telling you right now if you use my cheesecake water bath hack, you will be making cheesecakes all the time!

Simply place a 9×13” pan with one inch of water on the bottom rack of your oven. Place the cheesecake on the top rack and bake at 350°F for 45- 55 minutes. The cheesecake is done with the edges are slightly golden BUT there is still a little jiggle in the middle. That will firm up in the fridge!

Cool the cheesecake:

To cool a cheesecake, turn off your oven and then open it just a crack. Leave the cheesecake in there to cool and then remove it and let it chill overnight in the fridge or for at least 4 hours in the fridge.

The water bath hack and this cooling technique will prevent cracking in your cheesecake. 

Decorating the cheesecake:

When the cheesecake is cooled, remove it from the fridge and wipe off any condensation that may have formed on the top. Melt 1 cup of chocolate chips. Let it cool for 5 minutes, then pour and smooth it onto the cheesecake. 

You must work fast though because hot chocolate on a cold cake will firm up really quickly!

Chocolate swirled all over the top os a cheesecake on a wood cake plate on a gray background with pink plates around it.

How to store:

Store the cheesecake in the fridge covered for up to 7 days. You can freeze the cheesecake too either before putting the chocolate topping on or after. 

Yield

This recipe makes a 9-10″ large cheesecake that can probably feed 12-18 people depending on how large you cut the slices!

The best cherries for cheesecake

What I love about Oregon Fruit‘s red tart cherries is that they are always packed fresh so you know the cherries will have amazing consistent flavor in every can. 

They are also just two ingredients! Cherries and water with no added sugars so you know it’s on the healthier side. They also contain NON-GMO product verified fruit, and their cans have a Non-BPA lining on the inside.

So much goodness all in one can- they are my go to pick for canned fruit. Especially because even living in Florida- across the entire country from Oregon (I was there twice last year, and it takes 4 flights to get there and back for one trip LOL) I can get these cans at my local Walmart or online at walmart.com or amazon.com.

Recipe Tips:

  • Make sure to bring all your refrigerated ingredients to room temperature. This makes sure everything mixes well together and you have a less lumpy cheesecake.
  • To cut- dip a large knife in hot water, wipe it off and slice into the cake. Wipe the knife off and repeat before cutting into the cheesecake again
  • You can turn this cheesecake recipe into bars by making it in a 9×13” pan and slicing into squares
  • You can substitute heavy cream or milk for the half n half

Recipe FAQ

What’s the best kind of cream cheese to use for cheesecake? I like using Philadelphia Cream Cheese or the Trader Joe’s Cream Cheese. I don’t have a strong preference but you should always buy the blocks and not cream cheese in a tub because its so much easier to measure

How long does cheesecake keep for? You can keep this cheesecake for up to a week in your fridge!

Why is my cheesecake cracking? Cheesecake cracks either because it was over baked, or because you took it out of the oven too soon and the exposure to cold air made the cheesecake crack. Make sure to follow the water bath hack I mentioned above, don’t over bake it, and cool it the correct way!

Why is my cheesecake lumpy? It’s lumpy because your ingredients were not at room temperature before you started mixing.

What is the best pan to use for a cheesecake? The best kind of pan to use is a spring form pan where the sides come off!


More Cheesecake recipes:

  • Red Velvet Cheesecake Cupcakes
  • Salted Caramel Cheesecake


A slice of chocolate cheesecake with cherries in the middle sitting on two plates. The larger one is pink the smaller one is gray. There is a spoon on the pink plate.

Creamy Cherry Cheesecake with Chocolate Crust

This chocolate cherry cheesecake recipe is oh-so delicious. It starts with a chocolate cookie crust, then is filled with a creamy cheesecake filling with plenty of tart red cherries. Then, the whole thing is topped with another layer of chocolate! Talk about a swoon-worthy baked cheesecake. I also divulge my cheesecake water bath hack to avoid cracking!
5 from 1 vote
Print Pin Rate
Course: Dessert
Cuisine: American
Diet: Kosher
Keyword: cherry cheesecake, cherry desserts, how to make a no crack cheesecake
Prep Time: 15 minutes
Cook Time: 55 minutes
Chill time: 4 hours
Total Time: 5 hours 10 minutes
Servings: 12 people
Calories: 580kcal
Author: Sam Adler

Ingredients

For the chocolate crust:

  • 1 14 oz package chocolate sandwich cookies or 3 cups, separated and filling discarded, pulsed or smashed into crumbs
  • 1/2 cup butter melted

For the cherry cheesecake filling:

  • 4 8 oz. cream cheese room temperature
  • 1 cup granulated sugar
  • 1 cup sour cream room temperature
  • 1/2 cup half n half room temperature
  • 4 large eggs room temperature
  • 2 teaspoons vanilla extract
  • 1/3 cups all purpose flour
  • 2 14 oz cans Oregon fruit Red Tart Cherries drained and dried well

For the chocolate topping:

  • 1 cup chocolate chips melted

Instructions

For the crust

  • Preheat your oven to 375° F and place the cookie crumbs in a medium sized bowl.
  • Add the melted butter and stir to combine. The mixture should resemble wet sand, and if you squeeze a little bit it should hold its shape. If not, you need more butter.
  • Spray a 9″ springform pan with baking spray and press the cookie crumbs into the bottom and sides. You can use the bottom of a measuring cup to help press it down hard and evenly.
  • Bake for 8-10 mins until it smells like heaven from your oven and the crust is firm.

For the filling

  • Lower your oven temperature to 350° F.
  • In the bowl of a stand mixer fitted with the paddle attachment, add the cream cheese, sour cream, and sugar. Mix on low-medium speed, then add 1 egg at a time, mixing for a few seconds in between additions.
  • Stop the mixer and scrape down the sides of the bowl. Start the mixer again on low speed and add in the half n half and vanilla. Add in the flour slowly then move your speed up to medium and mix for 2-3 minutes. Scrape down the sides and bottom of the bowl to make sure everything is mixed evenly.
  • Pour half the batter into the spring form pan, then half of the cherries on top. Pour the last half of the batter into the pan and sprinkle the top with the remaining cherries. Press the cherries in under batter so they are barely peeking out. 
  • Fill a 9×13 in pan with 1 inch of water and place it on the bottom rack of your oven.
  • Place the cheesecake on the upper rack of the oven and bake for 45-55 minutes.
  • The cheesecake is done when the edges start to brown and break away from the sides of the pan. It will still be jiggly in the middle- you want that!
  • Turn the oven off and crack the oven door open a little bit. Leave the cheesecake to cool for one hour, then remove to finish cooling on the counter.
  • Chill in the refrigerator at least 4 hours or overnight, then pour and smooth melted chocolate on top.

Notes

Make sure you dry the cherries well!
You can set a side some of the chocolate crumbs to use as decoration when the cheesecake is done! I use full fat dairy products for best flavor but you can substitute for the less fat cream cheese and sour cream.
Sub whole fat milk for half n half

Nutrition

Nutrition Facts
Creamy Cherry Cheesecake with Chocolate Crust
Amount Per Serving (1 slice)
Calories 580 Calories from Fat 306
% Daily Value*
Fat 34g52%
Saturated Fat 18g113%
Cholesterol 122mg41%
Sodium 372mg16%
Potassium 263mg8%
Carbohydrates 63g21%
Fiber 2g8%
Sugar 47g52%
Protein 8g16%
Vitamin A 909IU18%
Vitamin C 3mg4%
Calcium 100mg10%
Iron 4mg22%
* Percent Daily Values are based on a 2000 calorie diet.

I love when you share my recipes!!

259 shares

Filed Under: Cheesecakes Tagged With: Cheese, cherry, Chocolate

About Sam Adler

Sam Adler is a Le Cordon Bleu professionally trained pastry chef, Saveur Blog Award winner, food photographer, and food blogger over on FrostingandFettuccine.com. She has been featured in numerous online and in-print publications including Taste of Home Magazine, Saveur Magazine, The Feed Feed, and Food Blogger Pro. Sam lives in Hollywood florida with her husband, two young kids, and french bulldog. When she’s not baking and dancing in her kitchen you can find her at her favorite yoga spot.

Reader Interactions

Comments

  1. Lisa D says

    February 12, 2020 at 9:59 pm

    Both steps 2 & 5 say to mix in the half and half. When should it be added?

    Reply
    • Sam says

      February 18, 2020 at 10:01 am

      Hey Lisa! Thank you so much for catching that! I just updated the recipe card- it should be added at step 5!

      Reply
      • Lisa D says

        February 22, 2020 at 11:49 am

        Thanks! I made a half batch in a 6″ cake pan last night. We’ll eat it tonight! The edges are a bit raggedy, since I didn’t use a springform, but it hopefully will taste good! 😀

        Reply
      • Alene says

        February 11, 2022 at 11:04 am

        Hi! What does the flour do to the cheesecake mix? I have to be gluten free, and I’m thinking that I can just skip it. I’ve made cheesecakes before and never used flour. And I have a great recipe for gluten free chocolate wafer cookies that can easily sub for the wheat kind. This looks so yummy!

        Reply
        • Sam Adler says

          February 13, 2022 at 4:10 pm

          Hi Alene! I use flour in this recipe to help with the binding of the ingredients because itll help ensure no cracks and will help the cuts come out smoother and cleaner. You can try using a gluten free flour or substituting it all for 1 tbsp of cornstarch. Please let me know how it works out!!

          Reply
  2. Alene says

    March 12, 2021 at 5:26 pm

    What does the flour do in the cheesecake? I have to be gluten free and I’m wondering if I can skip it or replace it with another gluten free flour that wouldn’t add a definitive taste. Thanks! It looks so yummy, and there will be a day that I can have dinner parties again, I hope!

    Reply

Leave a comment & rate this recipe Cancel reply

Do you love this recipe? If so, I would be so grateful if you left a star rating with your comment! Star ratings help other people find my recipes so they can make them too. Thank you for your support!

XO, Sam

Recipe Rating


Primary Sidebar

Search

Hi! Im Sam Adler,

I'm a professionally trained pastry chef and food photographer.
This is a place where you will find easy yet impressive looking desserts. I also share a ton of food photography resources too! What can I say, I love pretty & delicious baked goods! Learn more about me!

  • Facebook
  • Instagram
  • Pinterest

As Featured In:

Logo images of media places Sam Adler has been featured in
Saveur Blog award winner for best food Instagram
FeedFeed

frostingandfettuccine

Finding your style 📸 It’s probably the numbe Finding your style 📸

It’s probably the number one struggle I hear from food photographers. 

❌ Shoot after shoot, it doesn’t feel like your photos are consistent or that there is even a recognizable style there.

❌ You don’t feel as if anybody would see your photos and be like “hey! I know who’s that is!”

❌ You might even feel like your photos are pretty enough but that you learned or experimented with how to shoot in someone else’s style so you don’t really feel like it’s yours.

I GET IT 🙌🏻

✅I didnt know how to use my camera 5 years ago
✅I had no recognizable style
✅Once I thought I had a style, I stuck myself in a box and felt like I could never shoot differently

But after countless hours, investing time and money every day I now have the freedom to know that whatever I shoot will inevitably come out in my own style. 🎉 I shoot in ALLL the colors of the rainbow and it always comes out like me 🙋🏻‍♀️

And this is why in my signature program, The STYLE Mastermind, with it’s combination of coaching + education, I teach you how to find your own unique style, and not how to shoot in mine.

There is *literally* no point in shooting in a style that you don’t love because the whole point of running your own creative business is to do it because you love it.

And when you love your job and it shows through your work, that’s when the clients come in. 💰 💰 💰

Over the last 3 years my program has helped over 90 (!!) students find their unique consistent style, land their highest paid contracts ever, and LEAVE THEIR JOBS! No it doesnt happen overnight, but it does happen.

SO yeah you may be scared outta your mind to take that leap and join but trust me, it may just be the best thing you do for your mindset, creativity, your business, and your style.

PS. THE STYLE MASTERMIND IS NOW OPEN FOR ENROLLMENT! 🎉💵👩🏽‍🤝‍👩🏻 We are only accepting 24 students for this round with 2 spots already taken. Tap the link in my bio to apply and level up your business!!

#photographystyle #foodphotographyandstyling #foodstylingtips #foodphotographytips #producephotography #colortheory #ilovecolor #colorlover #grapes #strawberries #plum #foodphotographyandstyling
3 things I wish someone told me in the beginning o 3 things I wish someone told me in the beginning of my food photography career 📸:

1. Do not be afraid to use shadows! You NEED shadows in your work. They are what create dimension in a photo and what gives it the “pop of the screen” effect. Just because you like to shoot light and bright doesn’t give you an excuse not to use them either. Using shadows doesn’t = dark and moody. So please, if you feel like something is missing in your photos, maybe you need more shadows?

2. Mindset is EVERYTHING. You will have really good days and then really 💩 days too. Knowing how to navigate the ups and downs of entrepreneurship is the everlasting key to your success in the food photography world. 

3. Learn about licensing and usage!!! Like get in with the nitty gritty of it. I cant tell you how much I have given away for less than what I deserve because I didn’t know enough about licensing and usage. 

All three of these things are V important to me in terms of how I run my own business and what I teach to my students.

It’s some of the main reasons why and how students have been so successful. Like 10k+ months, and leaving their 💩 jobs they hate, kind of successful.

Theres a couple more hours left to get on the waitlist for my signature program The STYLE Mastermind for an early bird incentive.

Click the link in my bio to join and get in on it while it lasts!

#foodphotogrgapher #foodphotographers #foodstylist #foodstylists #learnfoodphotography #learnfoodstyling #mentorshipprogram #foodphotographycourse #foodphotographyprogram #photographer #miamieats #miamifoodphotographer #commercialfoodphotographer #commercialfoodphotography #foodstylingandphotography #southfloridafoodphotographer #foodphotographyteacher #foodstylingteacher #photographygoals #foodphotographytips #foodphotographystyling #foodphotography101
One thing I constantly tell my students is to get One thing I constantly tell my students is to get the hell out of their comfort zones- because nothing extraordinary ever comes from it.

Think about it- the things that have gotten you to where you are today, will not get you to where you want to go next. If they did, then you would already be there.

Constantly pushing yourself to the next level of your comfort will though.

Running a workshop in Tuscany and teaching in person was that for me, and it was one of the most magical weeks ever.

So grateful for all the people that traveled across the world to stay with people they never met for 5 days.

If that’s not pushing yourself, I don’t know what is!

If you’re thinking that you need help getting to the next level, then get on the waitlist for the next round of my signature program, The STYLE Mastermind. 

It’s designed to help you find your unique signature style (YES YOU HAVE ONE) and to get paid well in this industry.

The link is in my bio to learn more about the program and join the waitlist!

If you want more, check out my highlights for Testimonials 🙃

#cakephotography #cakestyling #foodphotography
#foodstyling #learnfoodstyling #foodstylist #foodstylingandphotography #cakeoftheday #cakedecorating #cakesofinstagram #cakestagram #vanillacake #girlycake #cakephotography #miamifoodstylist #miamifoodphotographer #miamieats #southfloridafoodphotograoher #commercialfoodphotographer
✨Artichokes ✨ They were allll over Rome- at t ✨Artichokes ✨

They were allll over Rome- at the markets and next to the restaurants- all bundled up and beautiful that I couldn’t resist taking some shots.

For these I wanted to go with a light chiaroscuro effect- using the contrast between light and dark to highlight parts of an image.

I took these artichoke shots in two different areas and also edited them differently. The first to bring out more of the contrast between green and purple and the second focusing more on the green.

I cant decide which I like best- I added the raw images here too so you can see how powerful editing it, especially when you already have the finished image idea in your head!

Which do you like better?

#artichokes #artichokehearts #artichoke #campodefiori #rome #romeitaly #saminrome #rometrip #romefood #romephotography #foodphotography #samsitalypics
In July 2019 while on vacation in Tuscany, I messa In July 2019 while on vacation in Tuscany, I messaged @healthylittlecravings with the idea of running a food photography workshop in Italy. I was hoping she didn’t think I was crazy 🤪, or maybe she was just as crazy as me- because she said YES. Almost 3 years later, after lots of frustration, zoom calls, planning, un-planning, and planning again, it’s finally happening!

I’m proud of us for not giving up, and grateful for the students that have invested their time and money in learning with us- whether they are coming this time or not. 

I won’t be posting anything on my feed bc it’s not where i want to be spending time this week, but I’ll be sharing on stories! And yes we plan on doing this again ❤️ 

#foodphotographyworkshop #tuscanyworkshop #foodphotographers #foodstyling #foodstylists #tuscanytravel #stradatoscana #italytravel #tuscanygram #tuscanyview #tuscanyhills #tuscanylover
Cupcakes. My least favorite thing to shoot- so nat Cupcakes. My least favorite thing to shoot- so naturally I have a BUNCH of cupcake recipes that I need to shoot over the next week or so. I find that when I find a food that I dont love shooting, I force myself to do it over and over until I am more comfortable with it. 

It happened once before with cookies, and now cookies and I are BFFAE.

So get ready Mr. Cupcake- meet your new best friend 🙋🏻‍♀️

#itme

#cupcakes #chocolatecupcakes #chocolatecupcake #vanillabuttercream #vanillafrosting #easycupcakerecipe #cupcakestagram #cupcakesofiinstagram #chocolatelover #foodstyling #foodstylingandphotography #foodphotographyandstyling #foodstylinginspiration #creativityfound #commercialphotographer #bakedfromscratch #bakingfromscratch #heresmyfood #whatsfordessert #foodfluffer #droolclub #miamifoodphotographer #miamieats #miamiphotographer
Load more please Follow me on Instagram!

Categories

Archives

Footer

↑ back to top

About

  • About
  • Web Stories
  • Privacy Policy

Disclosure

As an Amazon Associate I earn from qualifying purchases.

Disclosure Policy

Contact

  • Contact
  • Work with me

Copyright © 2022 Samantha Adler | Frosting & Fettuccine | Support by Foodie Digital

259 shares